Planning the animations
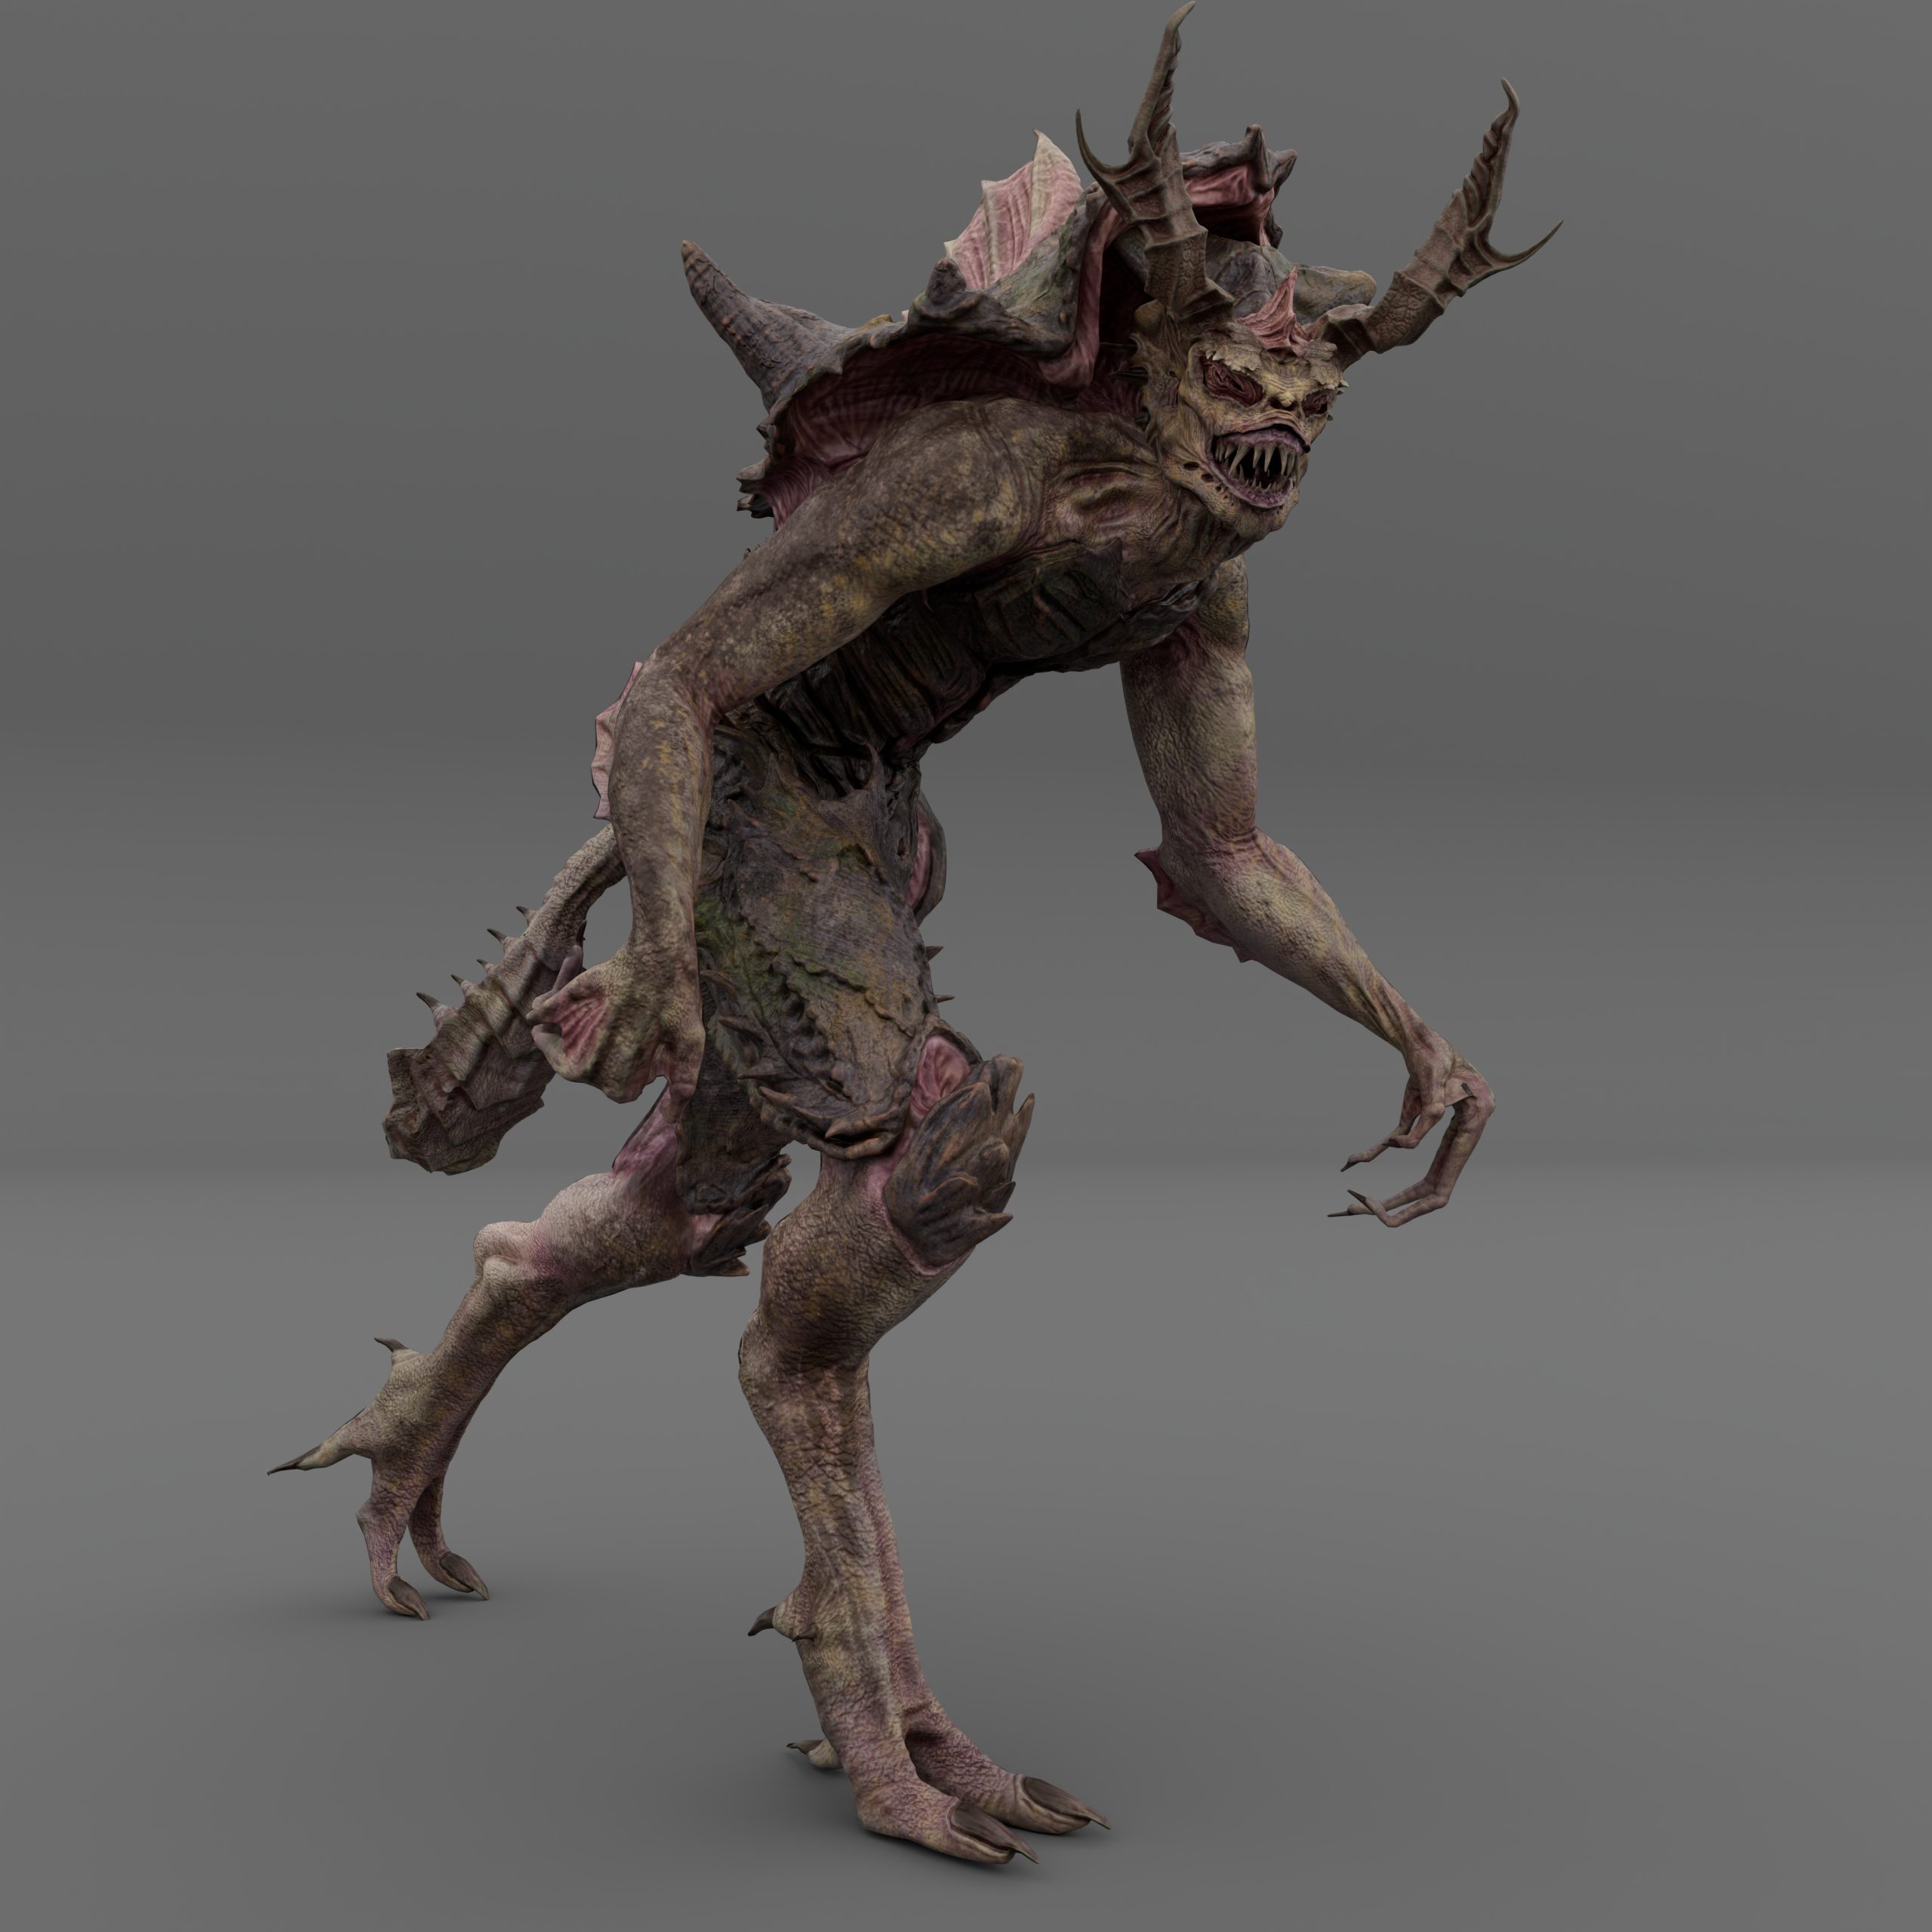
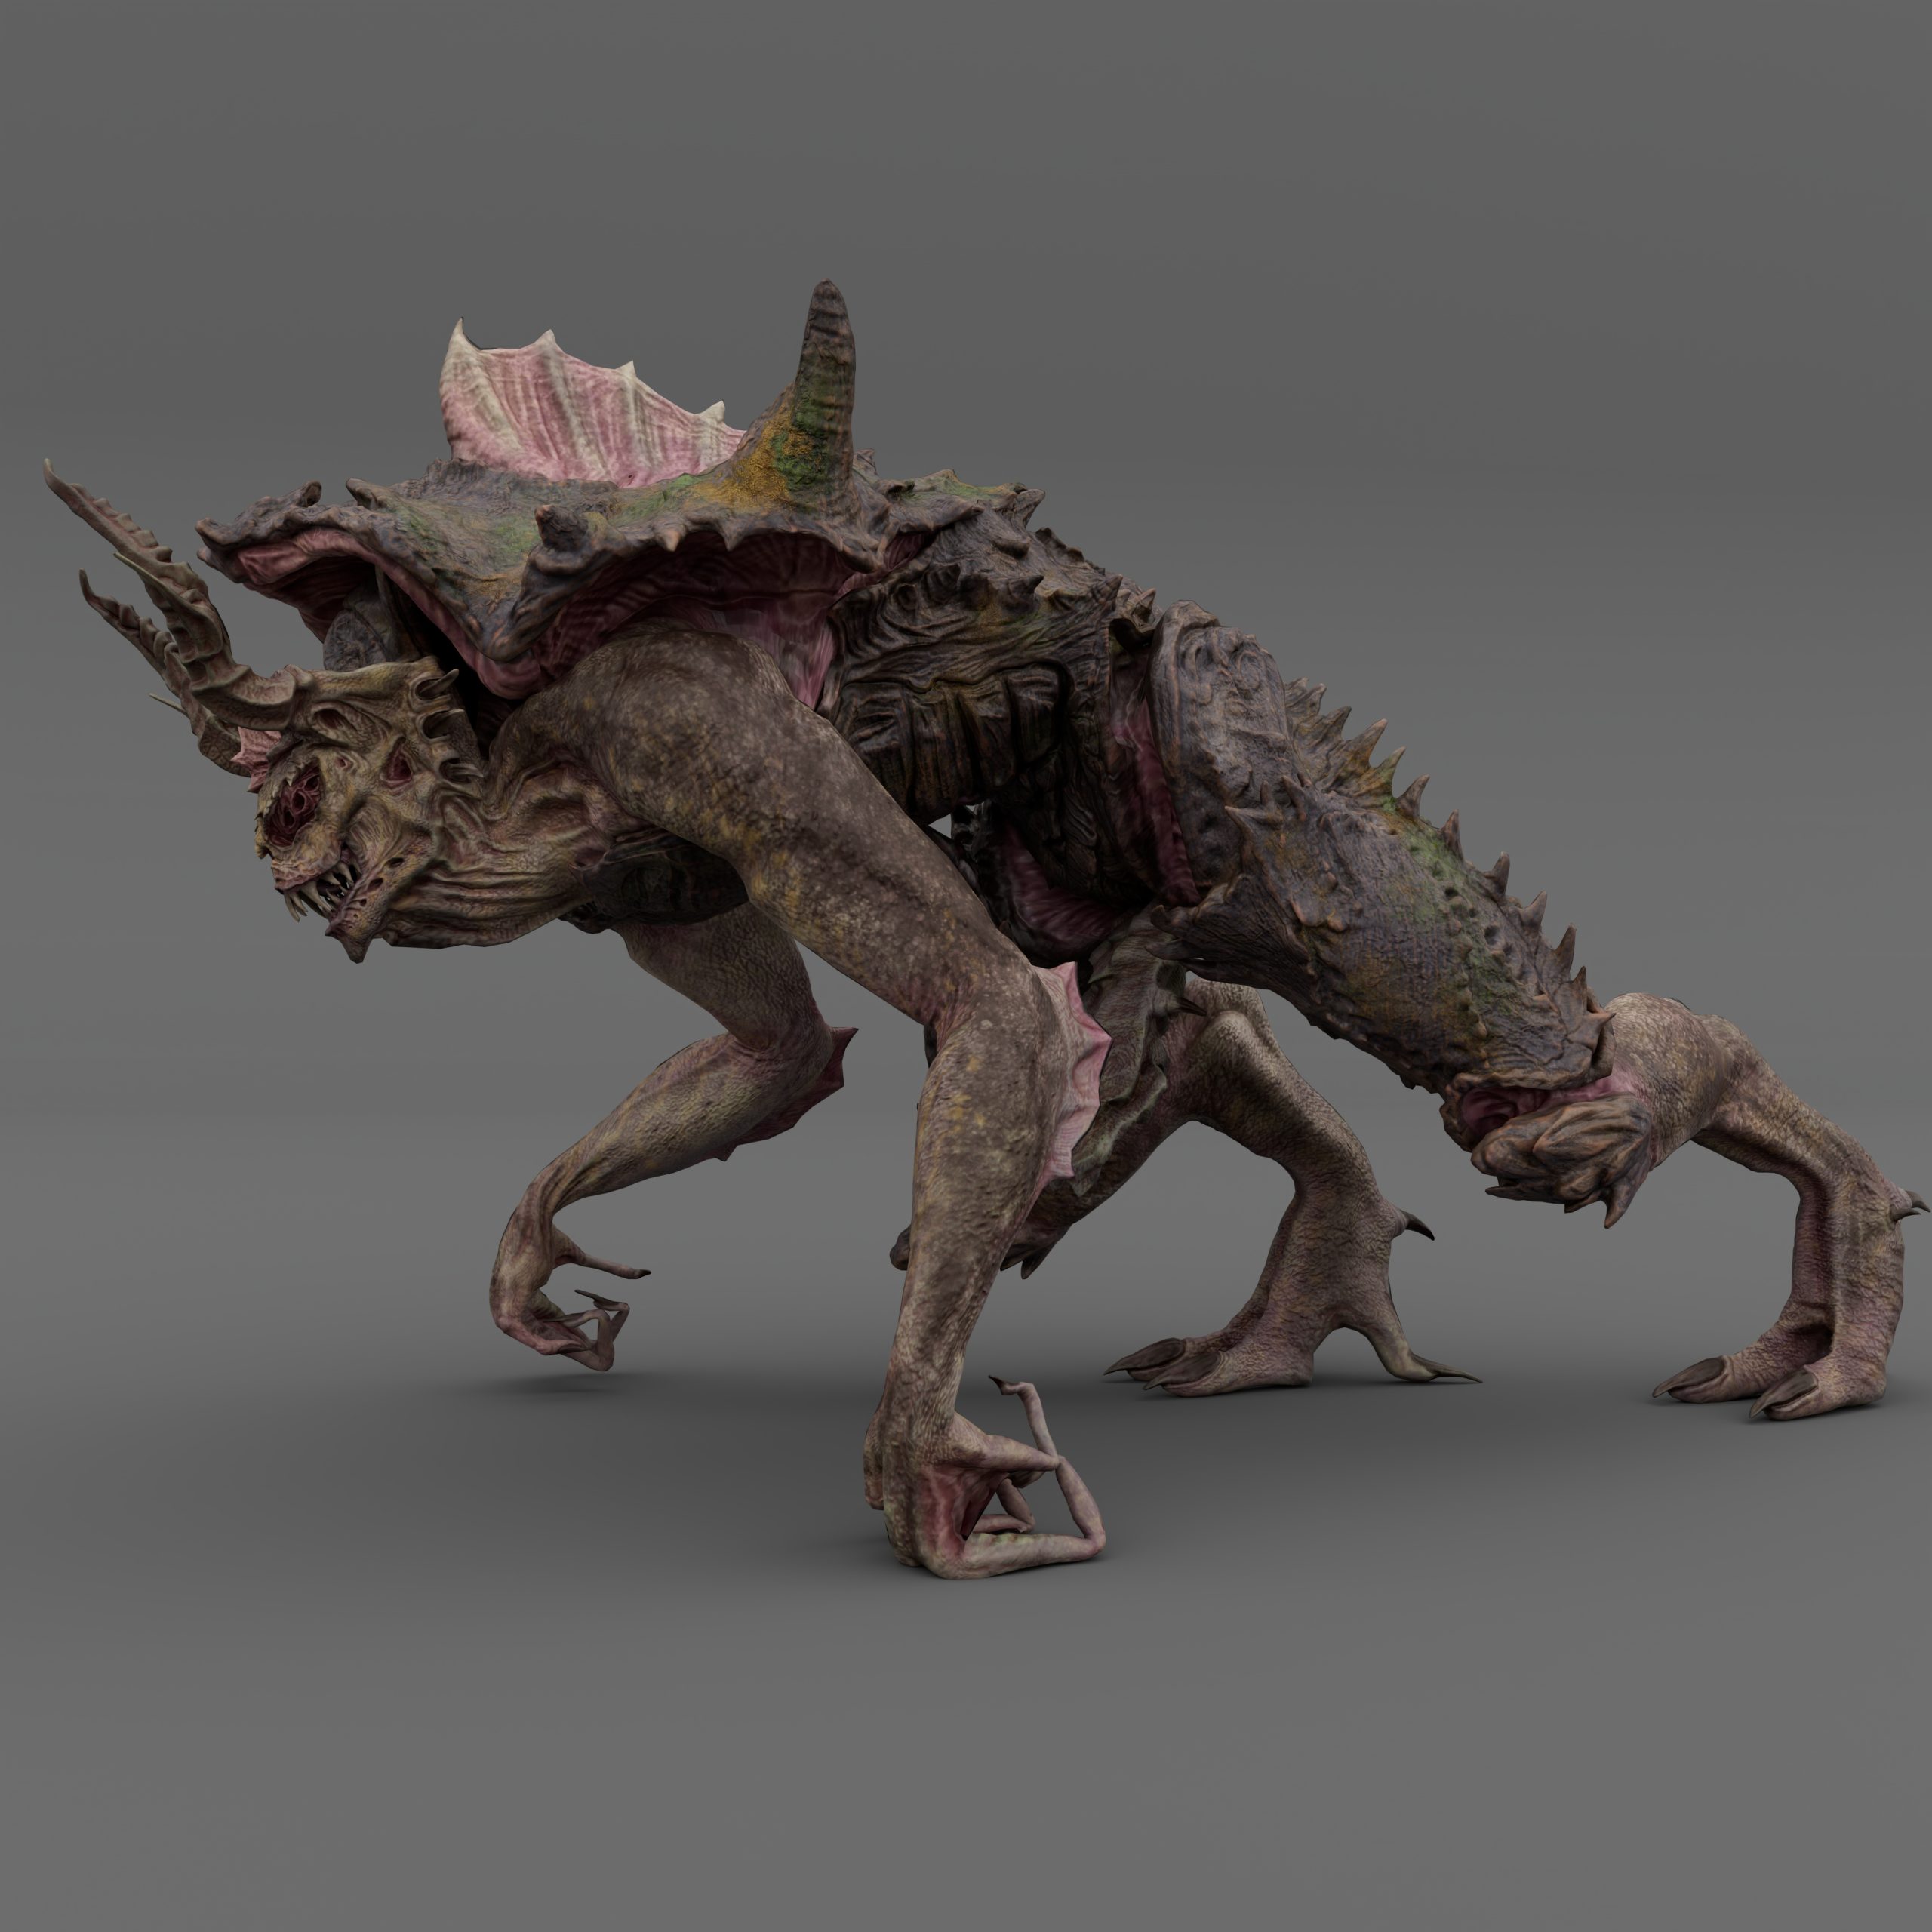
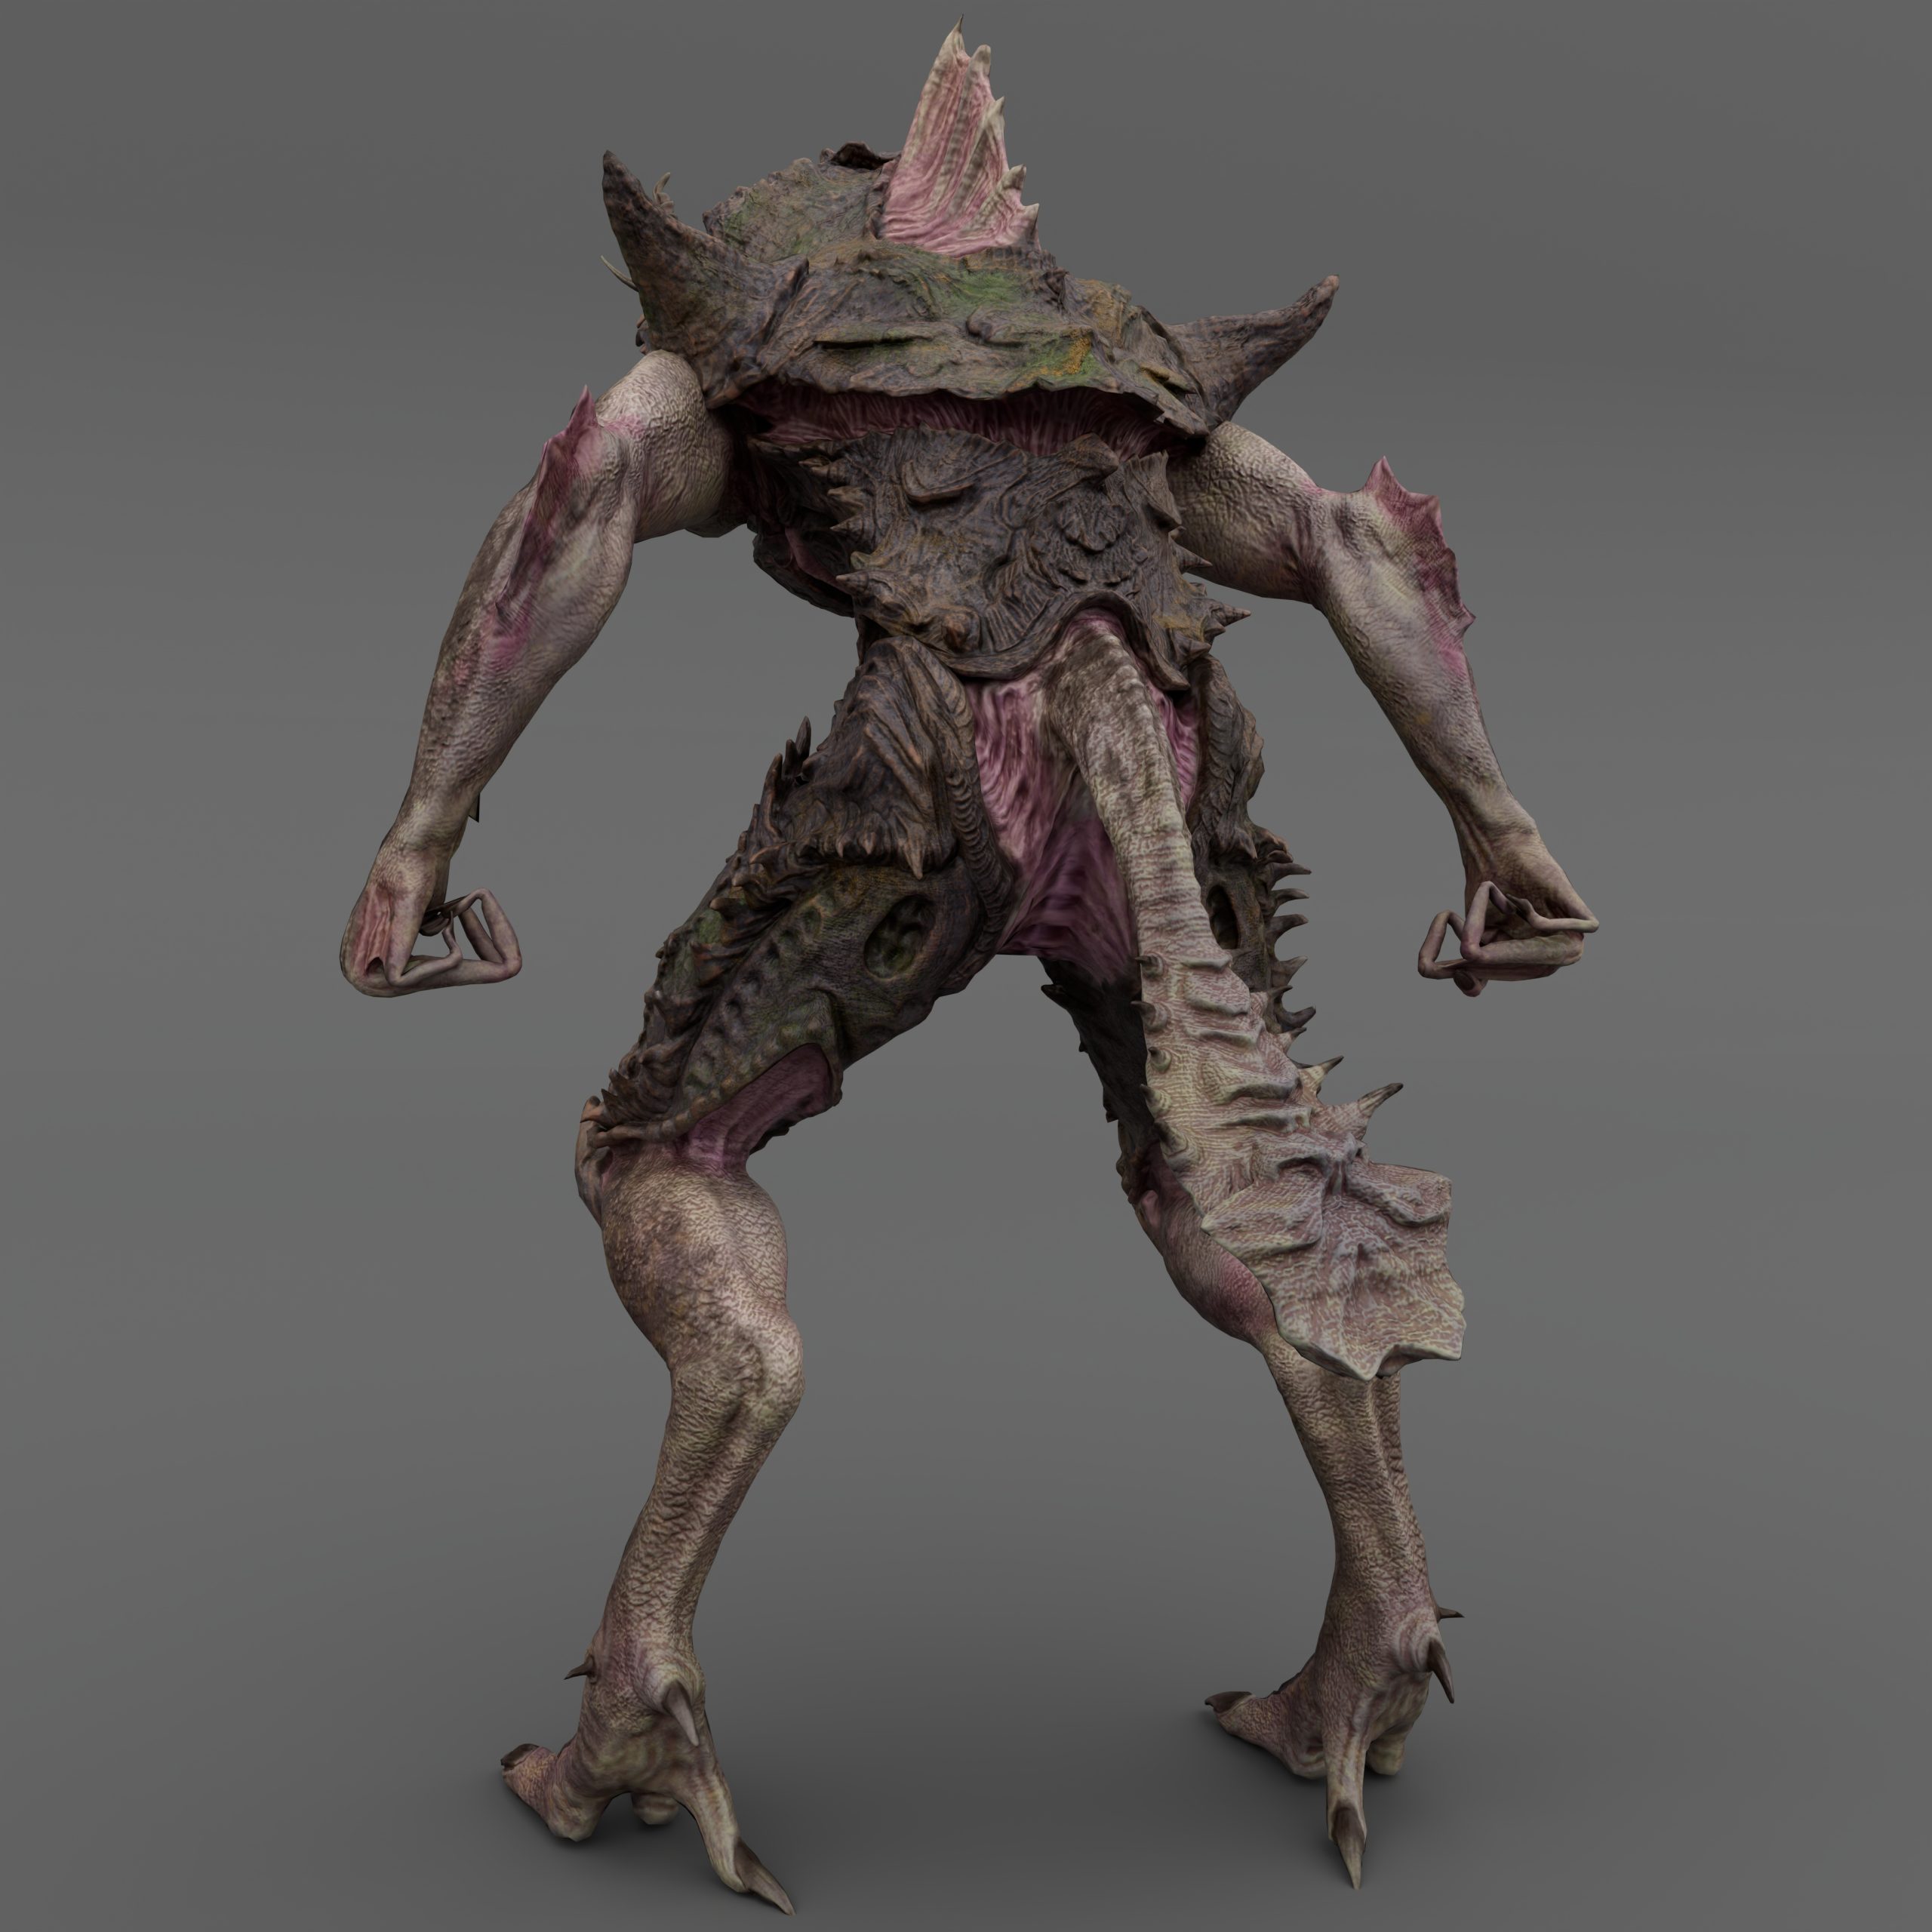
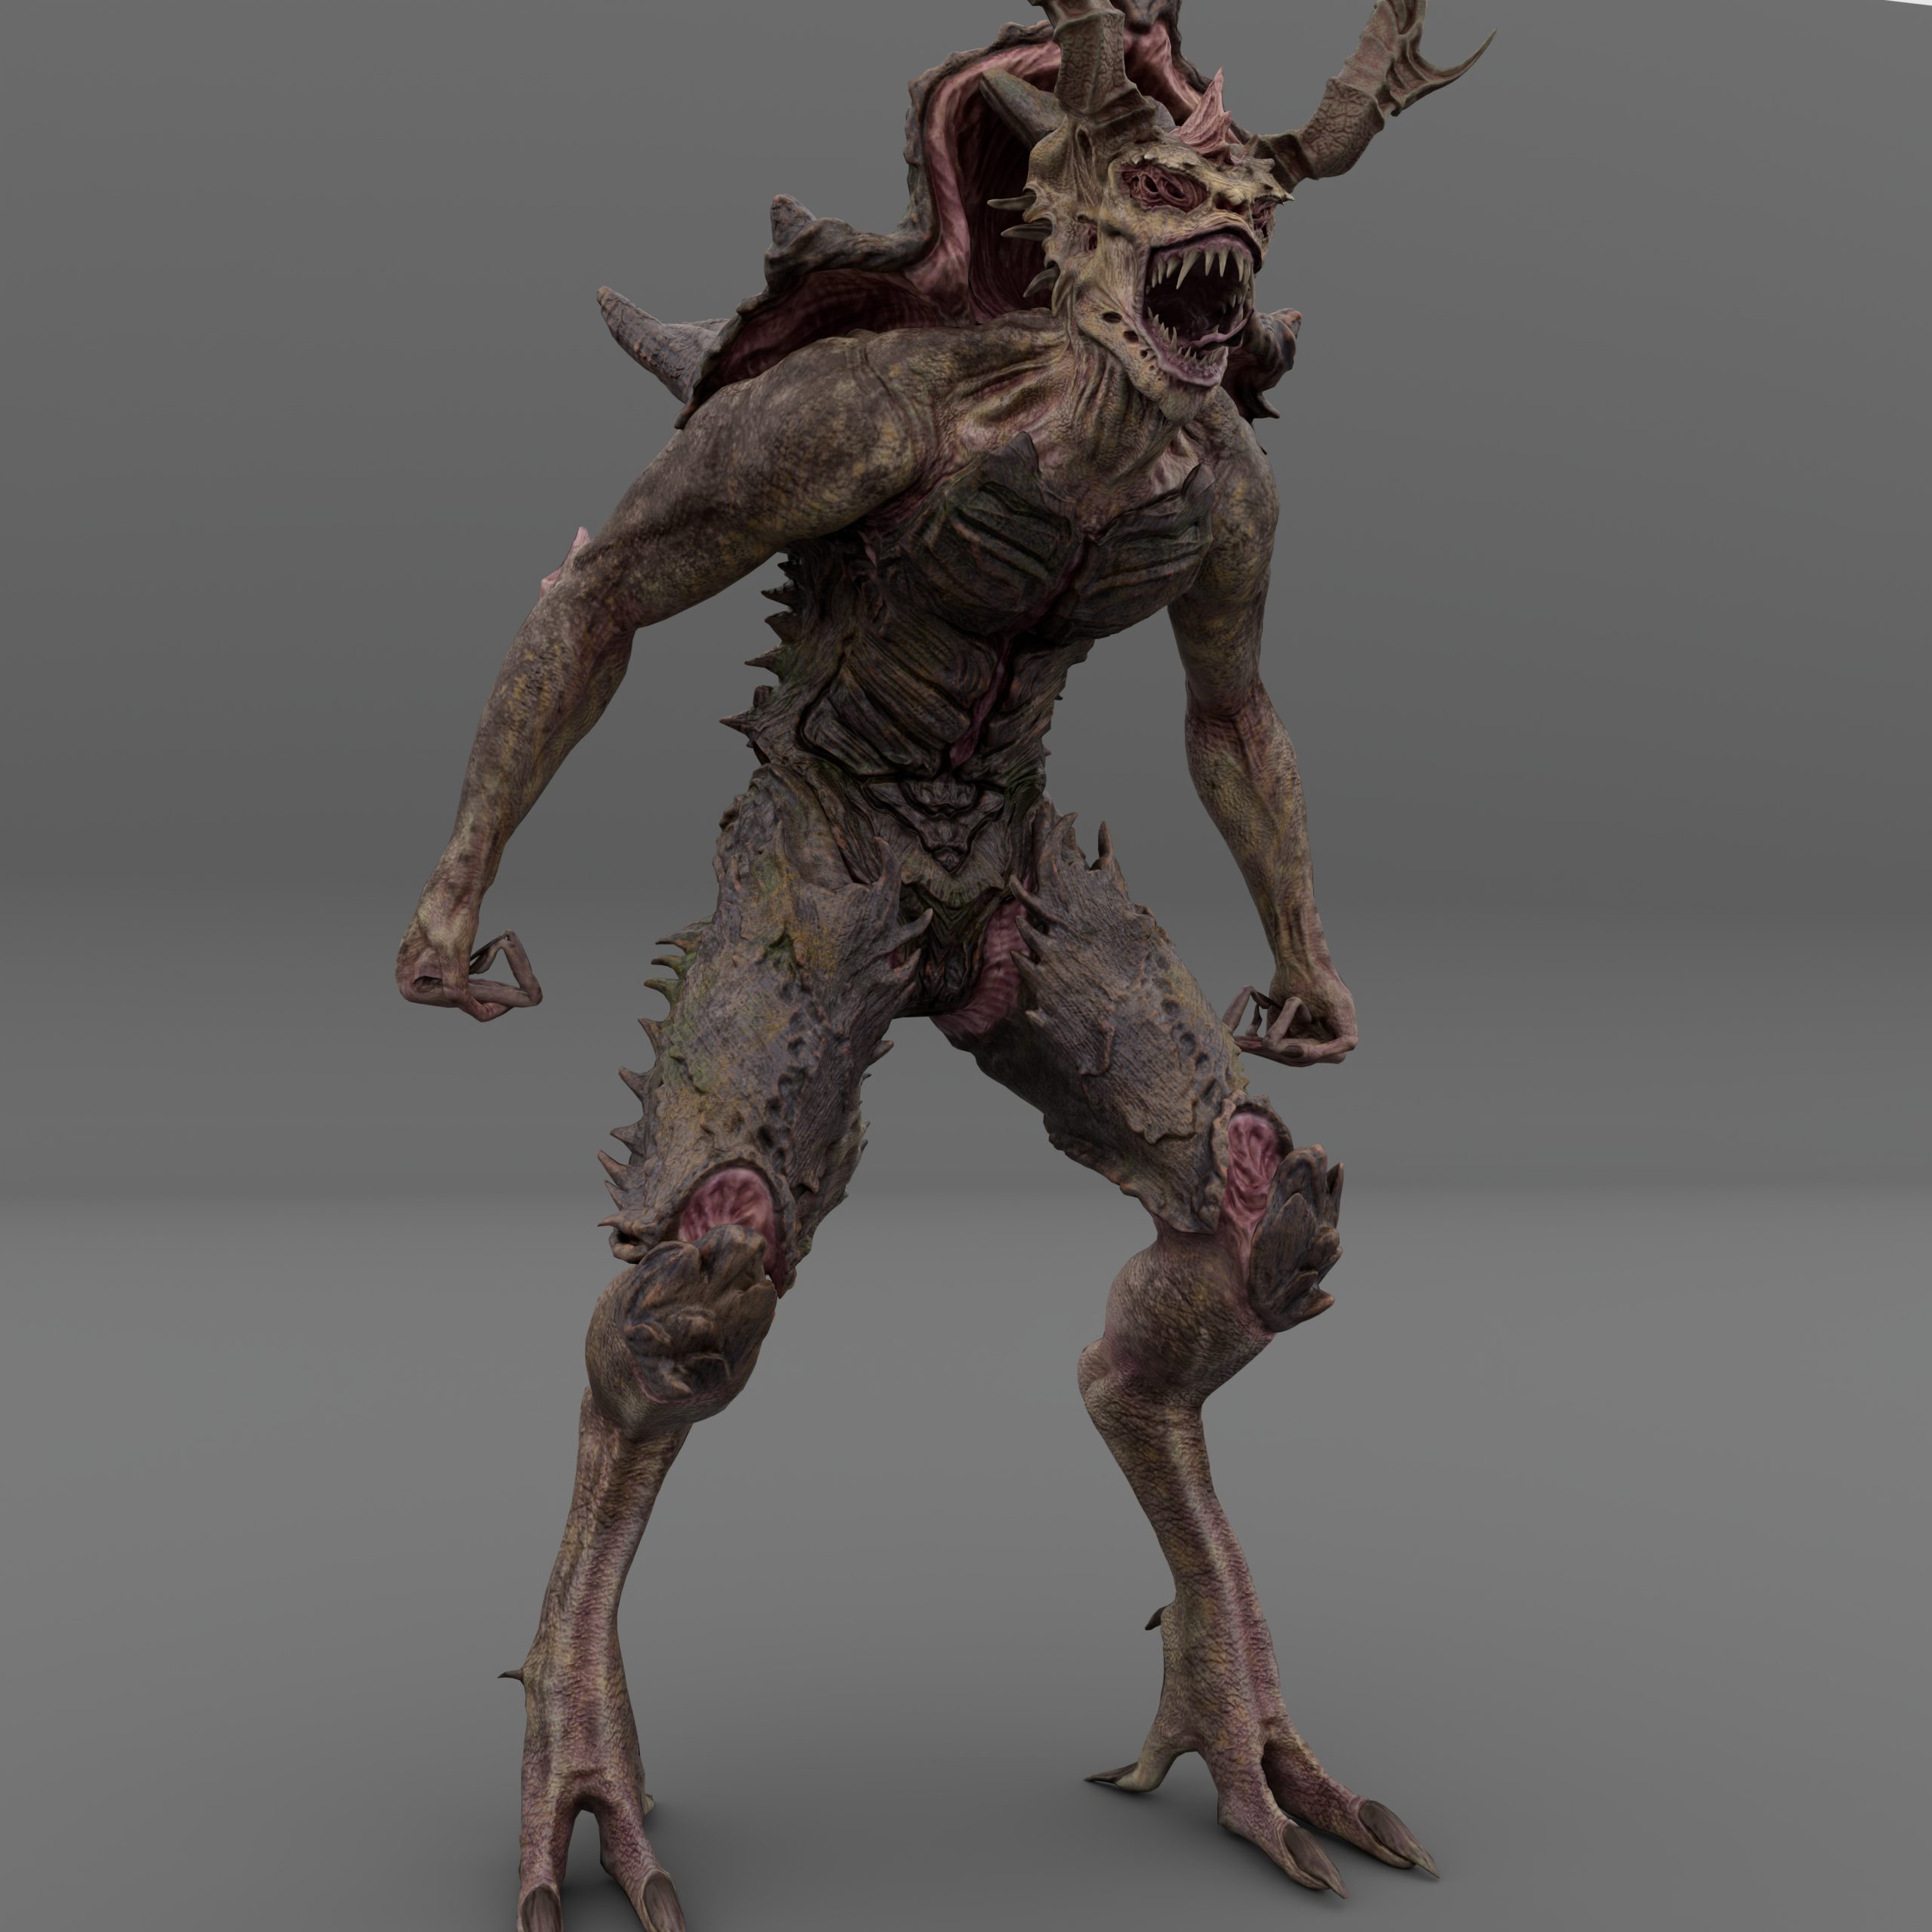
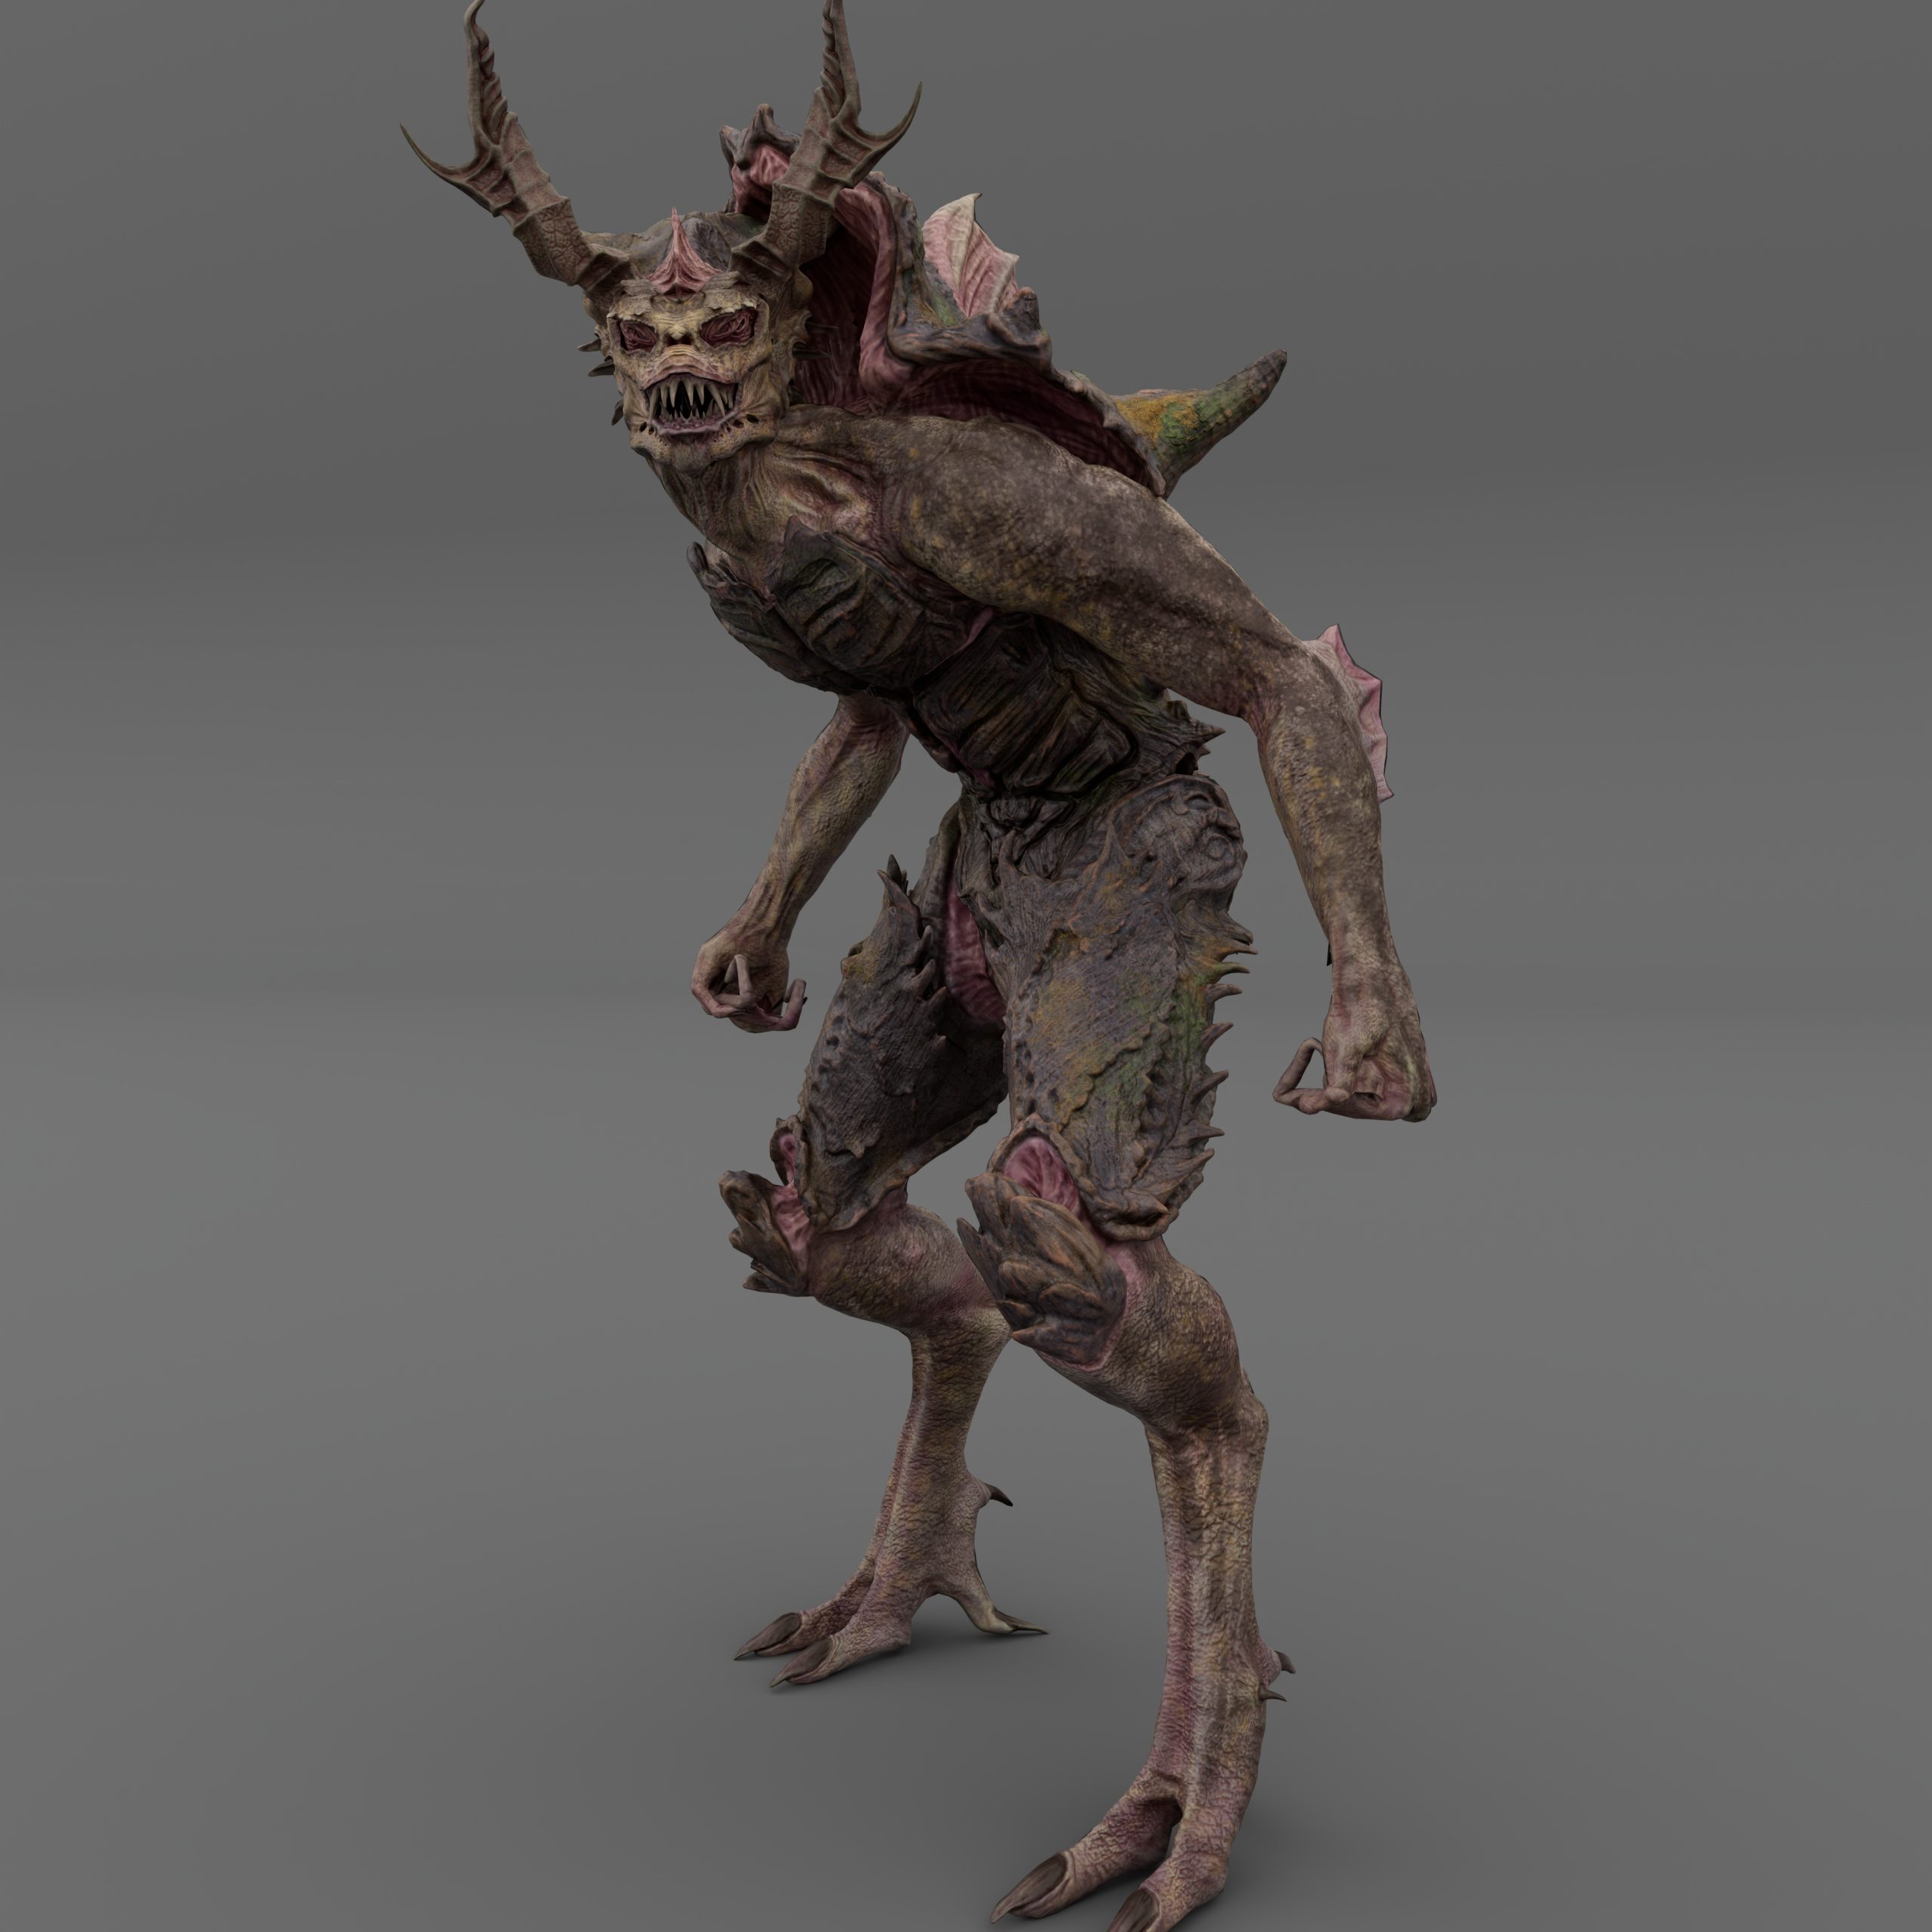
To begin with, I had to begin planning the animations of my creature and what I believed would represent the creature’s personality and aesthetics. I had designed the Trilobite with traits in mind during sculpting, I imagined it to be a stalking creature, that inhabited swamps and marshy areas, around eight feet tall and overly aggressive. I also designed the anatomy to be athletic, making the trilobite look fast and strong.
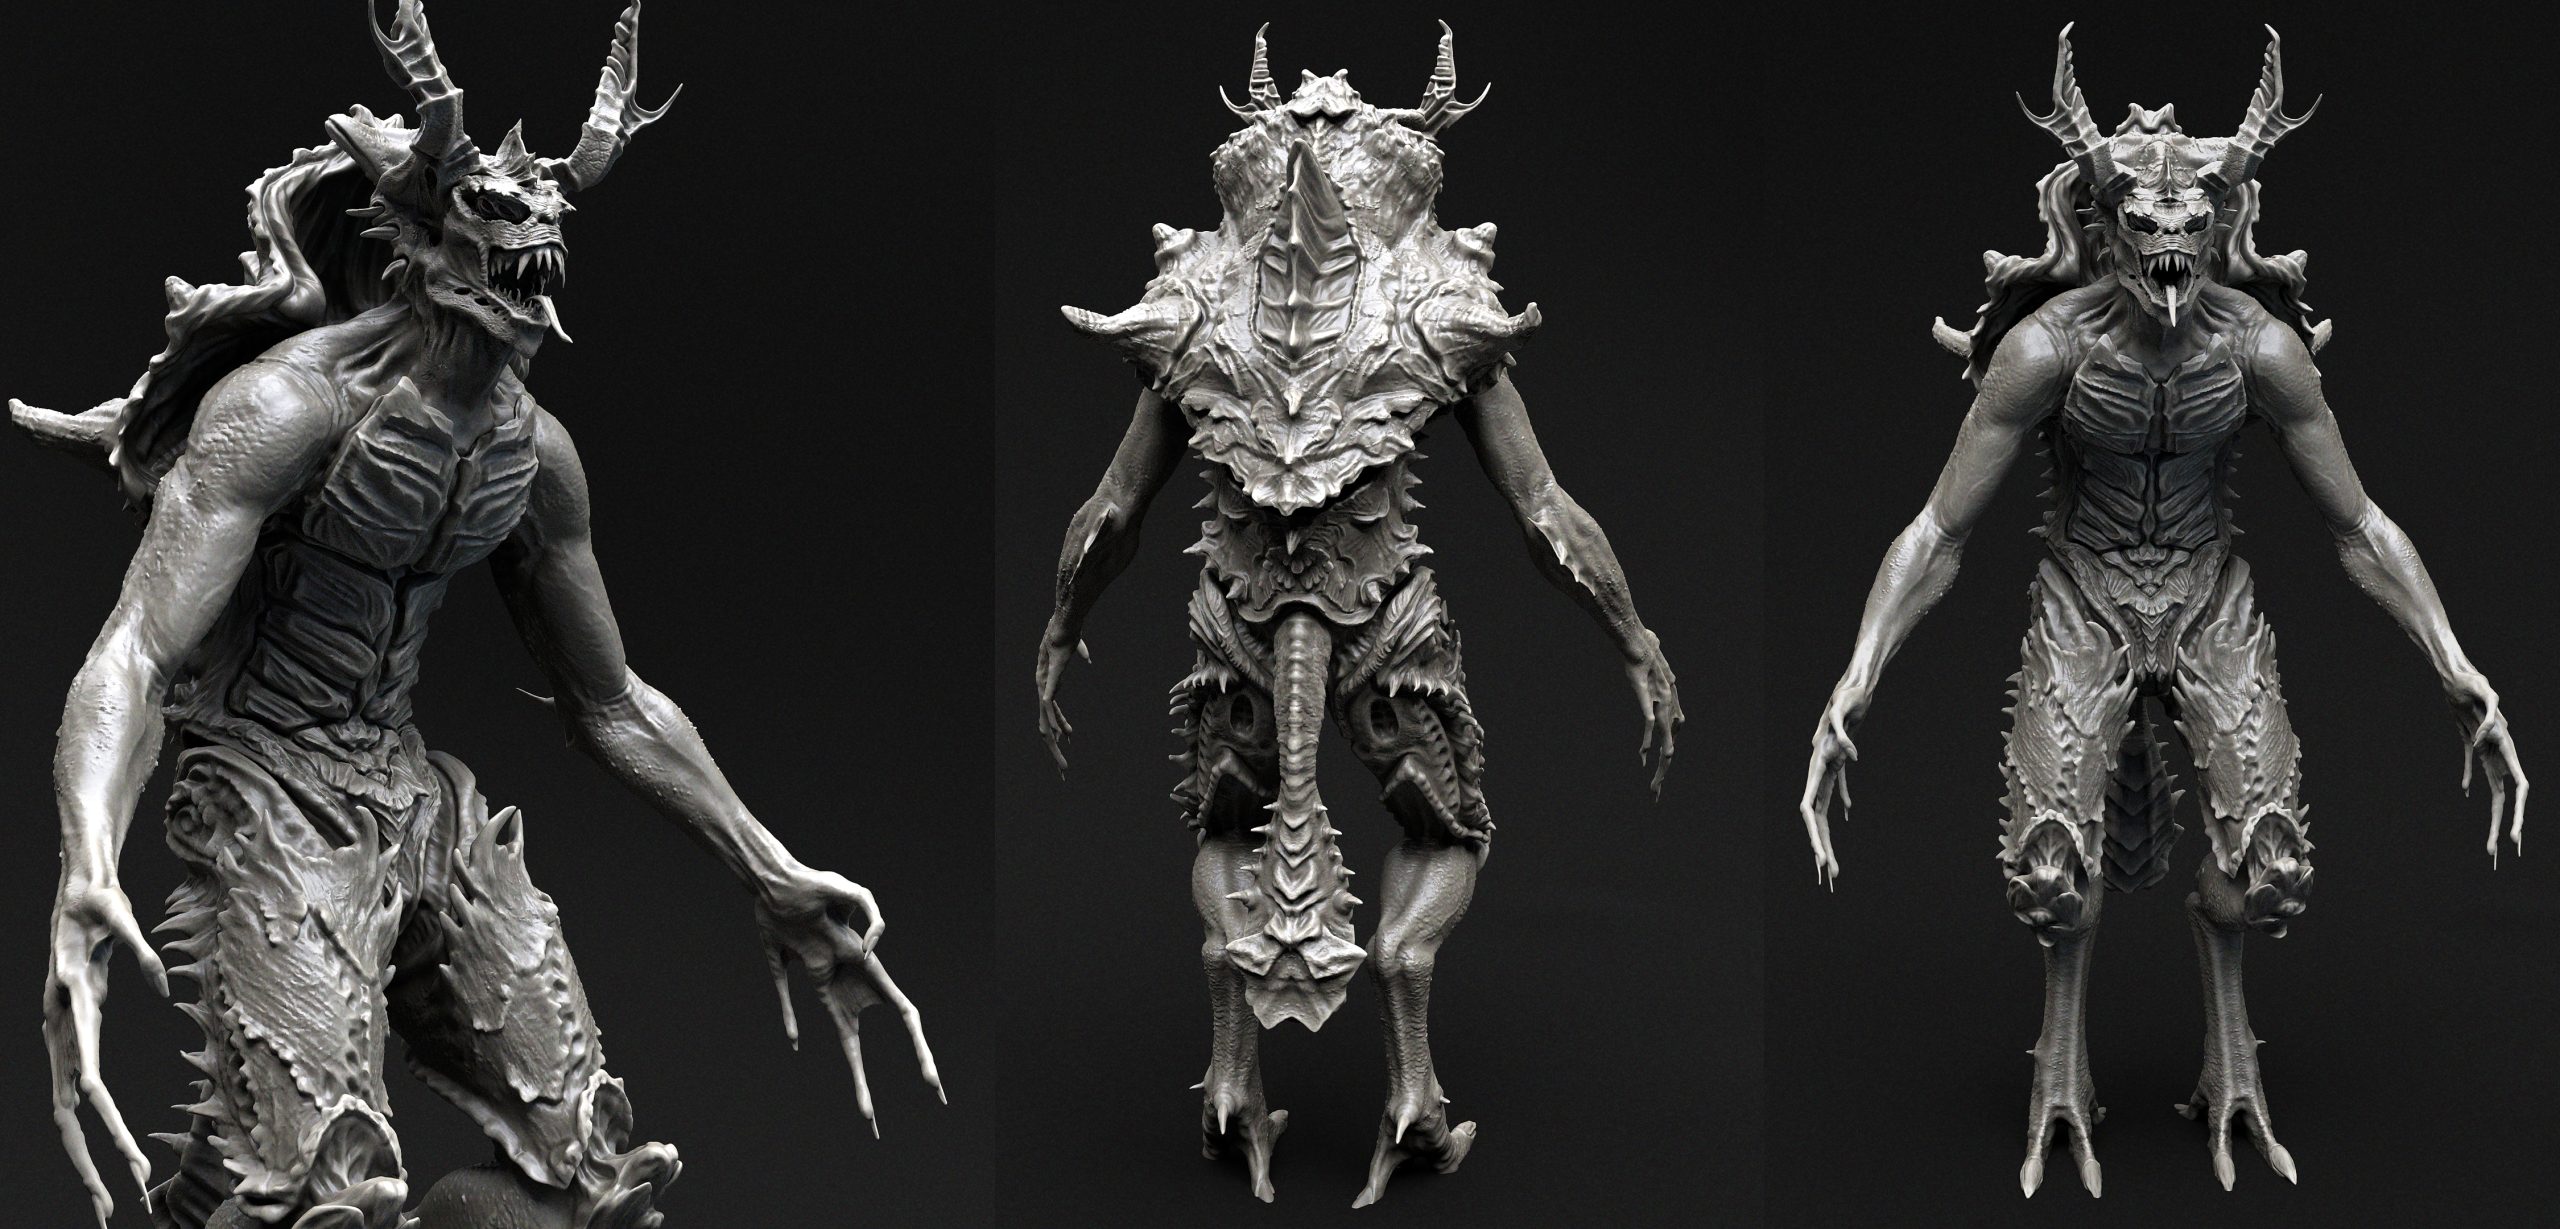
I next began researching other creatures with similar anatomies, looking more at creatures with the same leg and hip design as my own. This would inform me how other designers and creators have animated their similar designs and whether they incorporated a certain degree of realism, as realism is what I would be approaching for my animations.
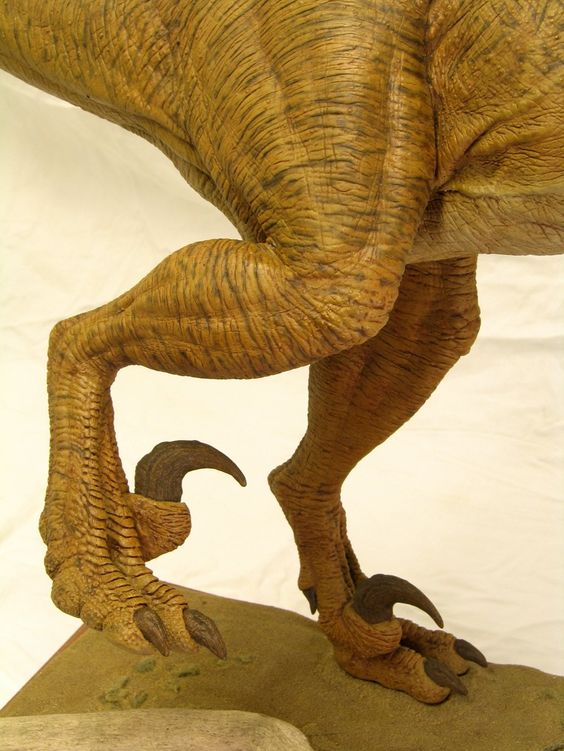
First, I looked at a Velociraptor from the Jurassic Park Film’s as this was the base creature which I had taken inspiration from for the legs (Pinterest, n.d.). I watched much footage from the films to determine how their running cycle was animated, looking at certain scenes where the legs were more prominently shown.
However, it was hard to find any footage I could possibly use as reference as the shots were cinematic in nature and constantly cutting away, leaving no scene where the raptors could be seen running for an extended period of time. I then however found a perfect video of the animation for “Blue” from Jurassic World.
After viewing the Raptor’s run cycle I moved on to another creature which I believed had the exact design my own had and would also have animations to view, since it was a game model. In the game known as Warhammer, there is a race of creatures known as the Lizardmen and these creatures resemble my design and its anatomy quite a bit. I managed to find animation footage of these creatures on YouTube, since they had been created for the game Total War Warhammer.
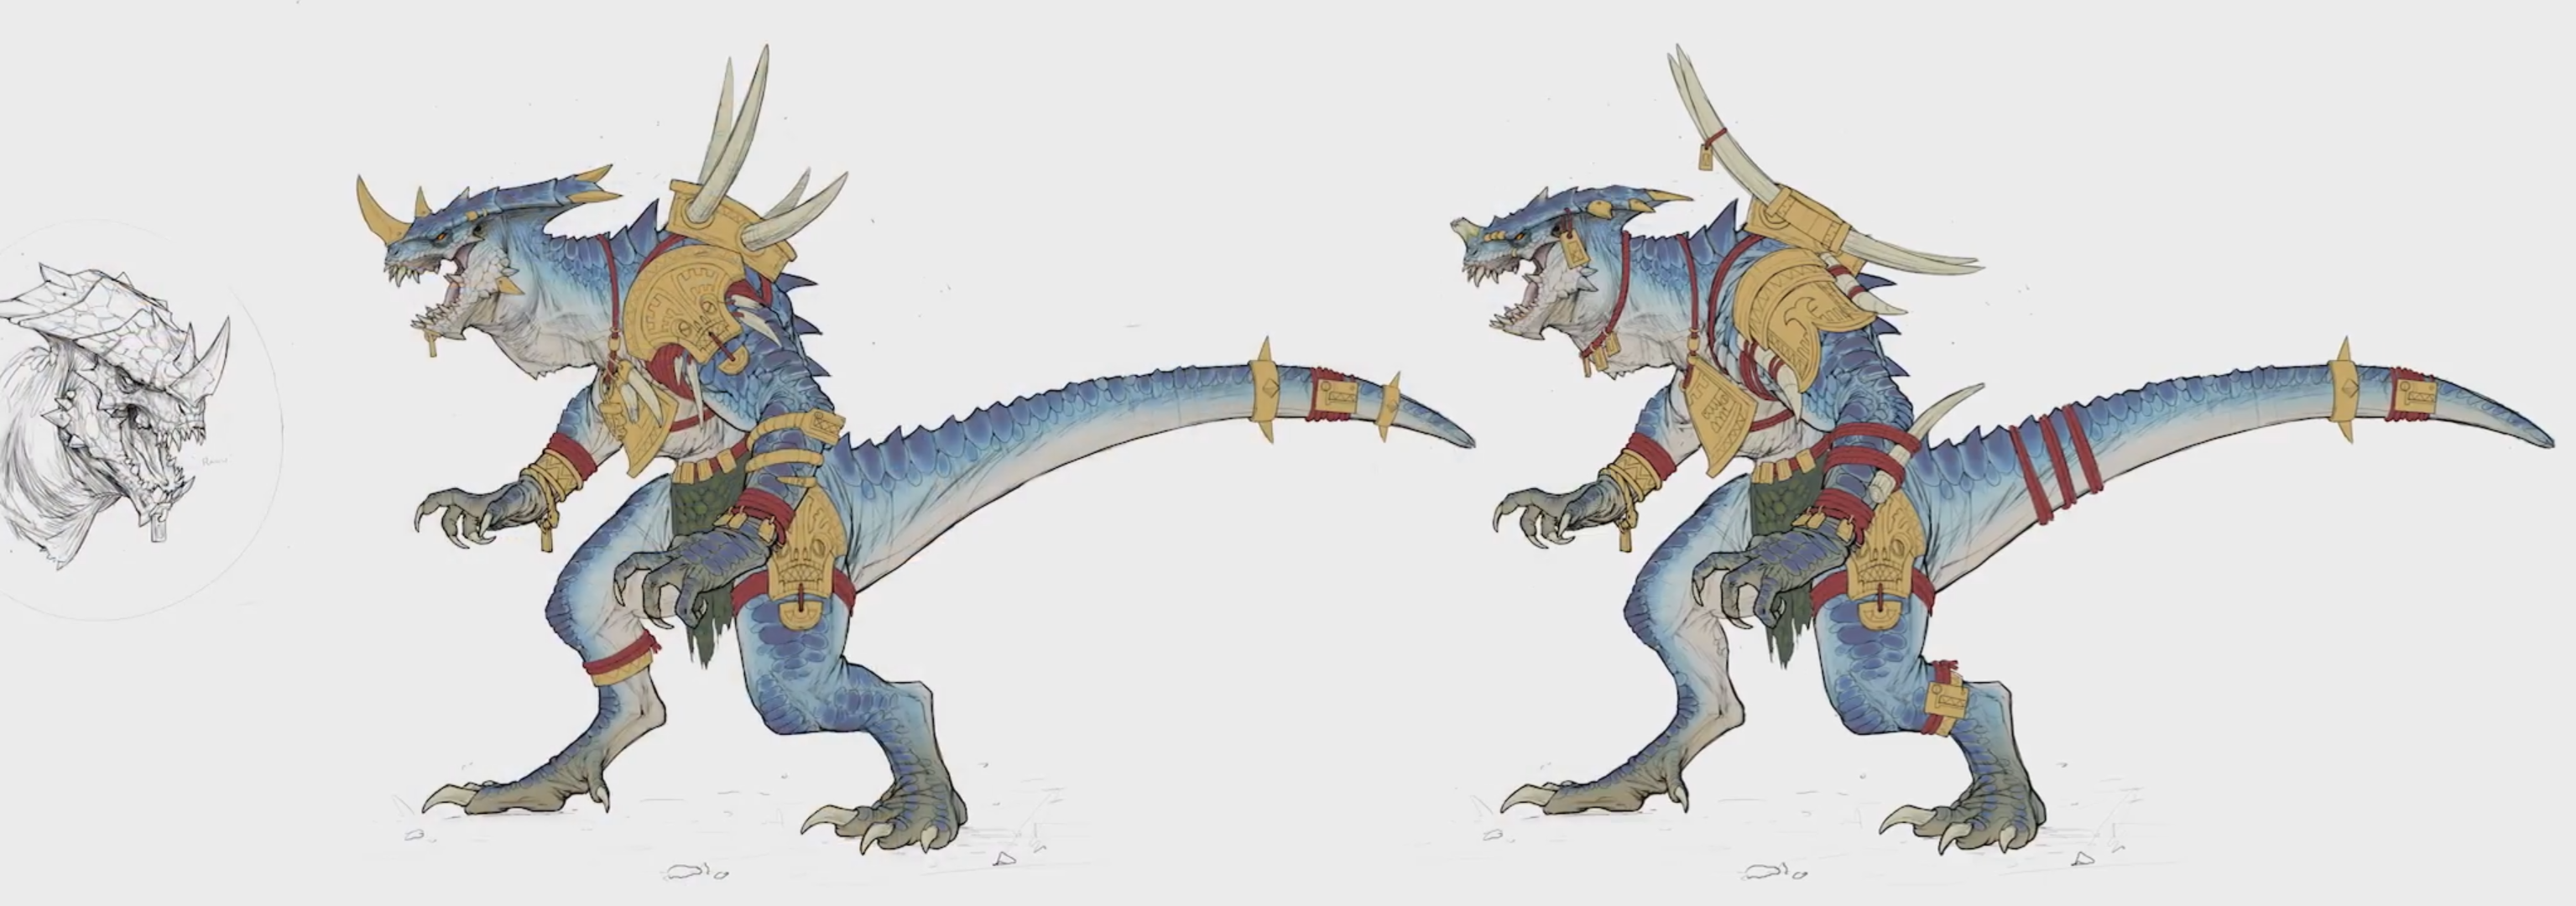
I studied these to see how they had been animated and how these creatures moved. From here, I created a simple Movement list that listed the movement characteristics of this type of anatomy for me to work from.
Now I had some reference I began my planning of what animations I would create. I had many in mind, however I knew I had to limit myself to keep the workload realistic and manageable as I had never animated before and knew I could easily overload myself with overly complex animations. I planned my first animation as a simple walk cycle with a crawl and roar incorporated into it. This seemed nice, simple and fitting to my character’s design. I imagined it as a stalking creature, so I believed a crawl with a sort of inquisitive scout of the floor would be fitting, like the Trilobite is searching and smelling for nearby prey and then upon smelling prey, stands up to roar and pursue.
I planned the second animation as an attack sequence, imagining feral, out of control swings from its arms, starting with a charging wind up to build anticipation followed by a flurry of swipes ending with a roar. Again, I believe this would portray the feral animalistic behavior of my creature well.
For the third, I imagined and planned either a swim motion or another type of attack sequence, as I had made this whole model as a game ready example. However, I ended up siding with another attack sequence as I believed it would be a little more interesting than a swimming sequence, even though this would have also fit well with the design of the creature.
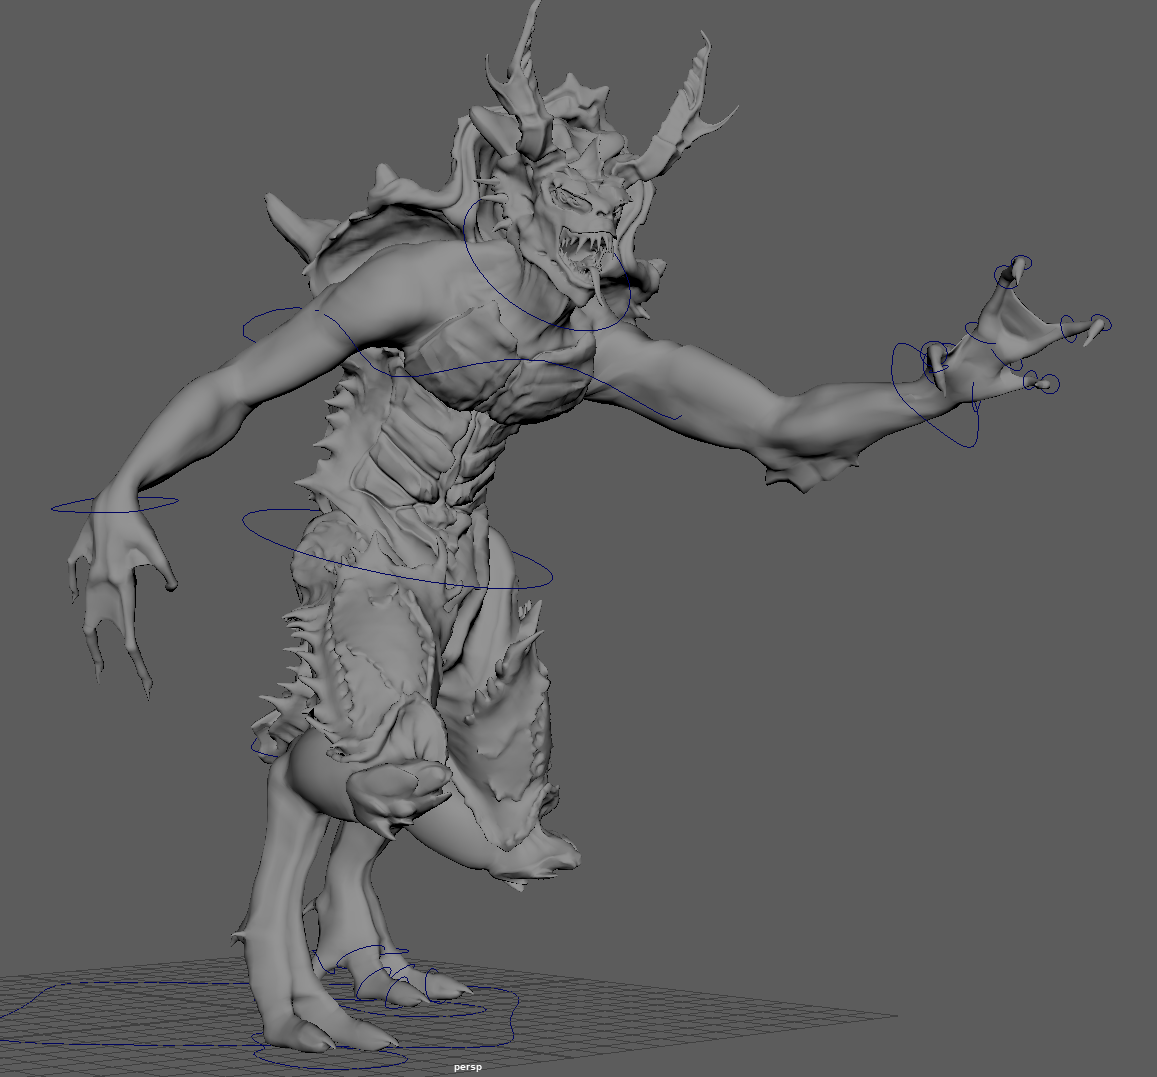
Rigging, weight painting and the creation of controls
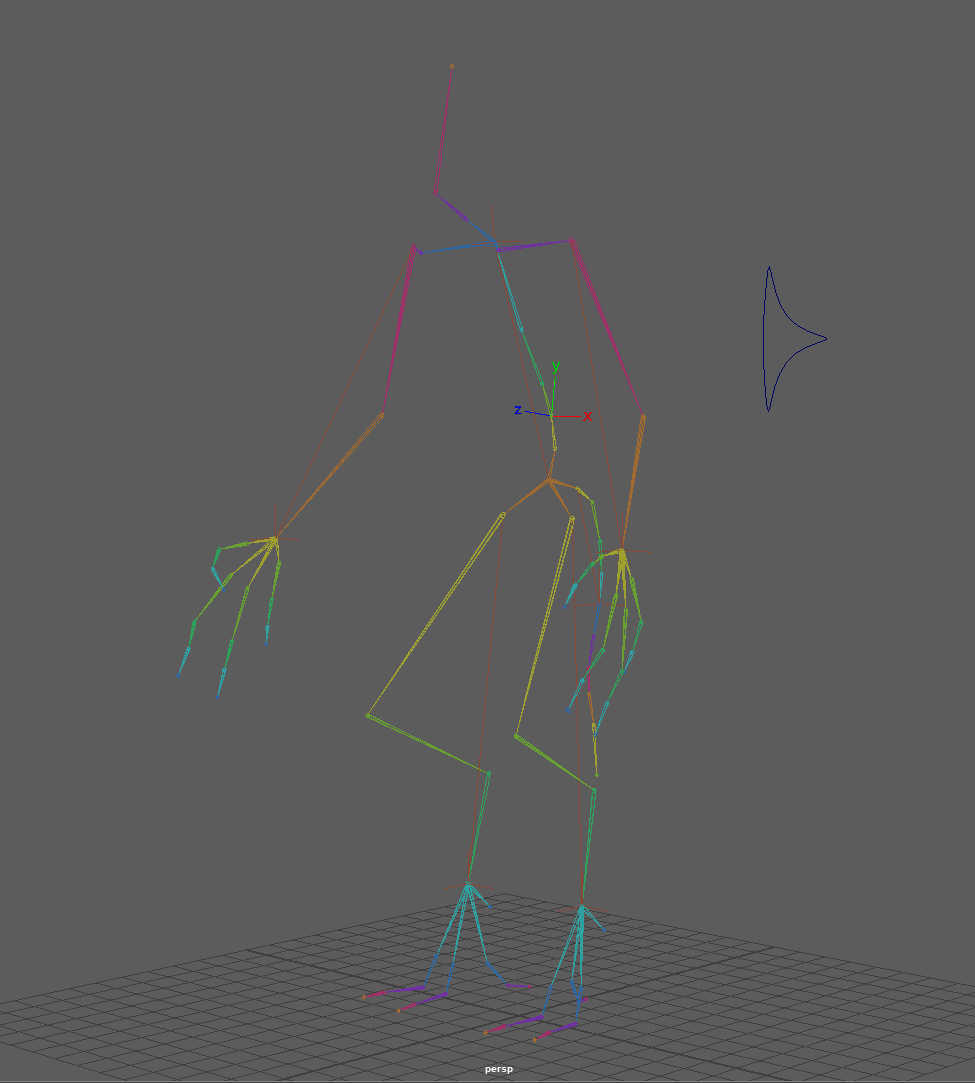
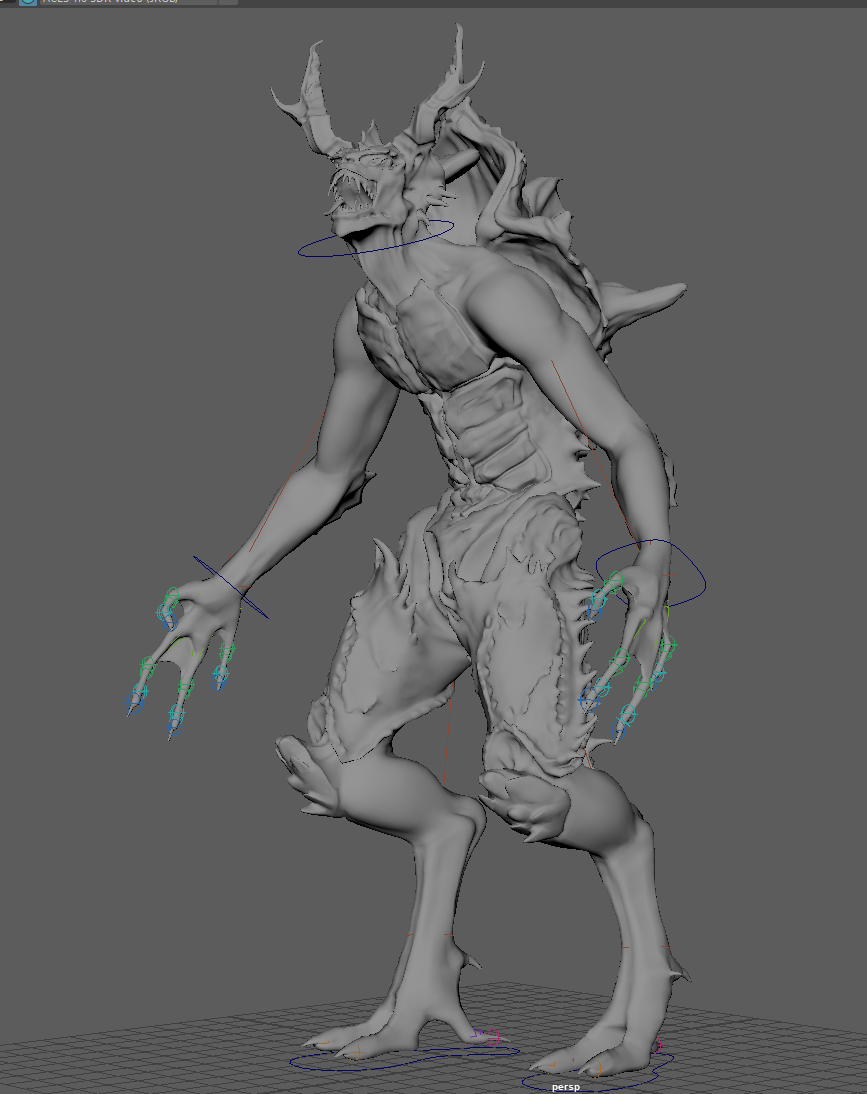
Now that I had some references and plans to begin the animations, I now had to rig the character with bones, skin weights and controls. For most of this process I simply followed along to the canvas tutorials provided by the university. However, these would prove later to be quite the dilemma, as they were old and sometimes wrong and would require me at a considerable proportion of the way through rigging to completely restart the process and begin again. As I approached the step of creating an Ik/Fk switch, it would turn out I would need to completely remove my old IK setups and restart these with the Ik/Fk switch in mind. I would also find out later that the tutorial stating how we orient bones was completely wrong and as I was now onto the finishing parts of the rig, I had no time to re-do all the rig again and begin anew. It would mean that later when it came to animating, certain parts, mainly the fingers, would not orient correctly and therefore be more difficult to animate.
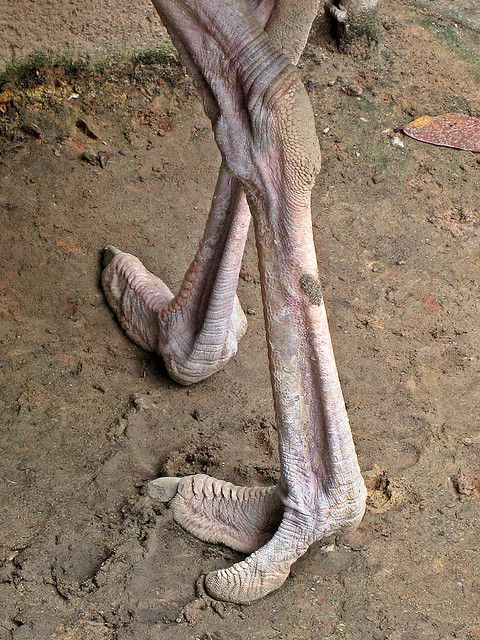
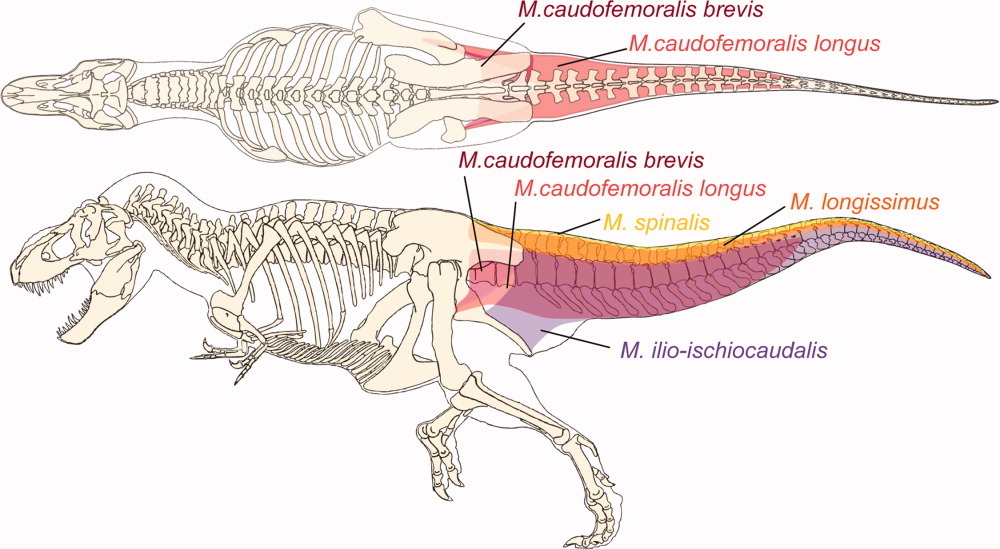
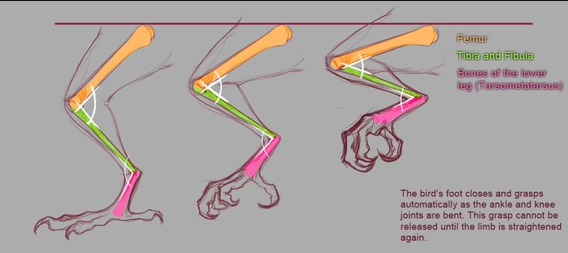
To begin with, I researched anatomy and bone structure of creatures that had similar leg designs (as the legs where the only part non-human) to get an idea of how their bones connected and articulated. I would find again that dinosaur legs would work great as they were the closest approximation of an upright bipedal creature and matched the legs of my design.
The rest however, was a simple human rig and I could conventionally follow along to the tutorials for the remainder of the rigging process. I was also going to rig the sail fin on the creatures back however, time and workload was too much of an issue at this point.
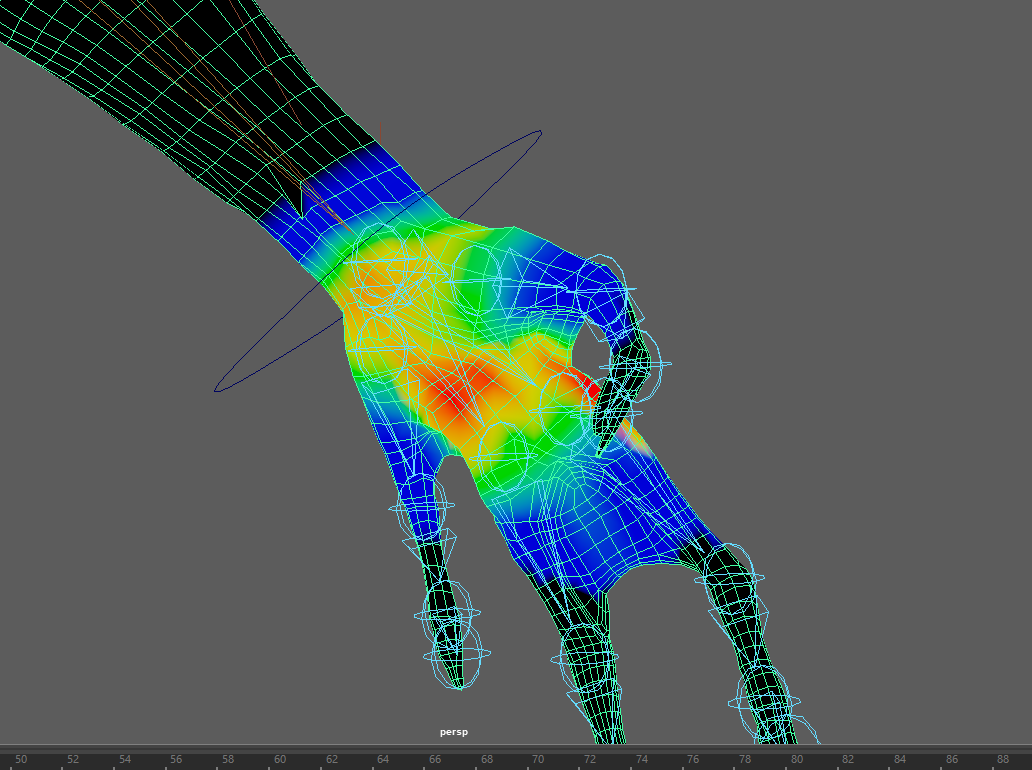
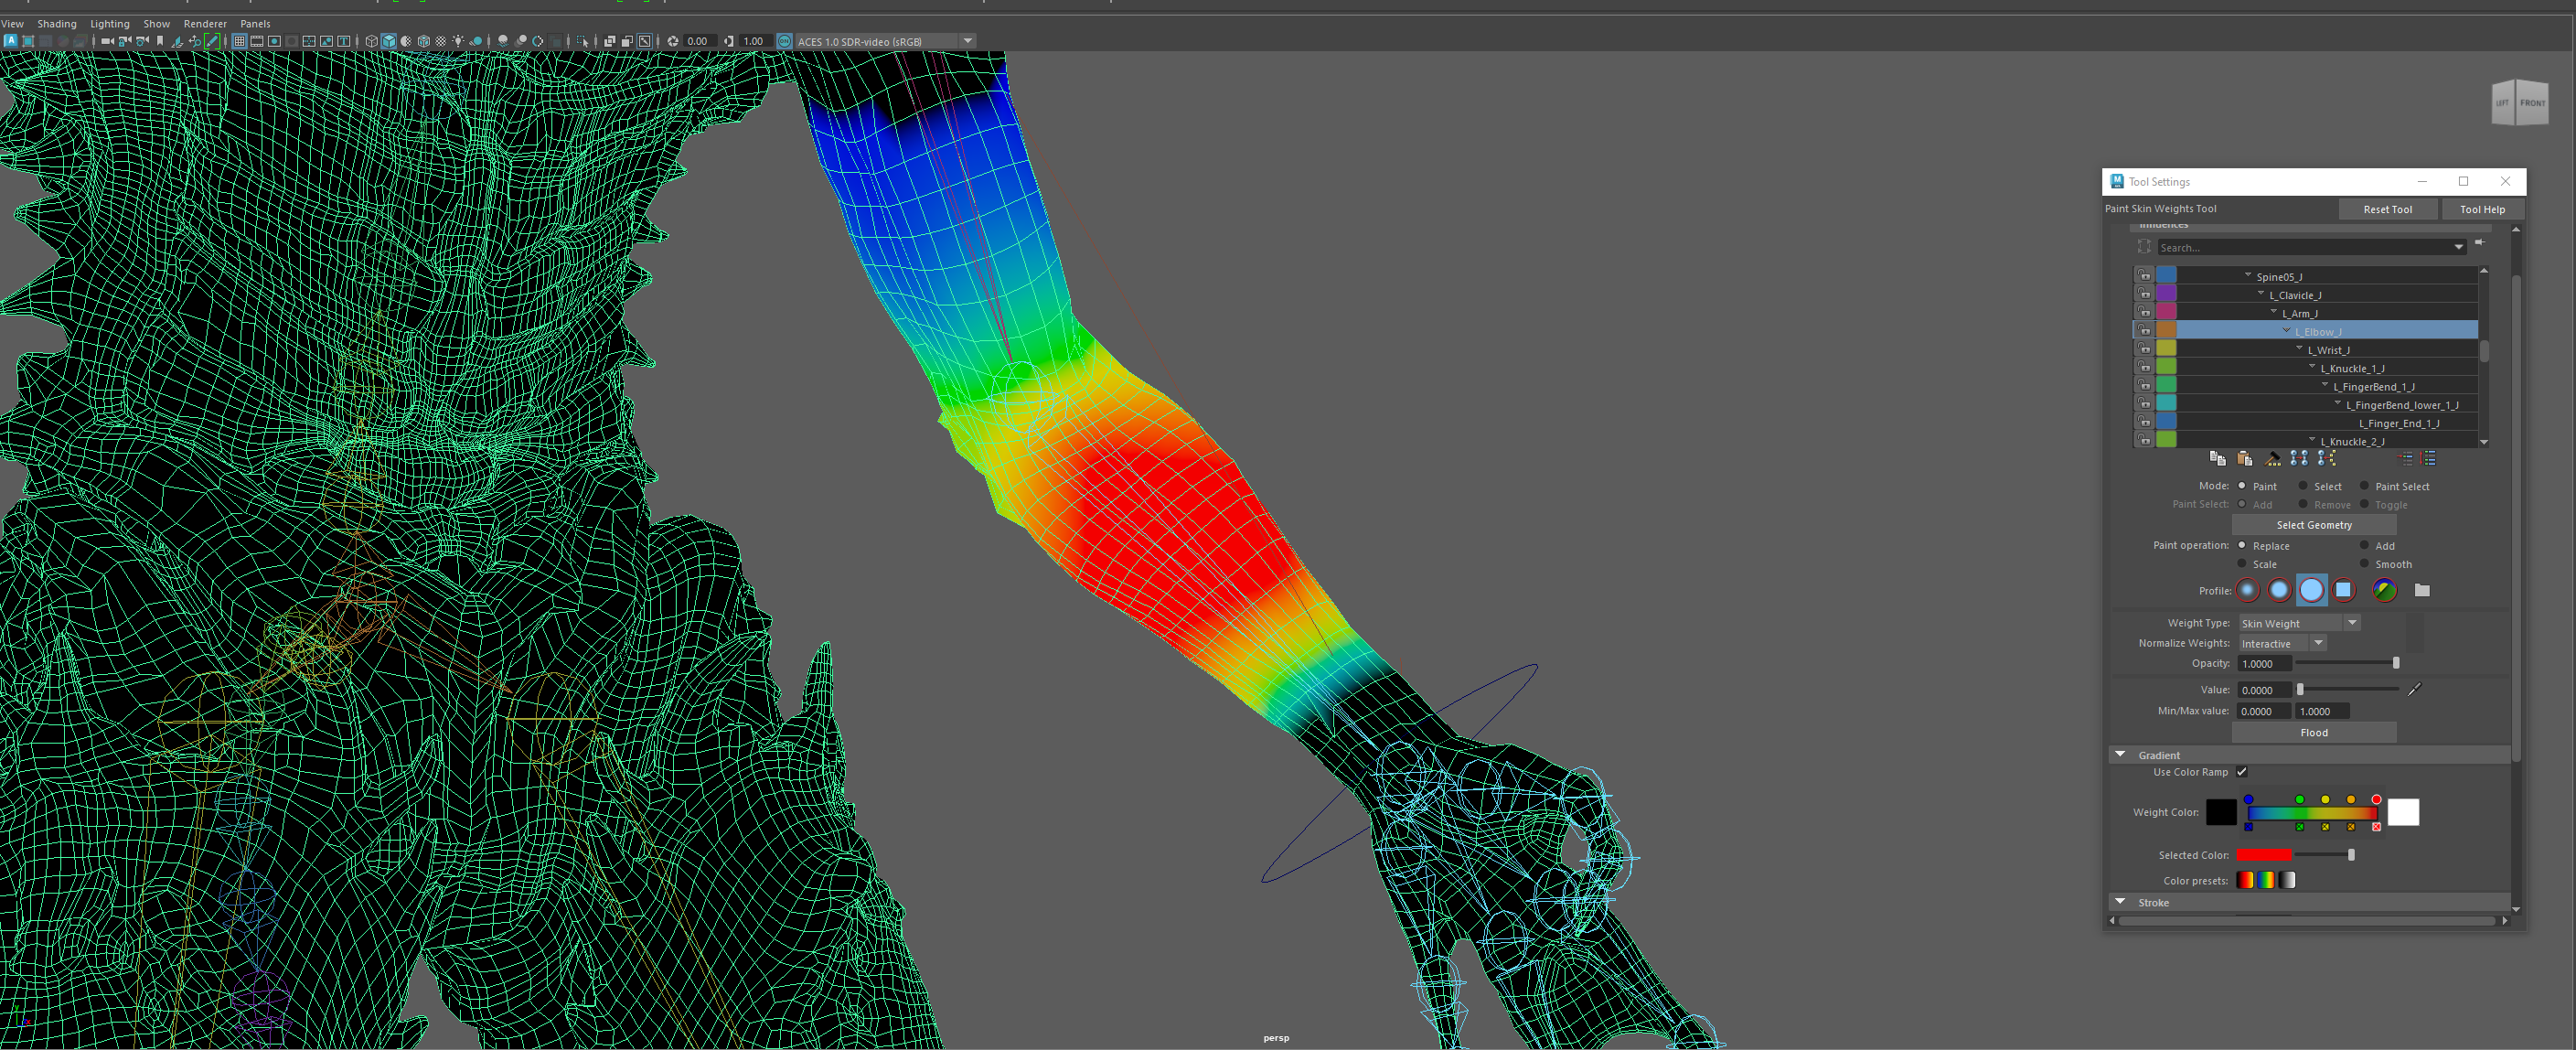
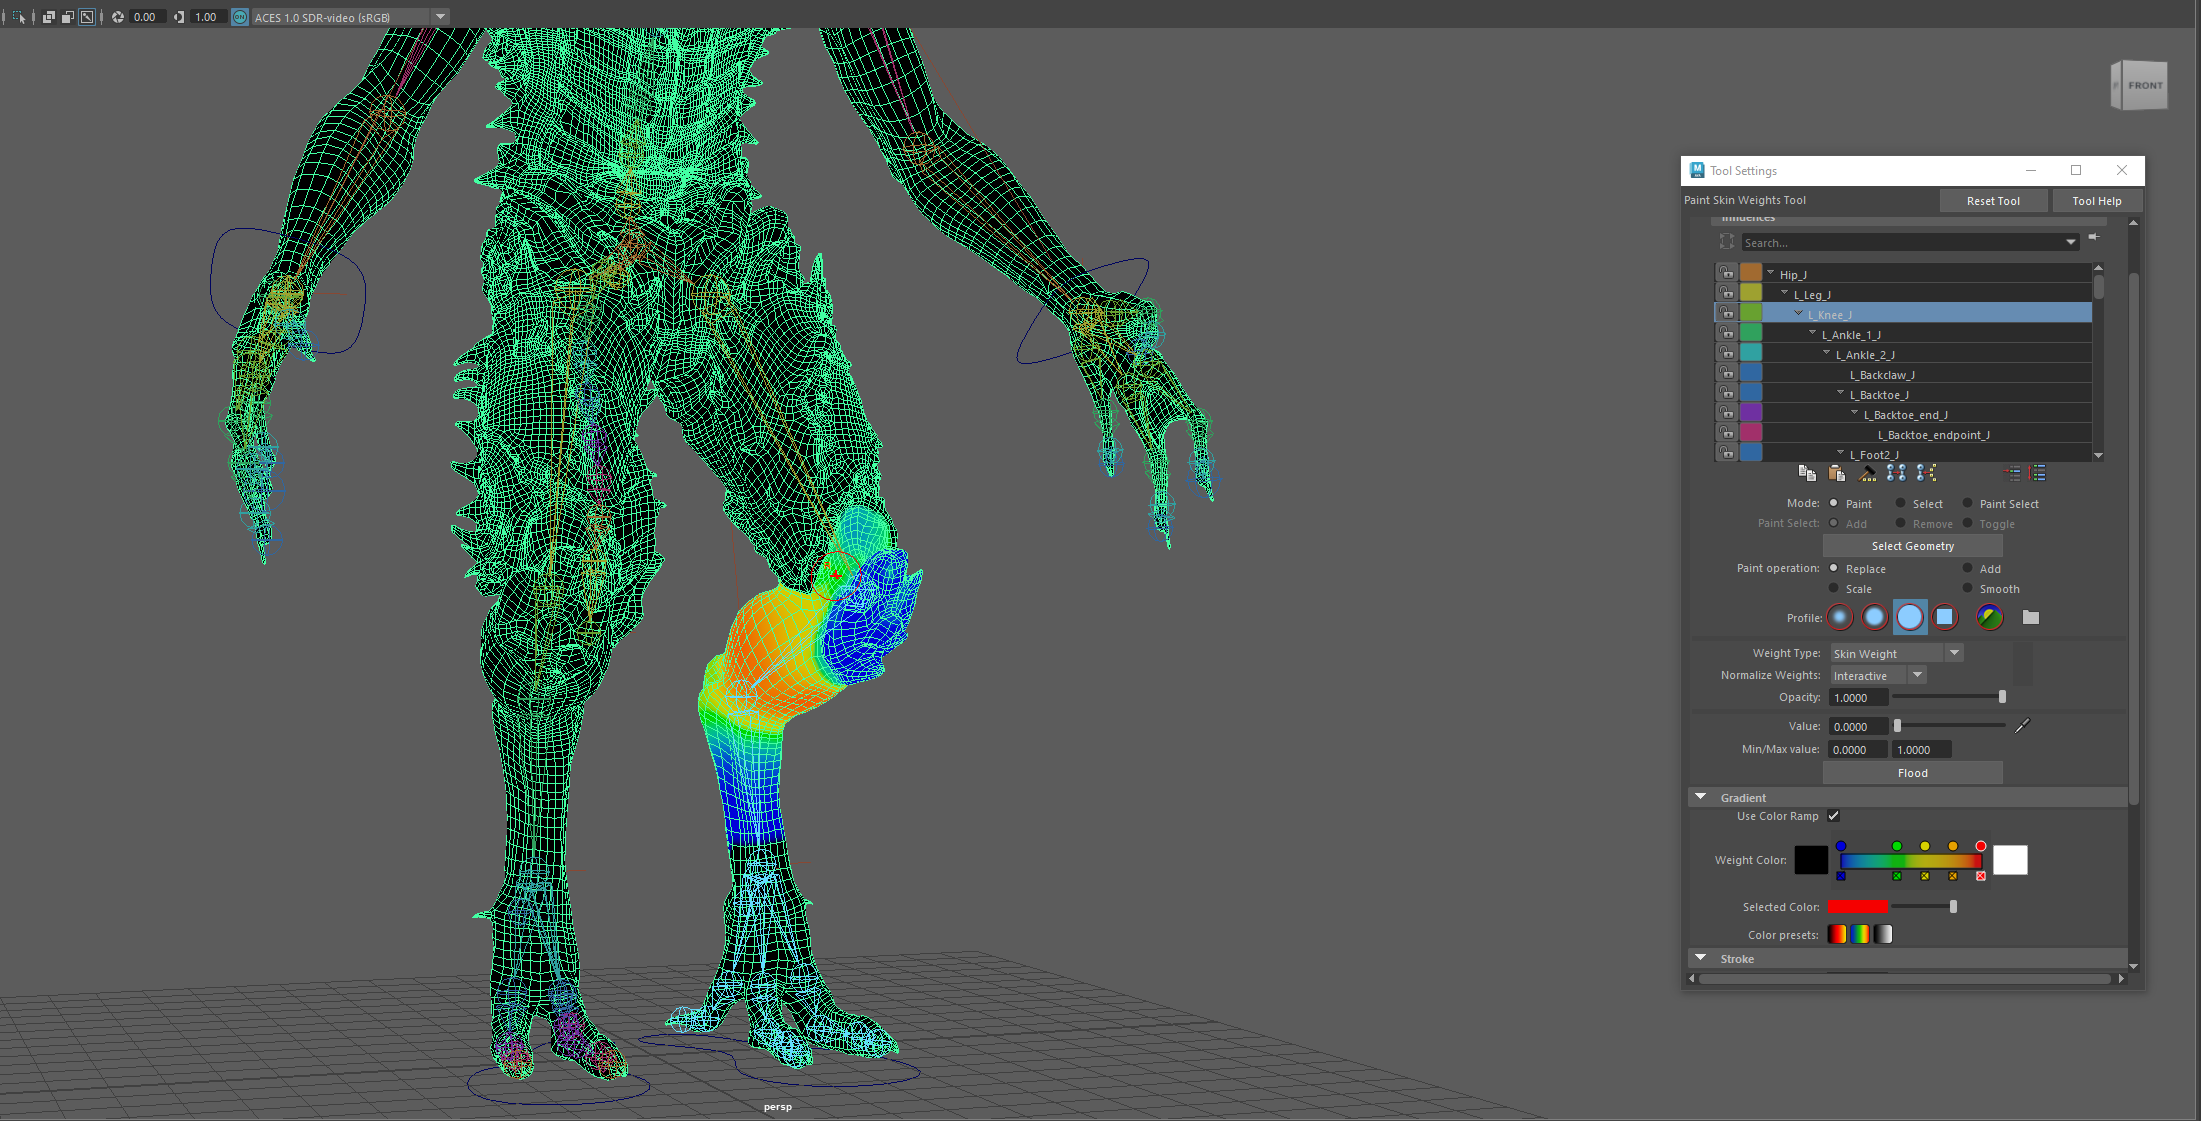
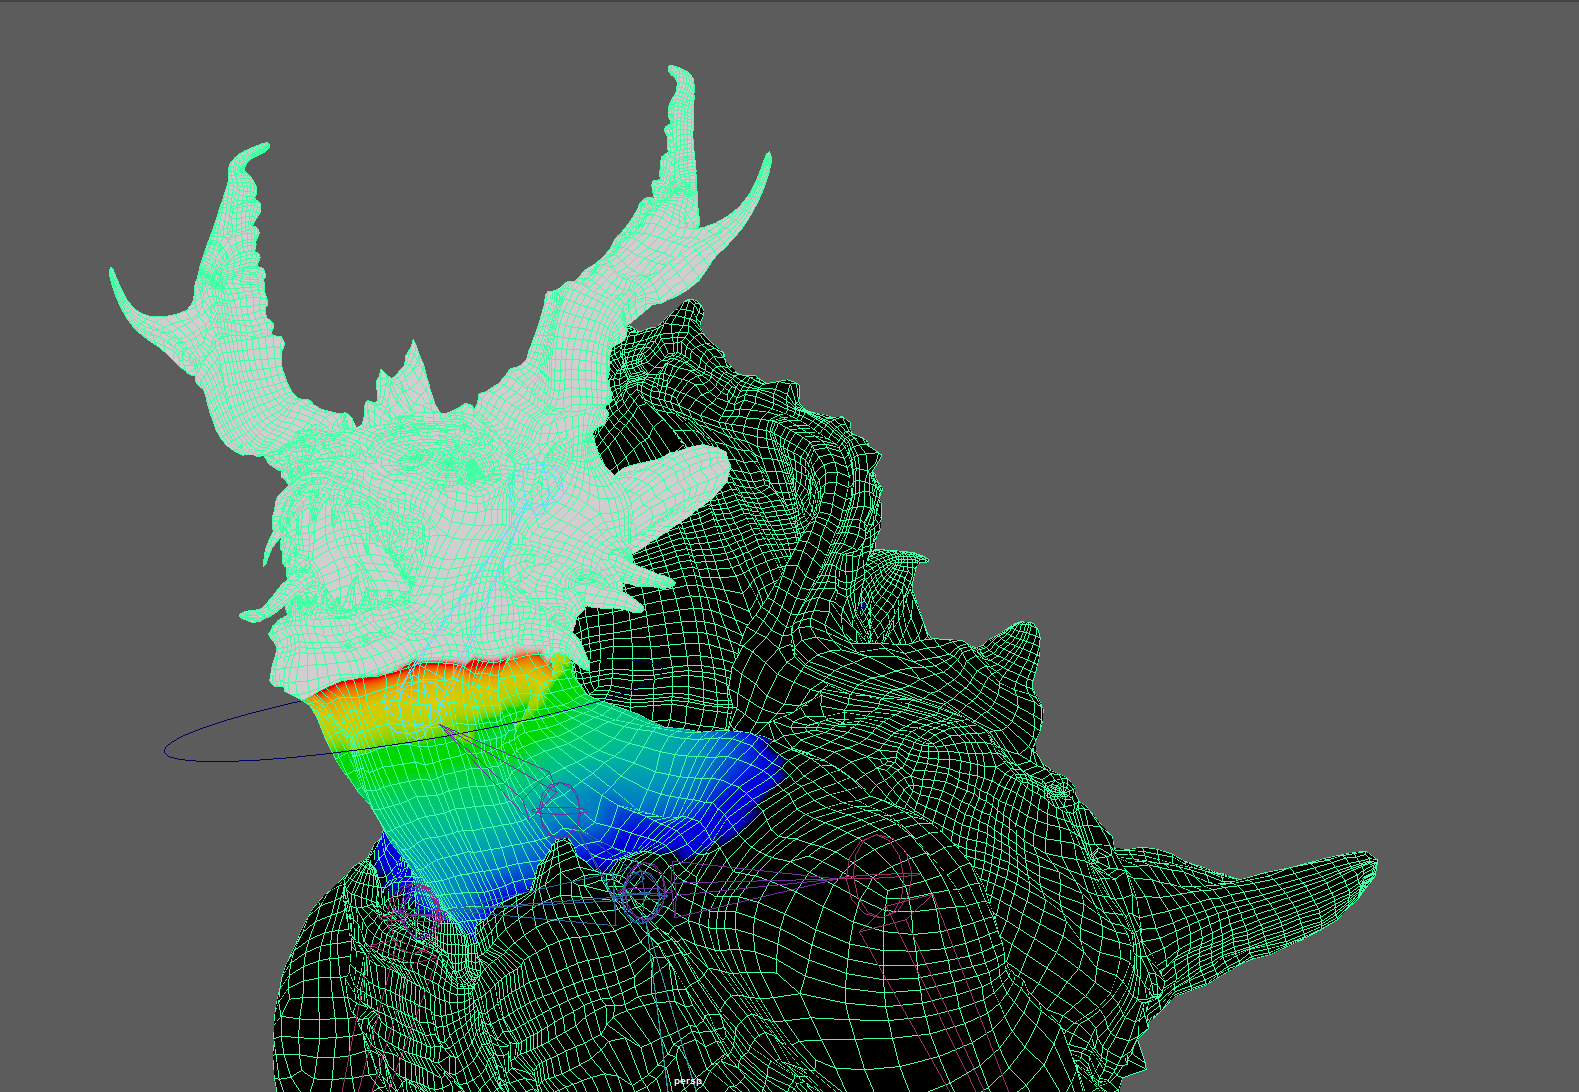
Once I had the rigging ready, it was time to paint the skin weights onto the character. Before doing so I researched imagery of skin weights displayed as heat maps on models to give me an idea of how these weights should look across my entire model.
Again, I followed the tutorials provided by the university, painting how it suggested, but I would run into issues. After more independent research, I found small hints and tips to painting weights in maya and many sometimes contradicted one another, one would say to lock weights while others described keeping them all open, another would suggest to only use the add and remove brush, where others said to only use replace and smooth. My main issue would be that after painting most of the weights onto the model, I would return to the model after closing it, and many of the weights would be different and messed up.
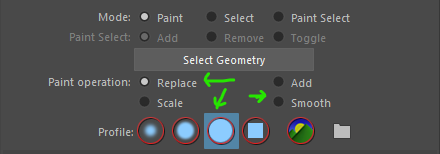
After weeks of trial and testing, I had settled on almost giving up on this near impossible project, when I discovered my own way of brute forcing these weights into their respected places. I found after watching more videos, reading forum posts and much trial and error that there was a system and method to the weights, that they all had to add up to a value of 1 around that bone, so painting a value of 1 or remarkably close then smoothing it, would give smooth professional weight maps without issue. I found by starting at the hip and working my way down the hierarchy one by one, painting only the left side of the model with replace and smooth, it limited the normalization of the weights and allowed more precise and permanent weights to be added. Once complete, I began testing and fine tuning the weights by moving parts, then seeing if any polygons that should not be affected were. When I was satisfied with the weights, I mirrored the weights and tested once more to ensure that the weights were correct.
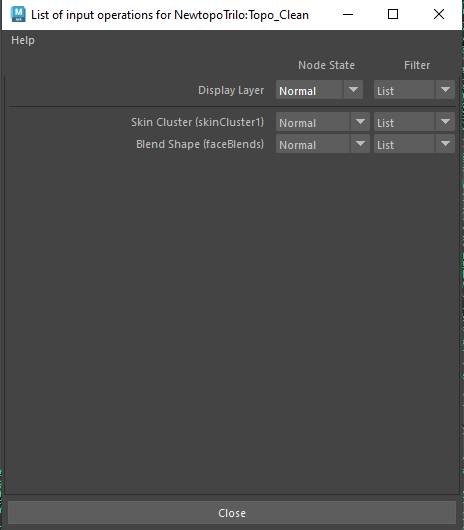
Once the weights where complete, I could begin creating some blendshape expressions for my creature. I made a list of possible expressions and combinations I could go with, including a roar, two separate types of snarls, a blink, a neutral look, and a flaring of the nostrils like a sniffing action. I did encounter a problem that was not recognised until I began to animate. As I would add a blendshape key, the character would return to the original position it was in at the start of the animation. I found after asking a tutor (David) that I needed to move the inputs in the mesh to the correct order. By right clicking the mesh and going to inputs, I simply had to move the order so the skinCluster node was before the blendshape node.
I would admit that I found this the most challenging portion of this module and that I still am uncertain and not entirely comfortable with weight painting and its process. I would state that I forced this to work after lots of painting and re-painting, reading, and watching videos. Despite these setbacks, I was able to create a rig that kind of worked, however it had many flaws and limitations, such as limited control to the spine and legs, which would limit me now in the creation of animations.
Animating the Trilobite
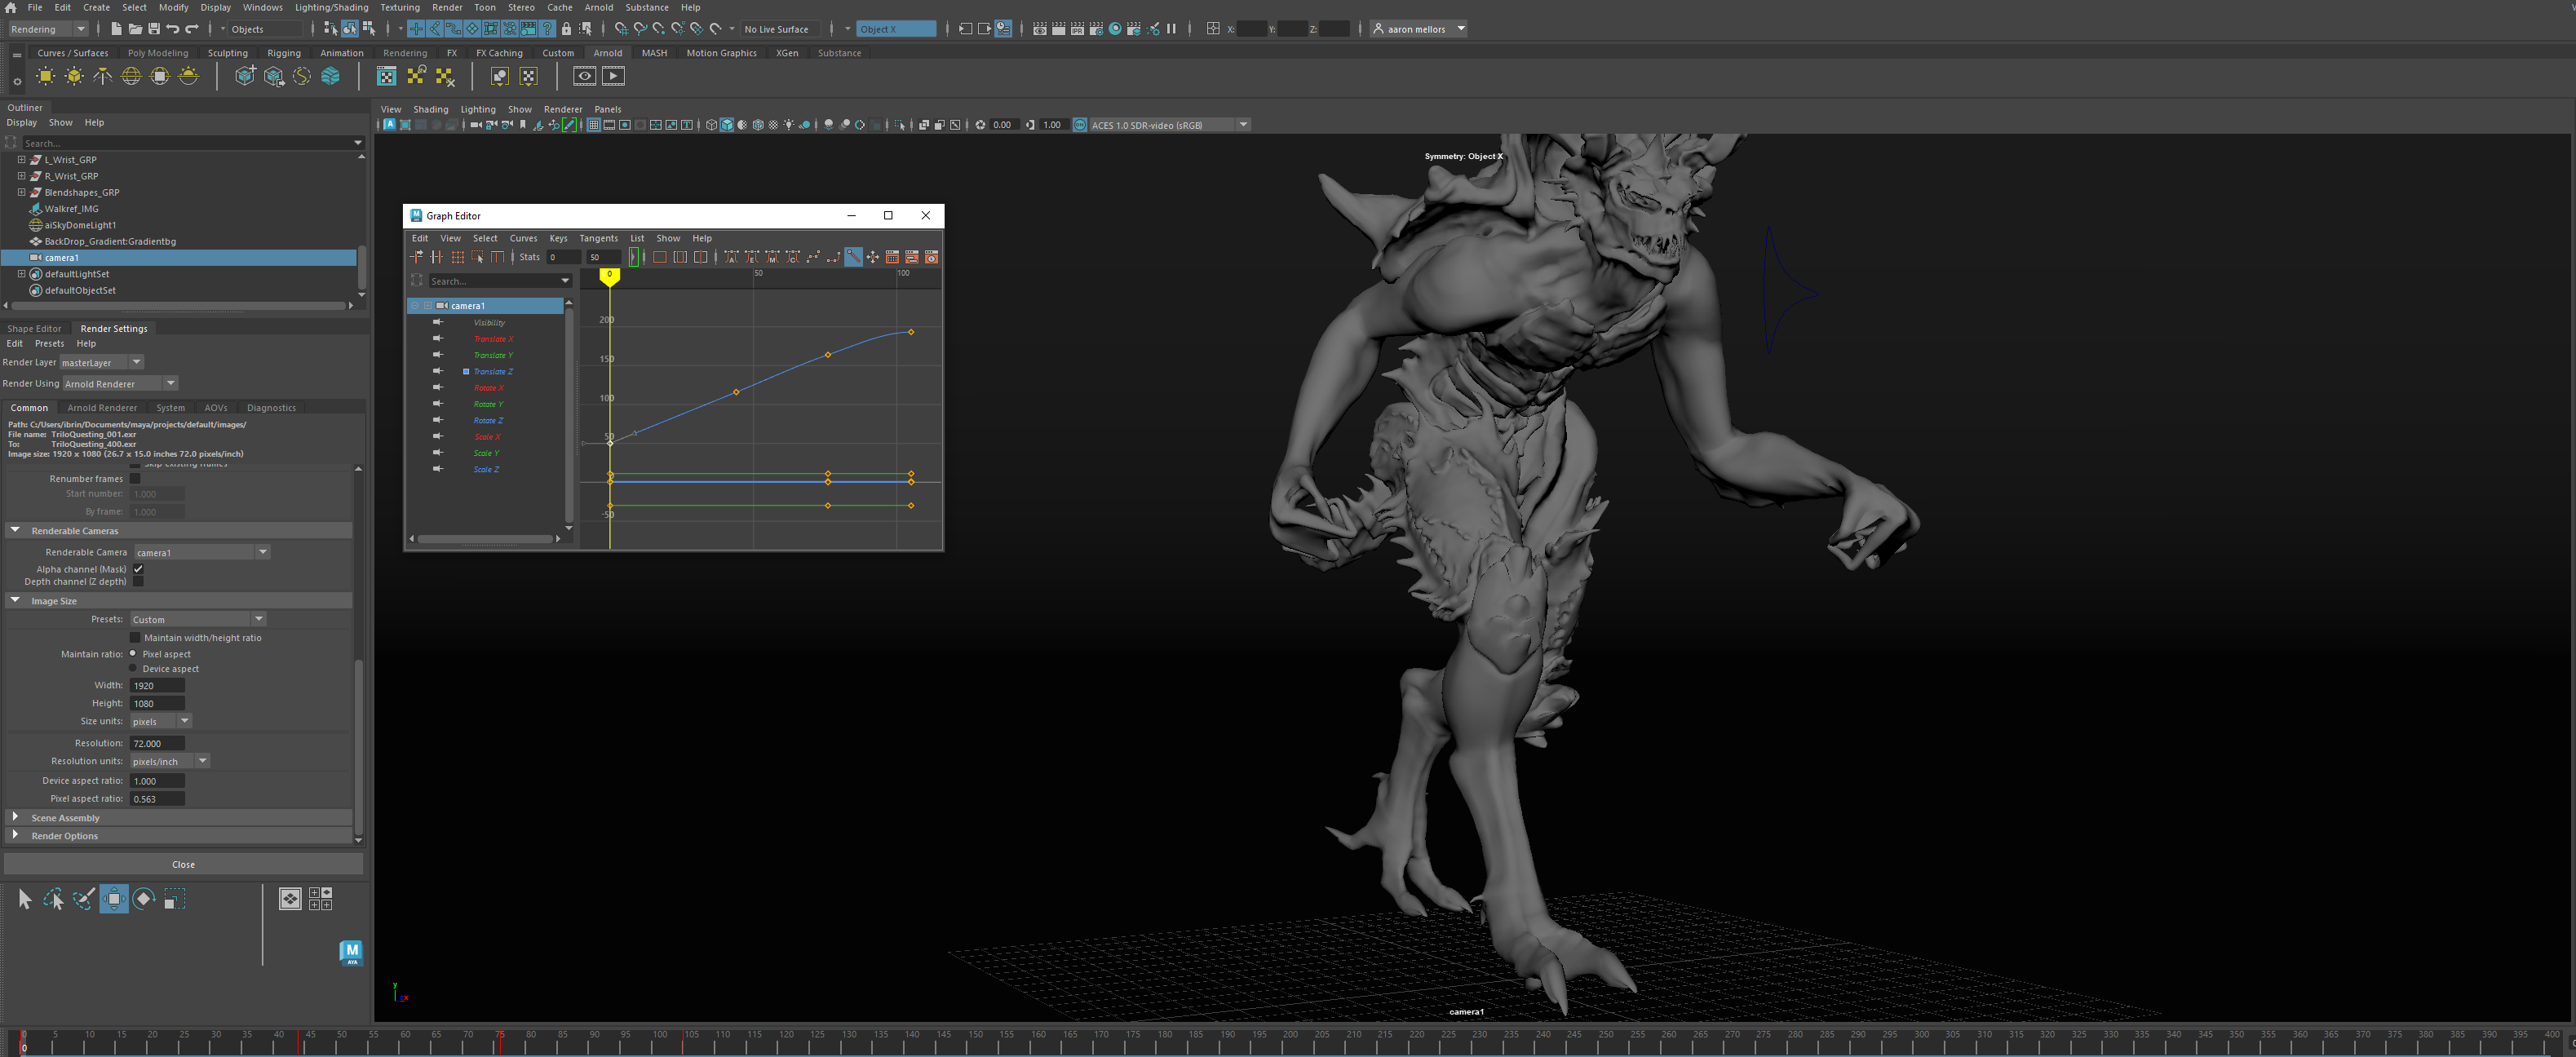
I began animating the “questing” sequence first as I believed it would be the easiest and best one to do as an introduction to animating. Once I began, I quickly realised the similarities between this and Unreal’s sequencer. Much like that sequencer Maya’s had a curves editor and keys acted the same, keying transform, rotate and other properties to certain frames within the timeline, extending the length of these keys to slow the changes and shortening them for quicker movements. Using the curves editor, I could precisely edit timings and edit the ease-in, ease-out qualities as well as control how it interpolates between each key. I also opted to use the auto key function, this allows Maya to key a property to a frame upon its value been changed, eliminating accidentally forgetting to key a certain value.

Now I fully understood how it all works, I set my frame limits in proportion to my frames per second (25) and began animation, choosing the pose-to-pose method for most of the animating, switching to straight ahead for things like precise finger timings and toe timings.
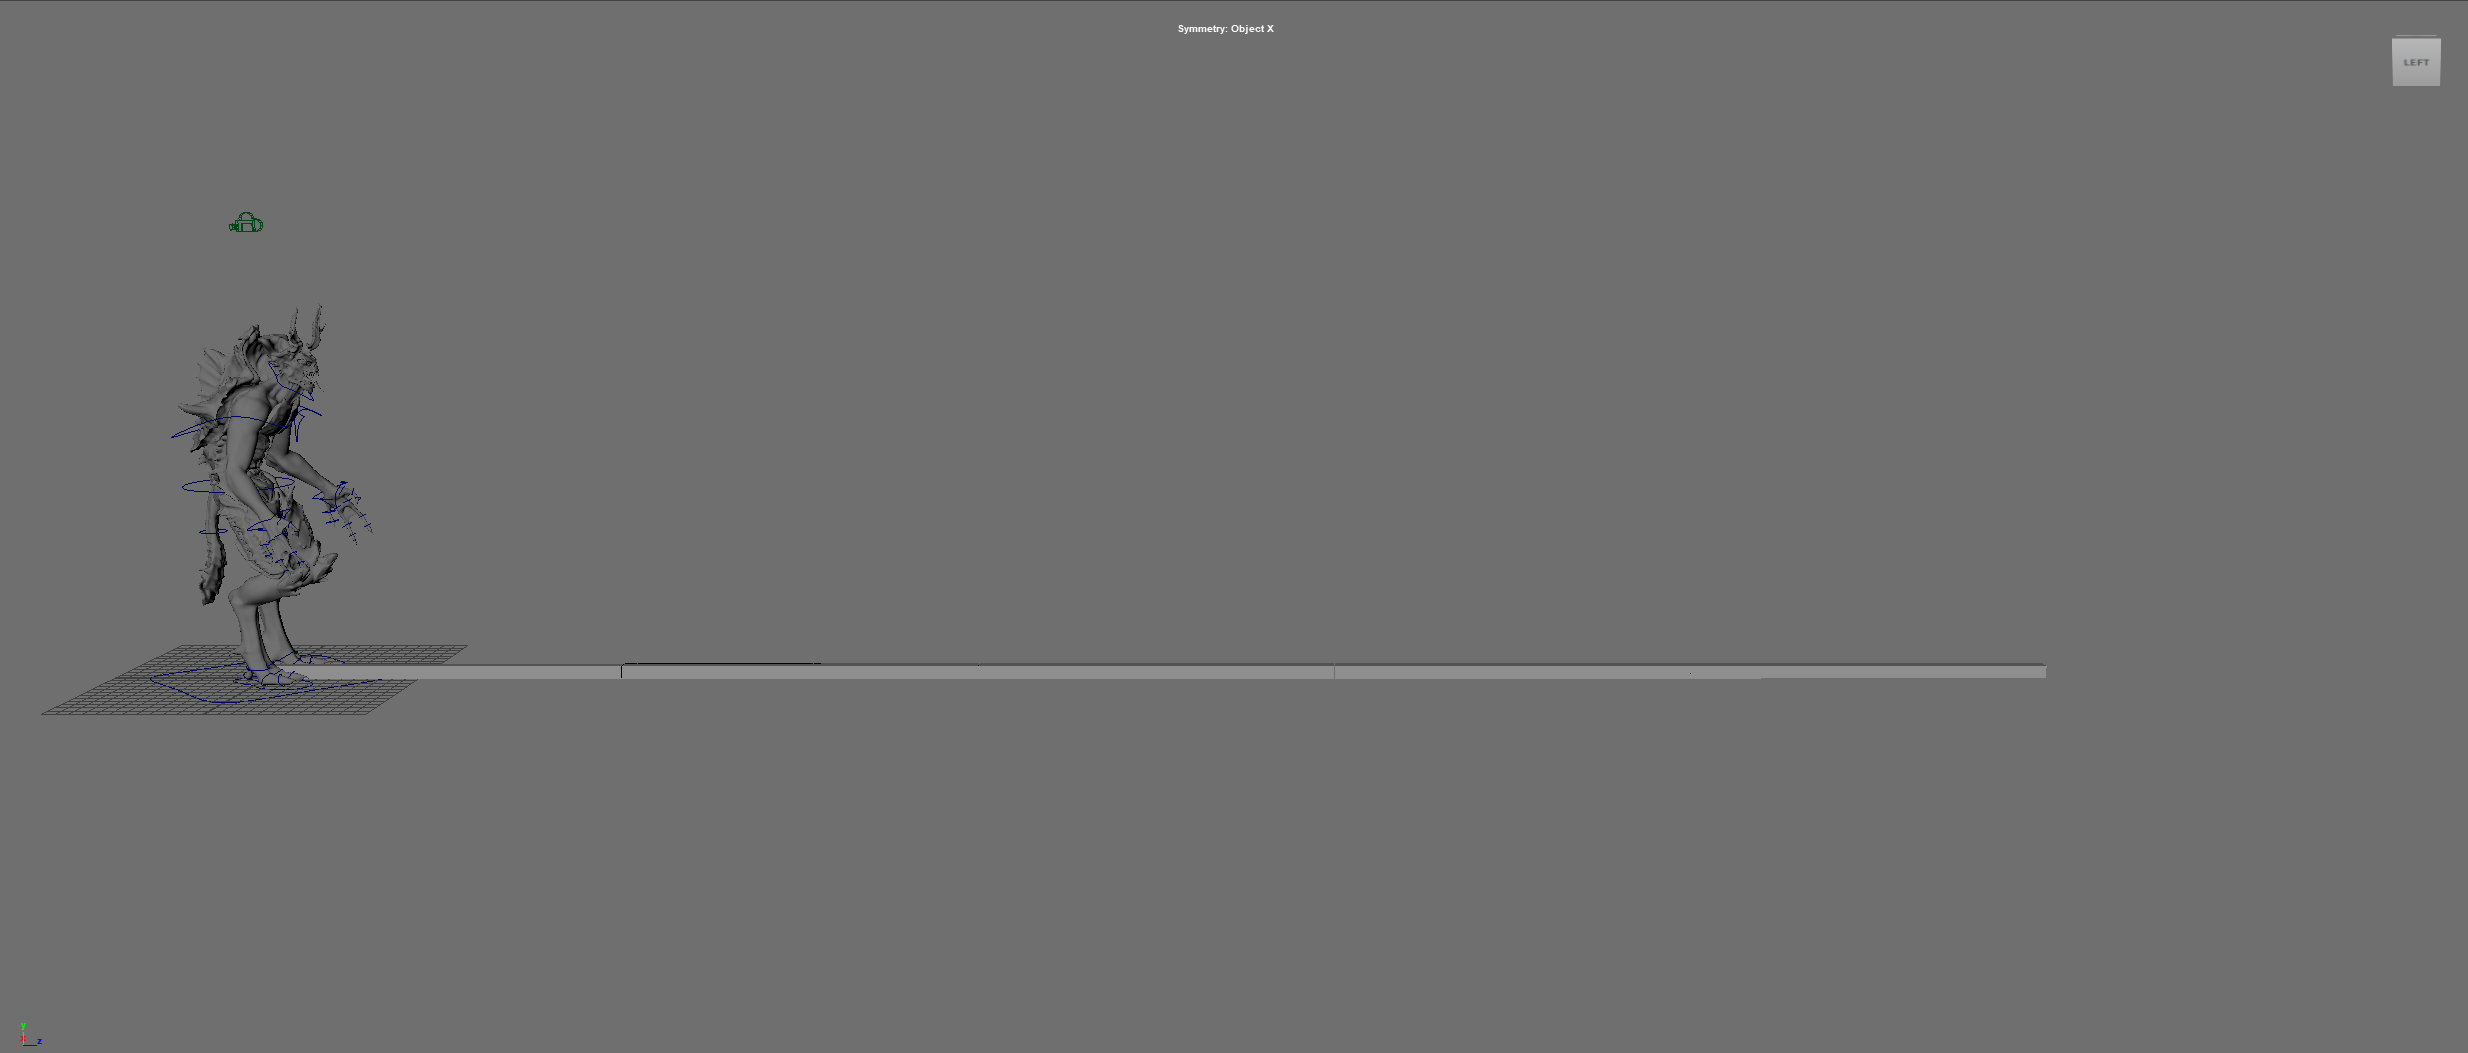
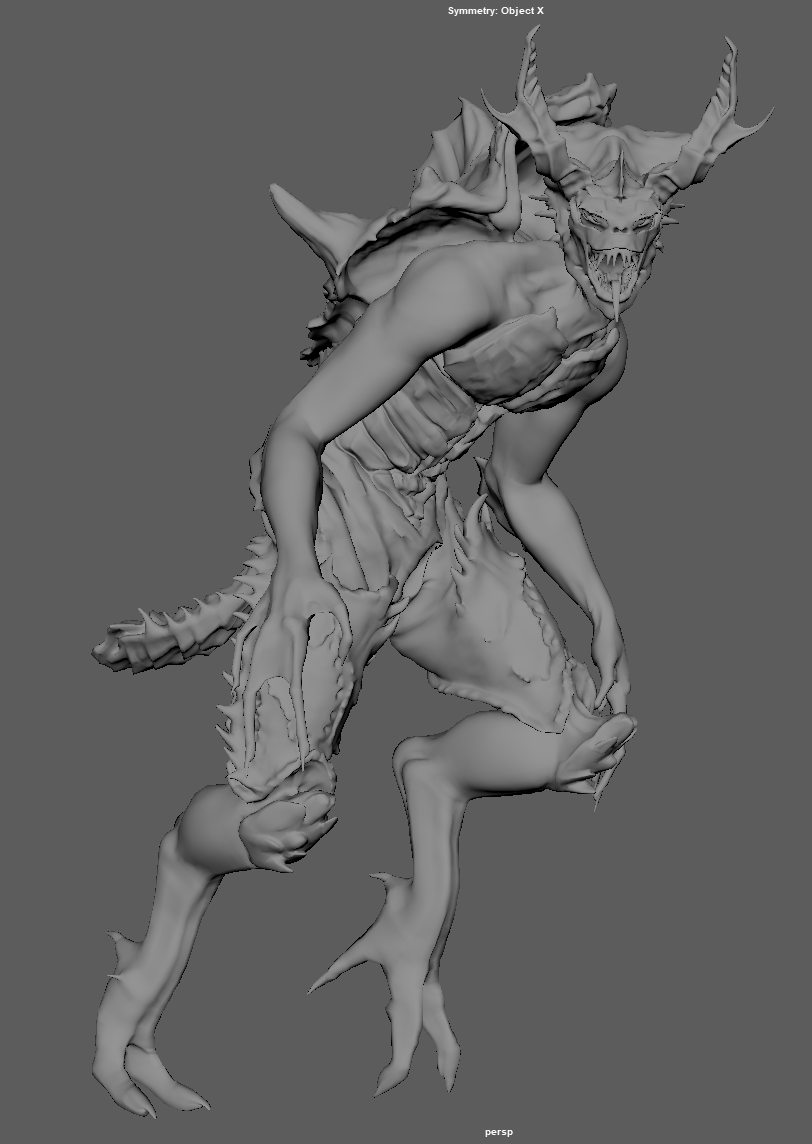
After acting out myself how I thought the sequence would go, I gave myself a frame limit of 500, equalling 20 seconds at 25 frames per second. If I needed to later, I could shorten this frame limit to my desired amount. I quickly realised after animating for a while that the limitations of my rig were quite large. For one, I could not rotate the thigh joint, only the ankle where the IK handle ended. Secondly, I found I could not rotate my character upside down or backwards because of the legs, limiting my animations to standing or forward moving sequences.
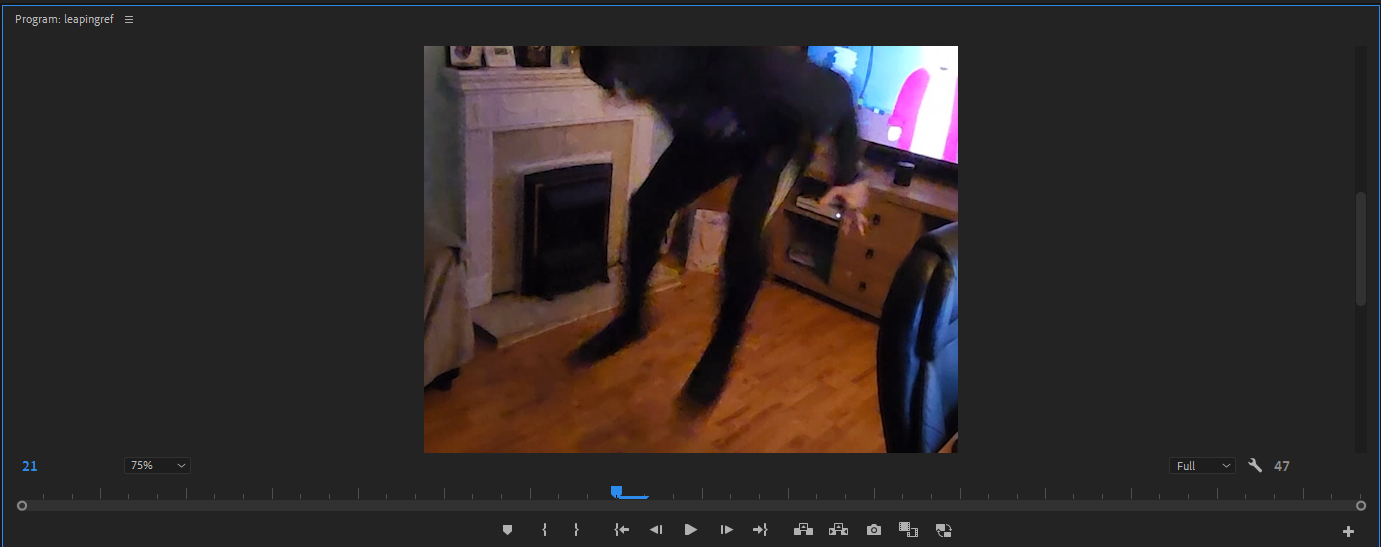
Regardless, I kept animating, sticking to reference from my own self footage and YouTube videos to keep the realistic movement and timings. For example, for the dive attack I needed a person performing the actual dive so I could time the frames and jump perfectly to keep the dive and fall realistic. Too long and the character floats, too short and the character drops too quickly like a brick. I also wanted the character to react to the fall and every step it took, to emphasise weight and impact. I initially wanted the character to roll out of the fall, however the limitations of the rig meant I could not. Instead, I chose to make him bounce as he hits the floor, again to punctuate the arcs, impact, weight, squash and stretch.
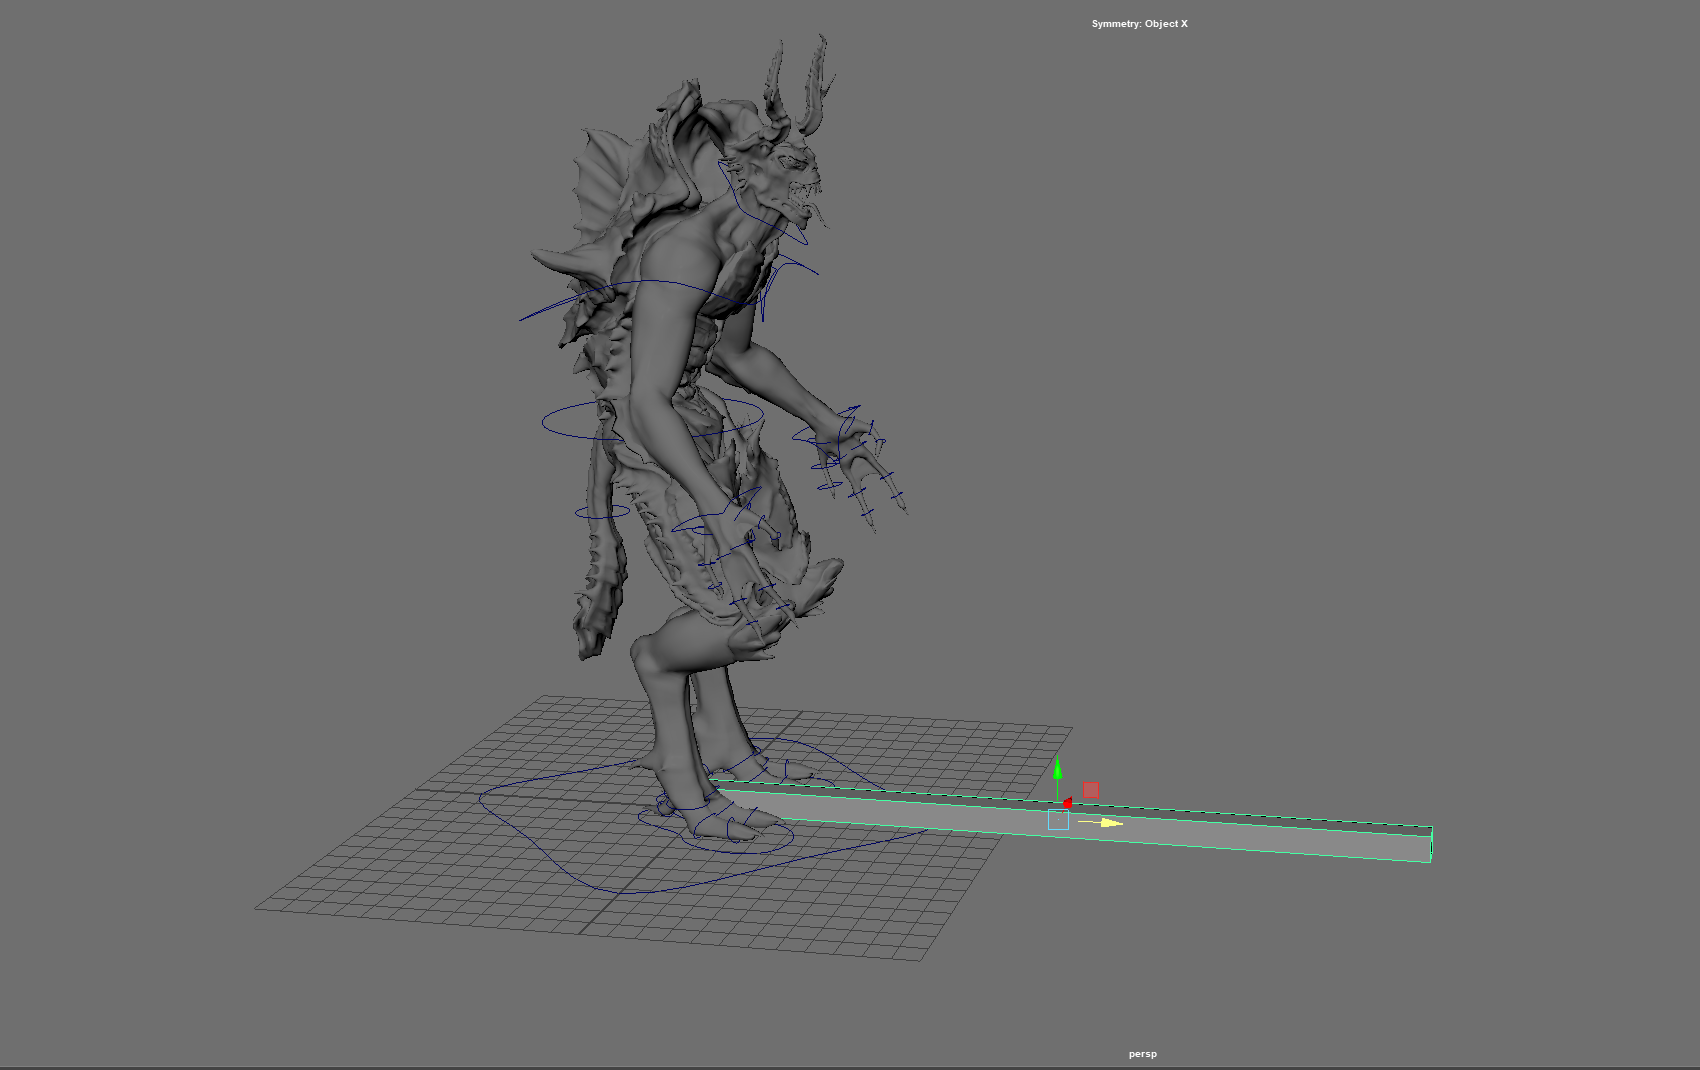
As an added effect of realism, I wanted to approximate a realistic running speed for my creature. I decided after looking at other animals of similar stature that 27 MPH would be a suitable sprinting speed. To work this out, I used what I knew, my model was 8ft tall and 27Mph equated to 40 feet per second. This meant that my character would cover 5 of himself in 1 second or 25 frames. From here I created a simple measuring tool in maya the length of my character and times its length by 5, giving an in-game representation of 40 feet. This meant all my character had to do was now cover that distance in 25 frames to be running at exactly 27Mph.
Rendering
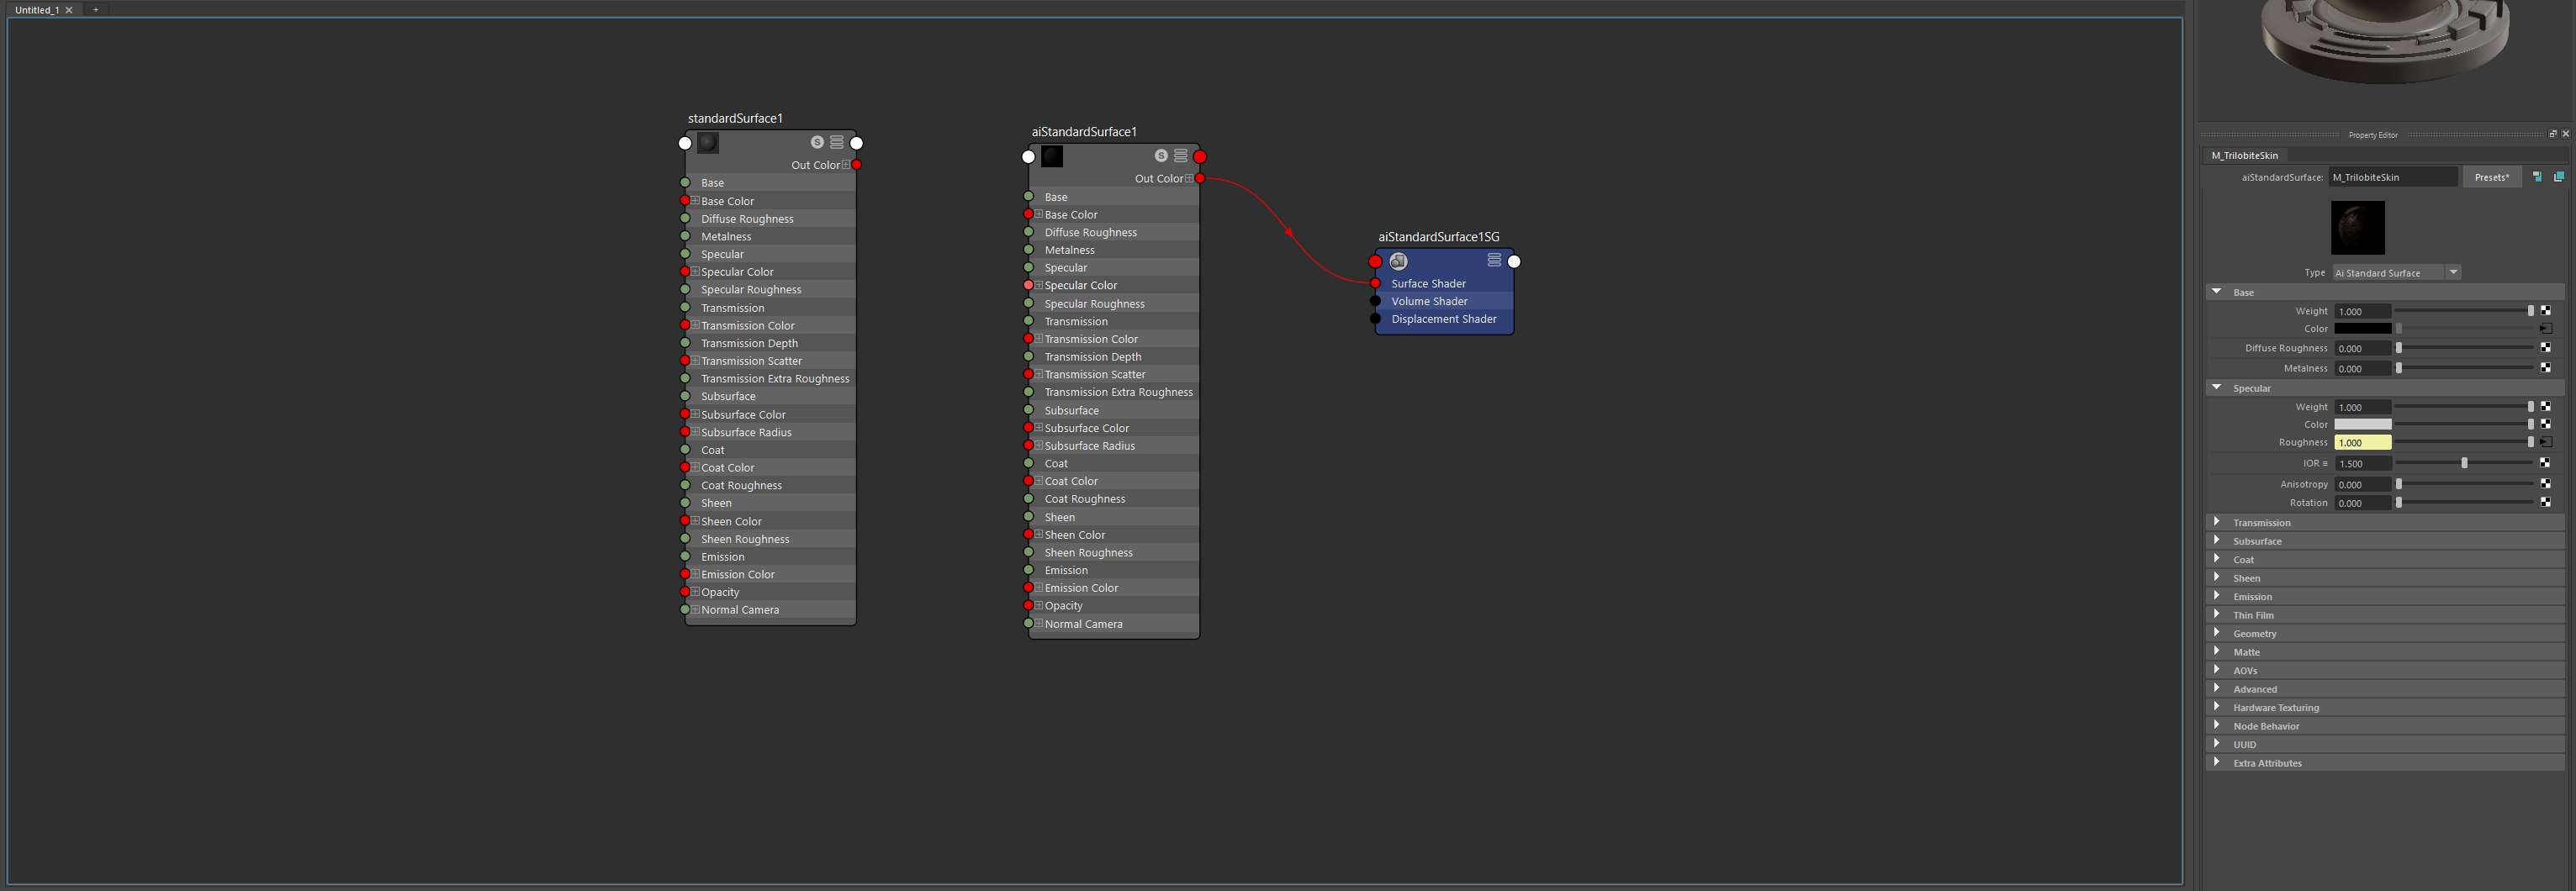
Once all the animations where now complete, I would now render them out into sequenced images to be transferred to Adobe Premiere Pro to be turned into an mp4. I set up a simple backdrop, texturing it and adding a simple aiSkyDomeLight to illuminate the area. I also had to plug in my own creatures’ textures, proving slightly difficult as my character used Udims. However, I followed a tutorial and managed to get textures working. Noting that my friend pointed out to check that my Normals where not reversed as it was something he had come across a lot in his professional career. They were indeed reversed, and I quickly corrected that by re-plugging in the Normals correctly with help from my friend.
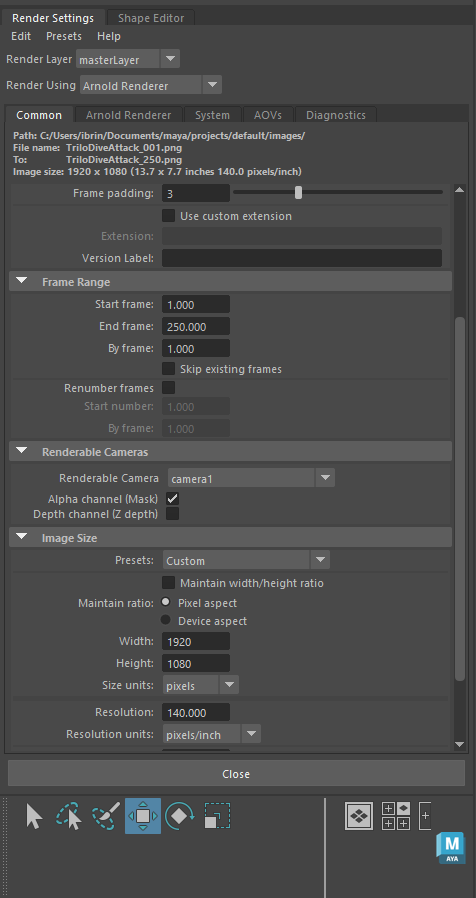
I set up my render setting with help from my friend, he advised me on setting and procedures in Arnold for maximum quality renders and medium quality renders for movies. Part of my procedure was to test certain frames in the render preview to ensure that the model was captured in its entirety and not lost in any of the footage and ensure the lighting and background was visible. Once satisfied, I rendered out my sequence and exported the images to premiere pro to turn into an mp4.

Reflection
To reflect on this assignment, I consider that I would have created a more intricate rig to allow for more complex and realistic animations. I most certainly would have purchased a detailed tutorial for rigging and weight painting, as I found this to be the most complex and confusing area. I would have also split the models head from the body to be used for blendshapes, just to ease the burden on polygon count and ram usage, as I used the entire model, duplicated for each blend.

This assignment has also changed my approach to future sculpting. In future I will sculpt the mouth closed before exporting to Maya, as well as consider design limitations in realistic anatomy. I found in certain ways such as crawling that the legs could have been slightly shorter at the shin, to allow more realistic crawling and less arching of the back. I would have also created separate eyelids and a separate mouth section to aid in animation ease.
Overall, I still managed to capture the essence and personality of my design, even with such limitations. Its movements paint an aggressive feral creature, that is amphibious and agile. If I had the time, I would have also considered other animations such as a standard neutral cycle, a swim cycle, a death sequence, more intricate attack patterns and environmental animations such as falling, leaping, and jumping.
Final Animations
References
Ostrich legs : www.flickr.com. (n.d.). All sizes | Ostrich Legs | Flickr – Photo Sharing! [online] Available at: http://www.flickr.com/photos/schristia/2838737845/sizes/z/in/photostream/ [Accessed 14 May 2023].
Raptor legs : Pinterest. (n.d.). 7.JPG (1000×1333) | Velociraptor, Creature design, Dinosaur projects. [online] Available at: https://www.pinterest.com/pin/558868634986787513/ [Accessed 14 May 2023].
Raptor Leg Anatomy: Theatlantic.com. (2023). Available at: https://cdn.theatlantic.com/thumbor/yyJ6ZRanpR0aM5pVizVBiXDtC_I=/570×252/media/img/posts/2013/12/graspowl/original.jpg [Accessed 14 May 2023].
T-Rex anatomy: Persons, W.S. and Currie, P.J. (2010). The Tail of Tyrannosaurus: Reassessing the Size and Locomotive Importance of the M. caudofemoralis in Non-Avian Theropods. The Anatomical Record: Advances in Integrative Anatomy and Evolutionary Biology, 294(1), pp.119–131. doi:https://doi.org/10.1002/ar.21290.
Blue Animation video: www.youtube.com. (n.d.). Velociraptor Running Animation – [ Blue Raptor from Jurassic World ]. [online] Available at: https://www.youtube.com/watch?v=mP93YcbQfeg&ab_channel=Psygnozis [Accessed 14 May 2023].
Lizardmen animation: www.youtube.com. (n.d.). David Vince – Total War: Warhammer 2 Animation Reel 2018. [online] Available at: https://www.youtube.com/watch?v=G3bzbOsV5dc&t=31s&ab_channel=Davidvince [Accessed 14 May 2023].
Lizardmen concept: Total War Forums. (n.d.). Collected all the new Lizardmen Concept Art from today’s video here. [online] Available at: https://forums.totalwar.com/discussion/194853/collected-all-the-new-lizardmen-concept-art-from-todays-video-here [Accessed 14 May 2023].
Rigging tutorial: www.youtube.com. (n.d.). Rigging for Beginners: Painting Weights in Maya. [online] Available at: https://www.youtube.com/watch?v=lA5gVcLEZWk&ab_channel=AcademicPhoenixPlus [Accessed 14 May 2023].
Diving Reference Youtube: www.youtube.com. (n.d.). Dive Roll Tutorial for Parkour, Free Running, etc | Fraser Malik How to. [online] Available at: https://www.youtube.com/watch?v=LyYflNqksV0&t=13s&ab_channel=GingerNinjaTrickster [Accessed 14 May 2023].
Udim tutorial: www.youtube.com. (n.d.). Maya + Substance UDIM Texture Process Tutorial! Easy to Follow! [online] Available at: https://www.youtube.com/watch?v=wb3VV-7BldQ&ab_channel=Nexttut [Accessed 14 May 2023].