To begin with, I had to formulate an overall idea for my piece; I knew from the start i wanted something sci fi in nature, as it’s one of my core interests. I ultimately decided the piece would centre around ‘Alien’ (1979), a fan-fiction of the iconic opening scenes to the movie.
The movie begins with slow panning shots of space and then ultimately reveals a spacecraft before text at the bottom of the screen provides a little more detail of the scene. The next key shots are close ups of the ship and eerie long takes of un-manned equipment from within. In the sequel, Cameron used many of the same scene elements in the opening of Aliens. Coupled with the dramatisation of the ethereal orchestra and cold looking hallways as the drone ”slices” the door open, in both films the atmosphere remains the same, long framing shots to emphasise wonderment and grandure, while the soundtrack sets the scene with unease and tension.
ALIEN opening scene
(O’Bannen and Shusett, 1979)
Title Sequence of Ridley Scott’s ALIEN 1979Title Sequence of James Cameron’s 1986 ALIENS
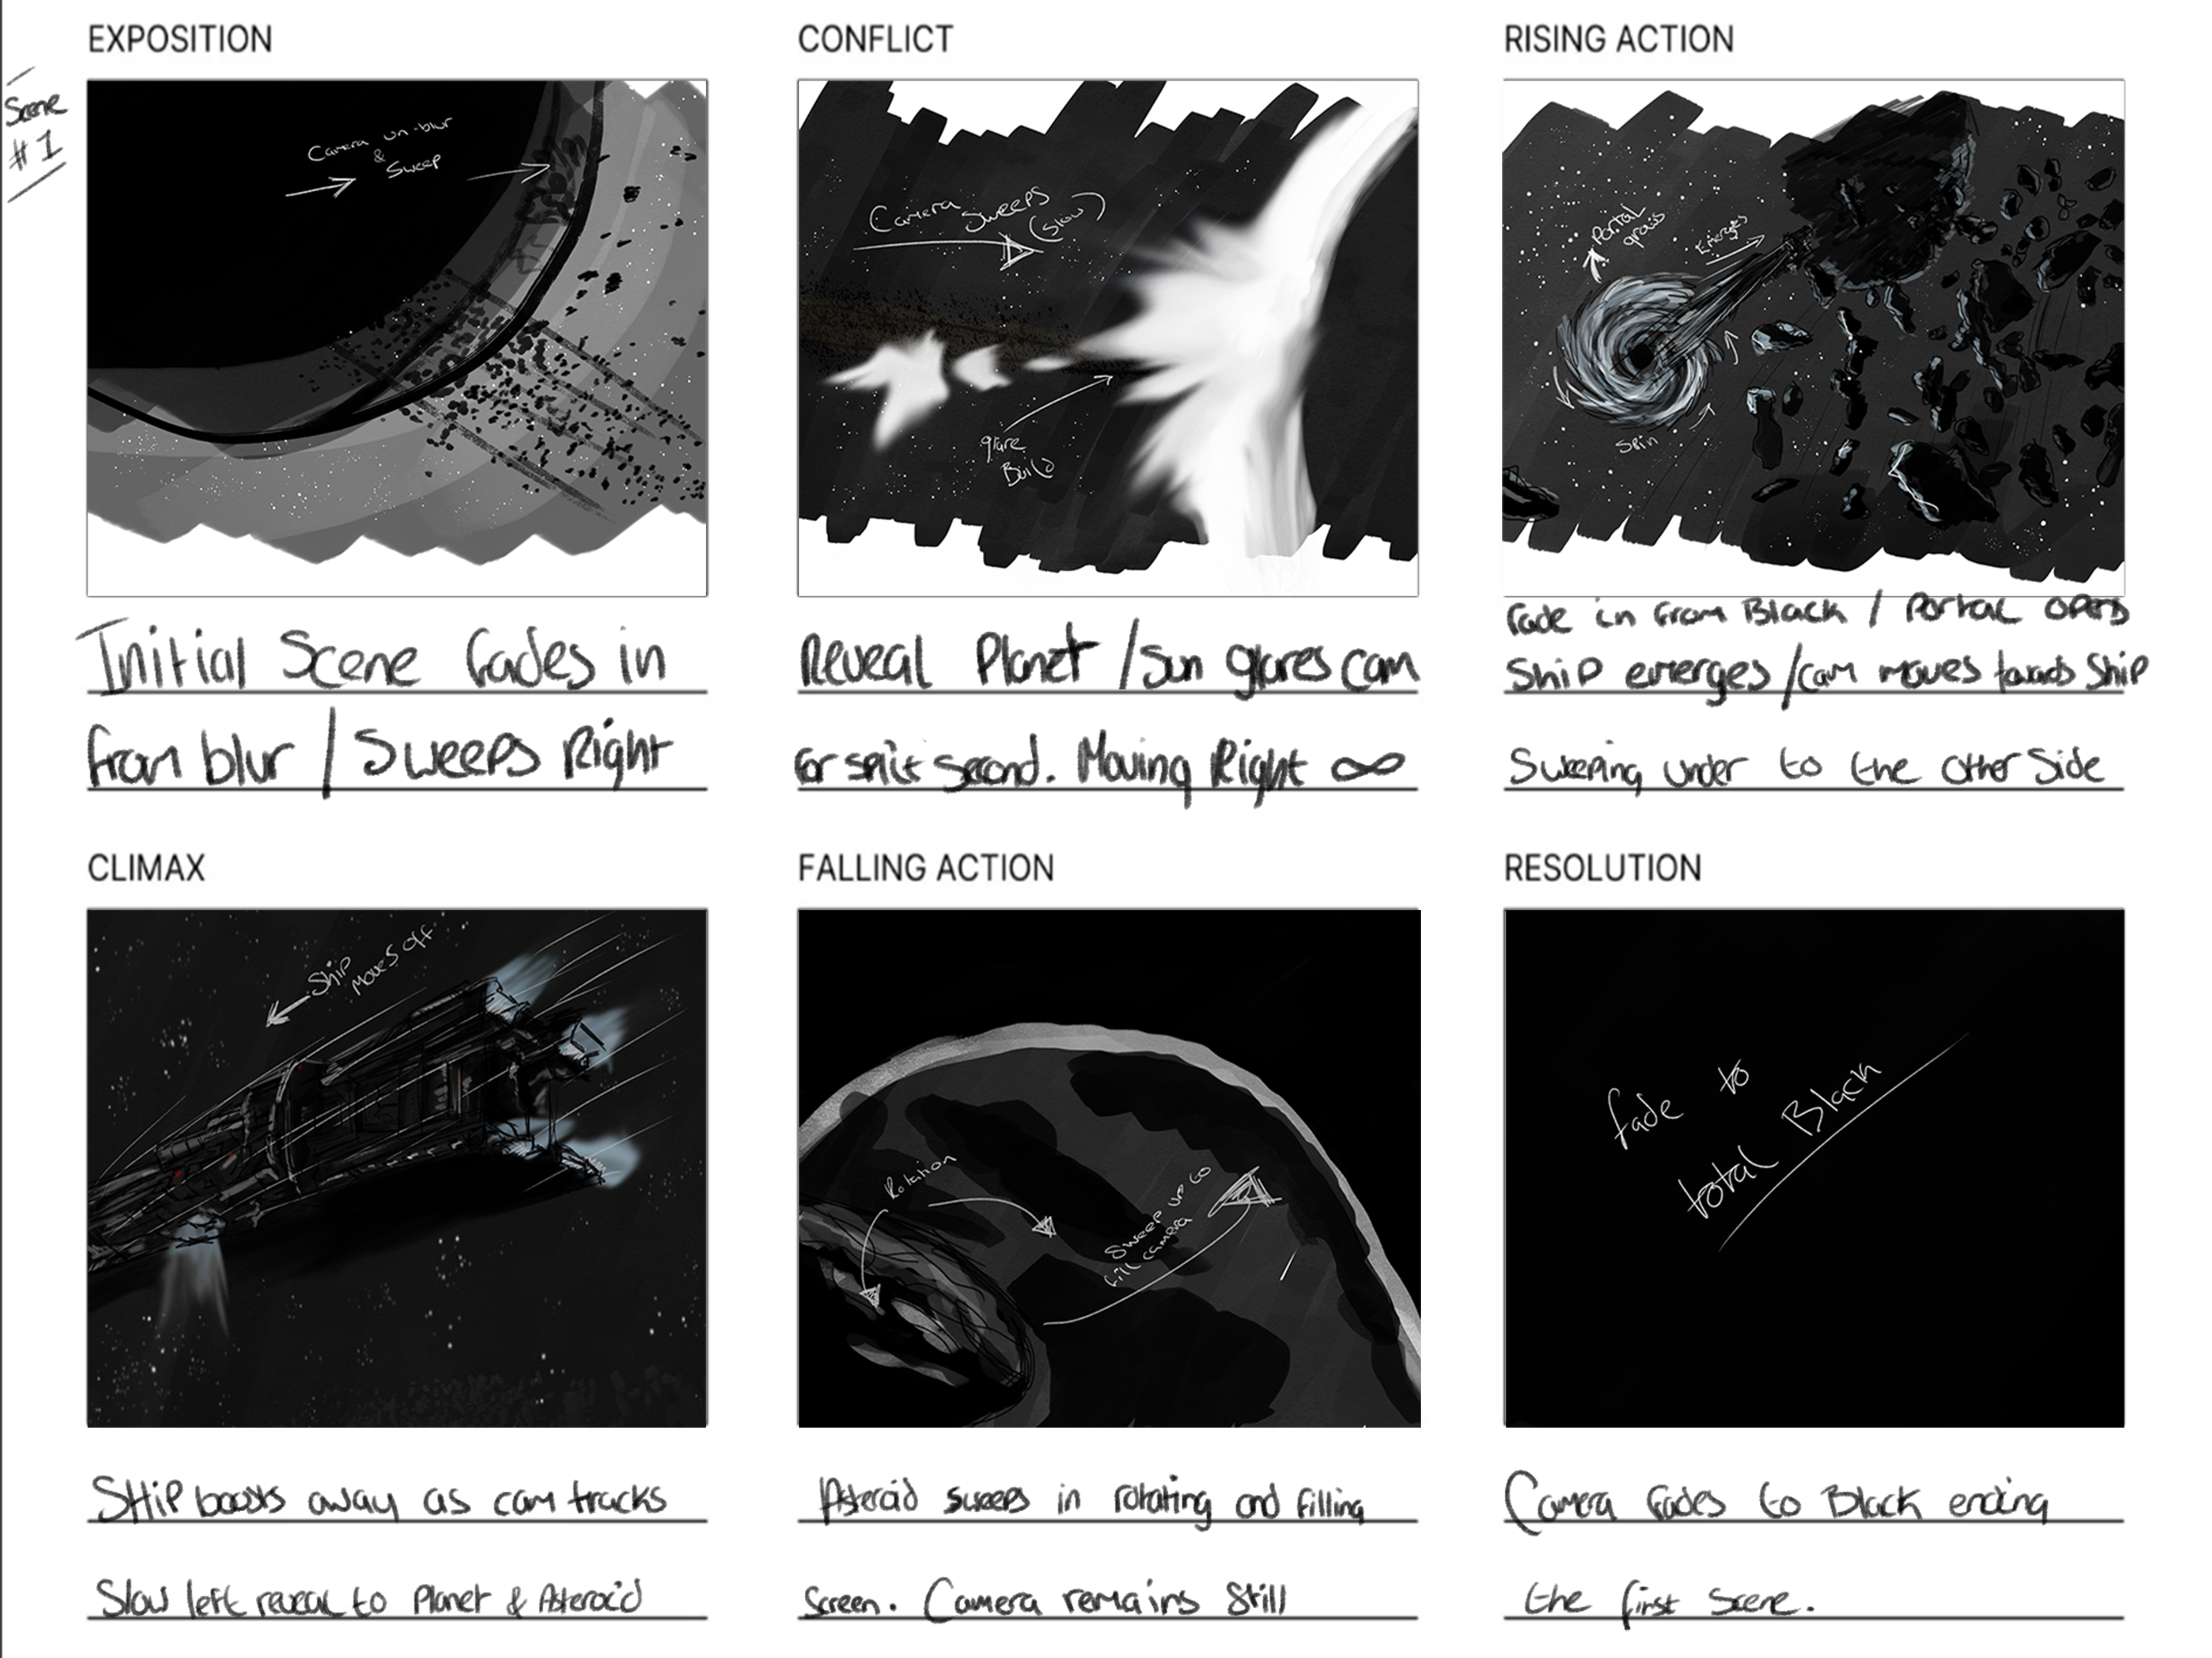
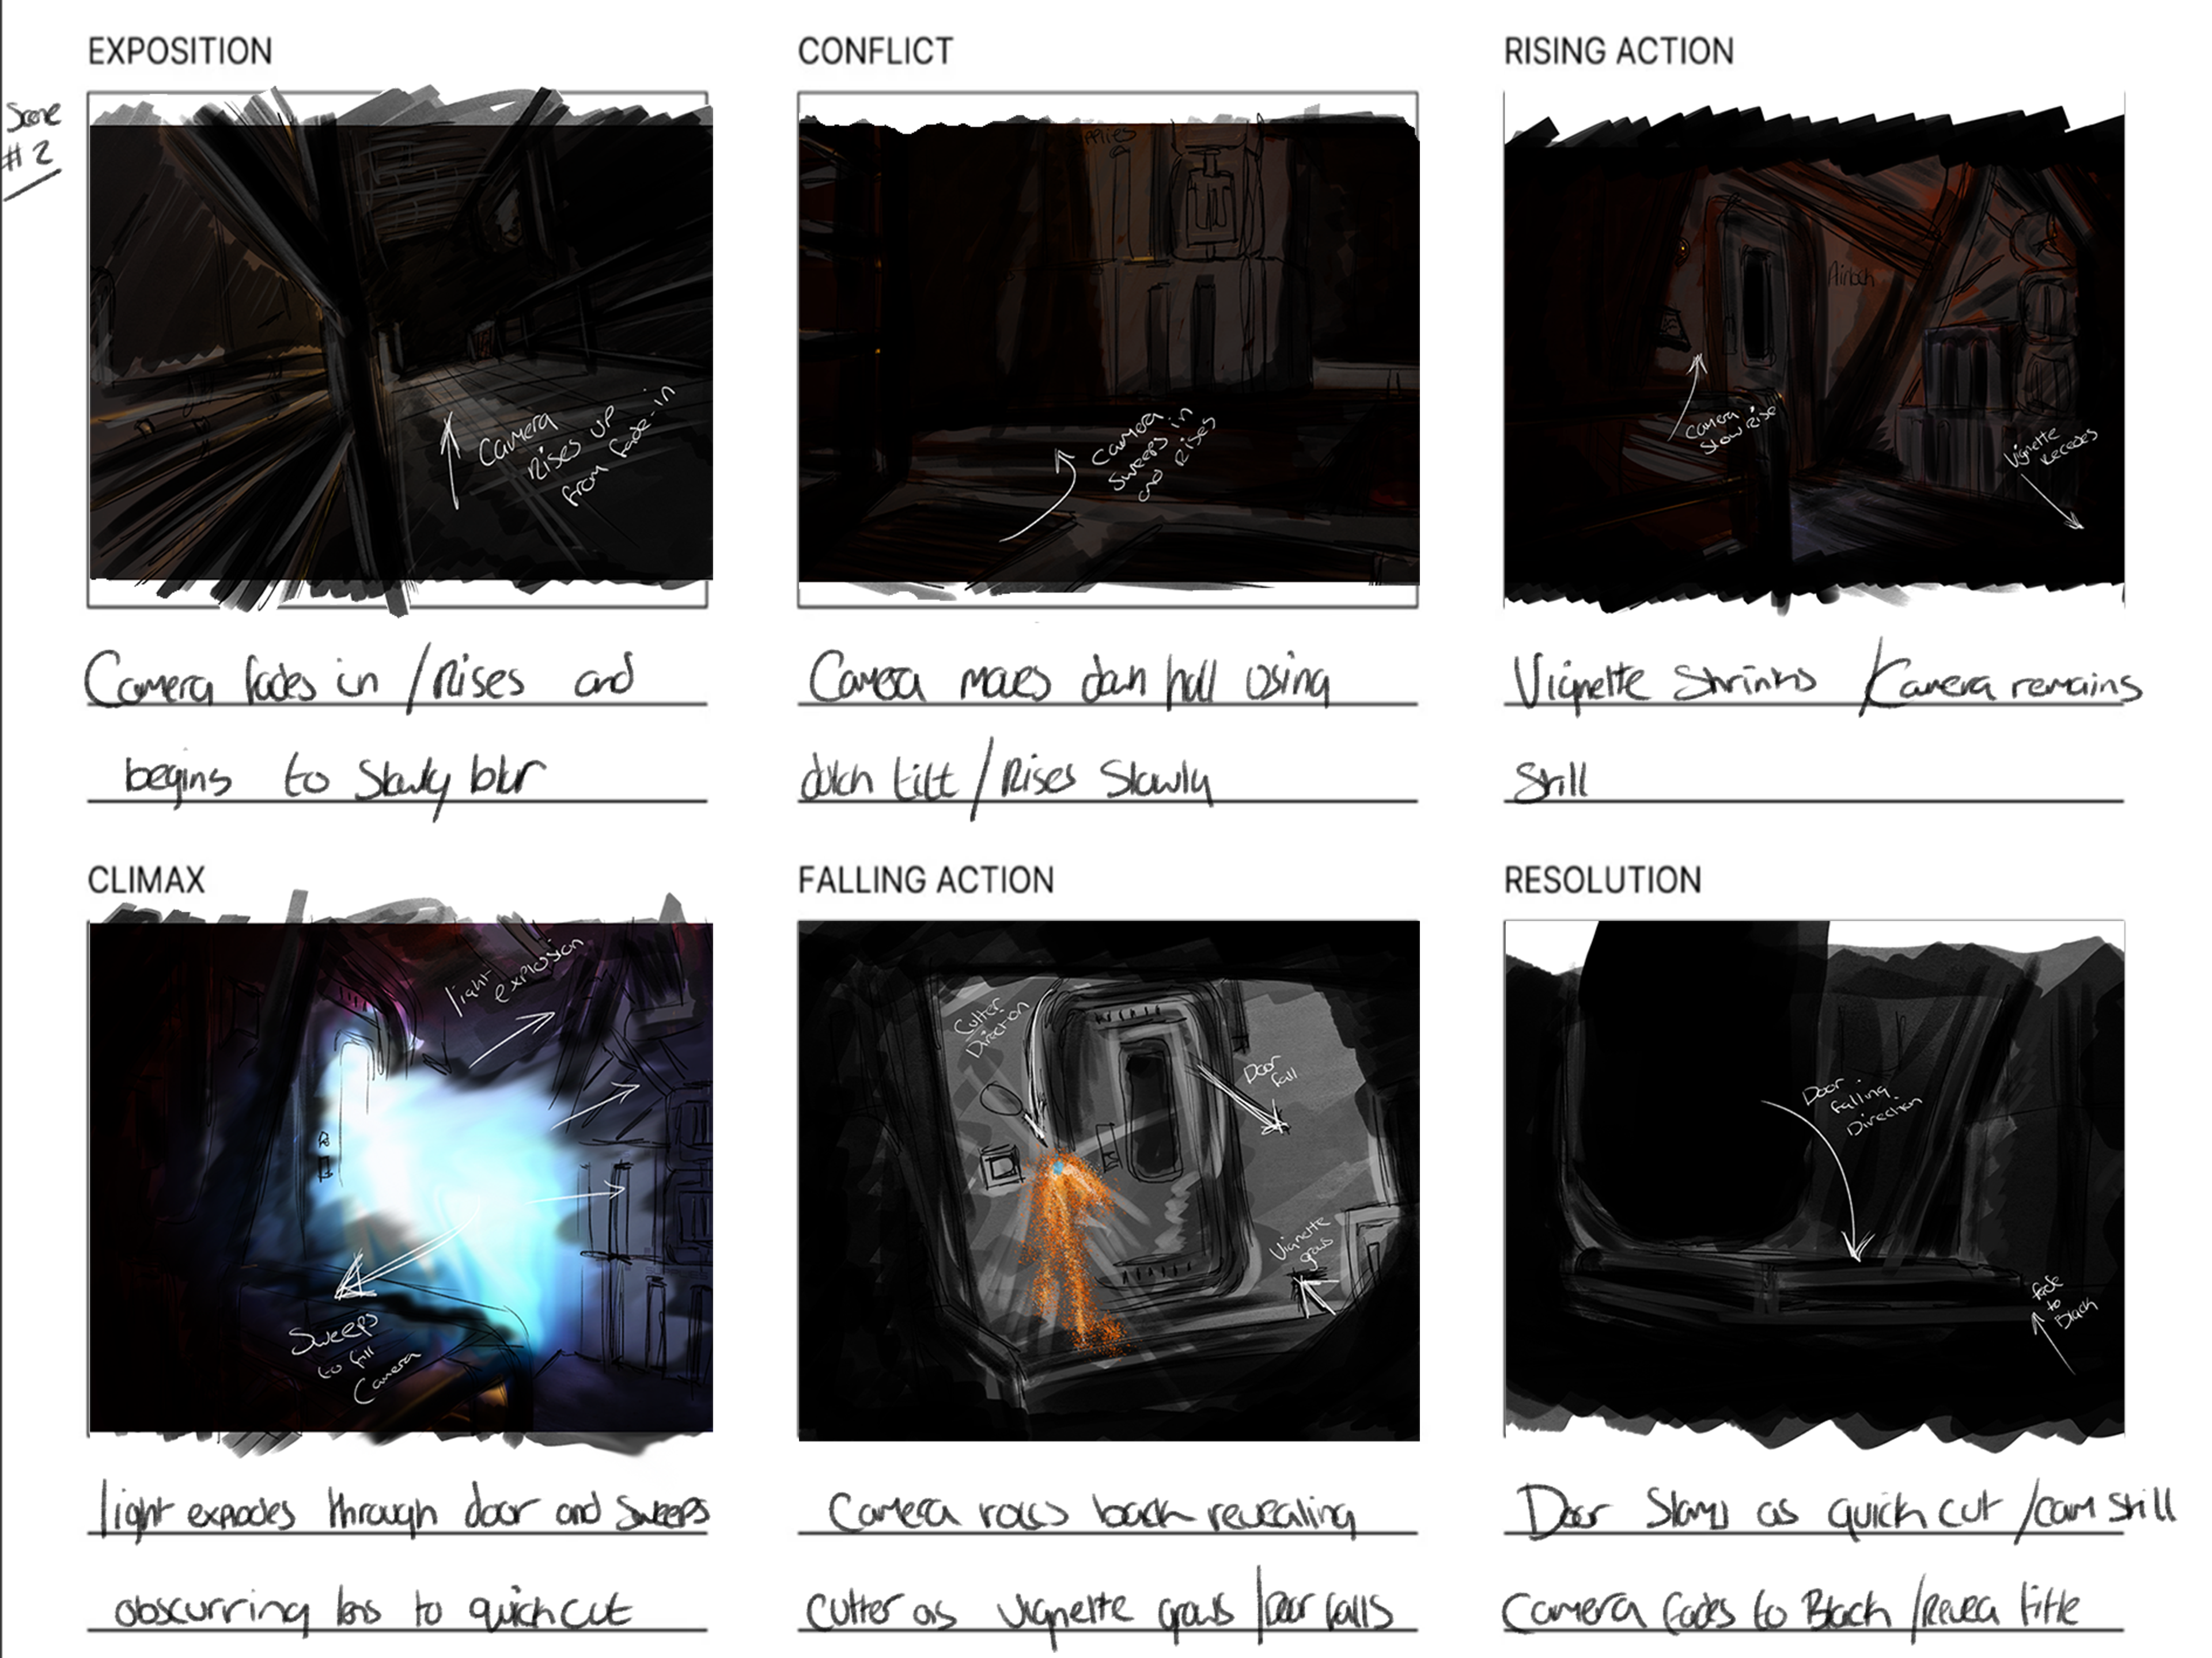
I took these inspirations heavily from ‘Alien’ which then began to mould ideas for what I thought would qualify as an alien scene. I started by writing up a short story and structure to follow – a mini tale and backstory to help fuel the ideas. I then began to visualise these scenes, the camera actions and drew up a short storyboard. This would guide my creation within unreal with accuracy.
Storyboard
From the storyboards, I could now develop a list of assets to gather, a list of VFX systems to create and a to do list to follow in the creation of the overall scenes. I needed a space environment and planets to begin with (these were to frame the size of the scene and set a destination in the viewers mind,) however I knew they needed to be alien looking – they could not resemble anything within the Earth’s solar system. I wanted to portray this as a foreign system, far from our normal preconceptions. I also needed a ship, as this would be the main point of the cinematic. I needed a hallway environment for the interior shots and lots of visual effects to bring it to life. I would also need a great musical and realistic sound score to bring it to life. I had a very specific idea for the sound design and the composition of the music, heavily inspired by James Horner’s take in Aliens, it had to be orchestral. The sound effects had to be subtle and not too abundant as I wanted to follow the classics, ‘Alien’, ‘Close Encounters’, ‘Star Wars’; along with others. Within these classics, the music is utterly vital to the atmosphere of the current scene, not what is displayed, but heard. I wholeheartedly believed that an orchestral piece of music would bring this cinematic to life and set the exact tense, eerie scene I desired.
The Plot
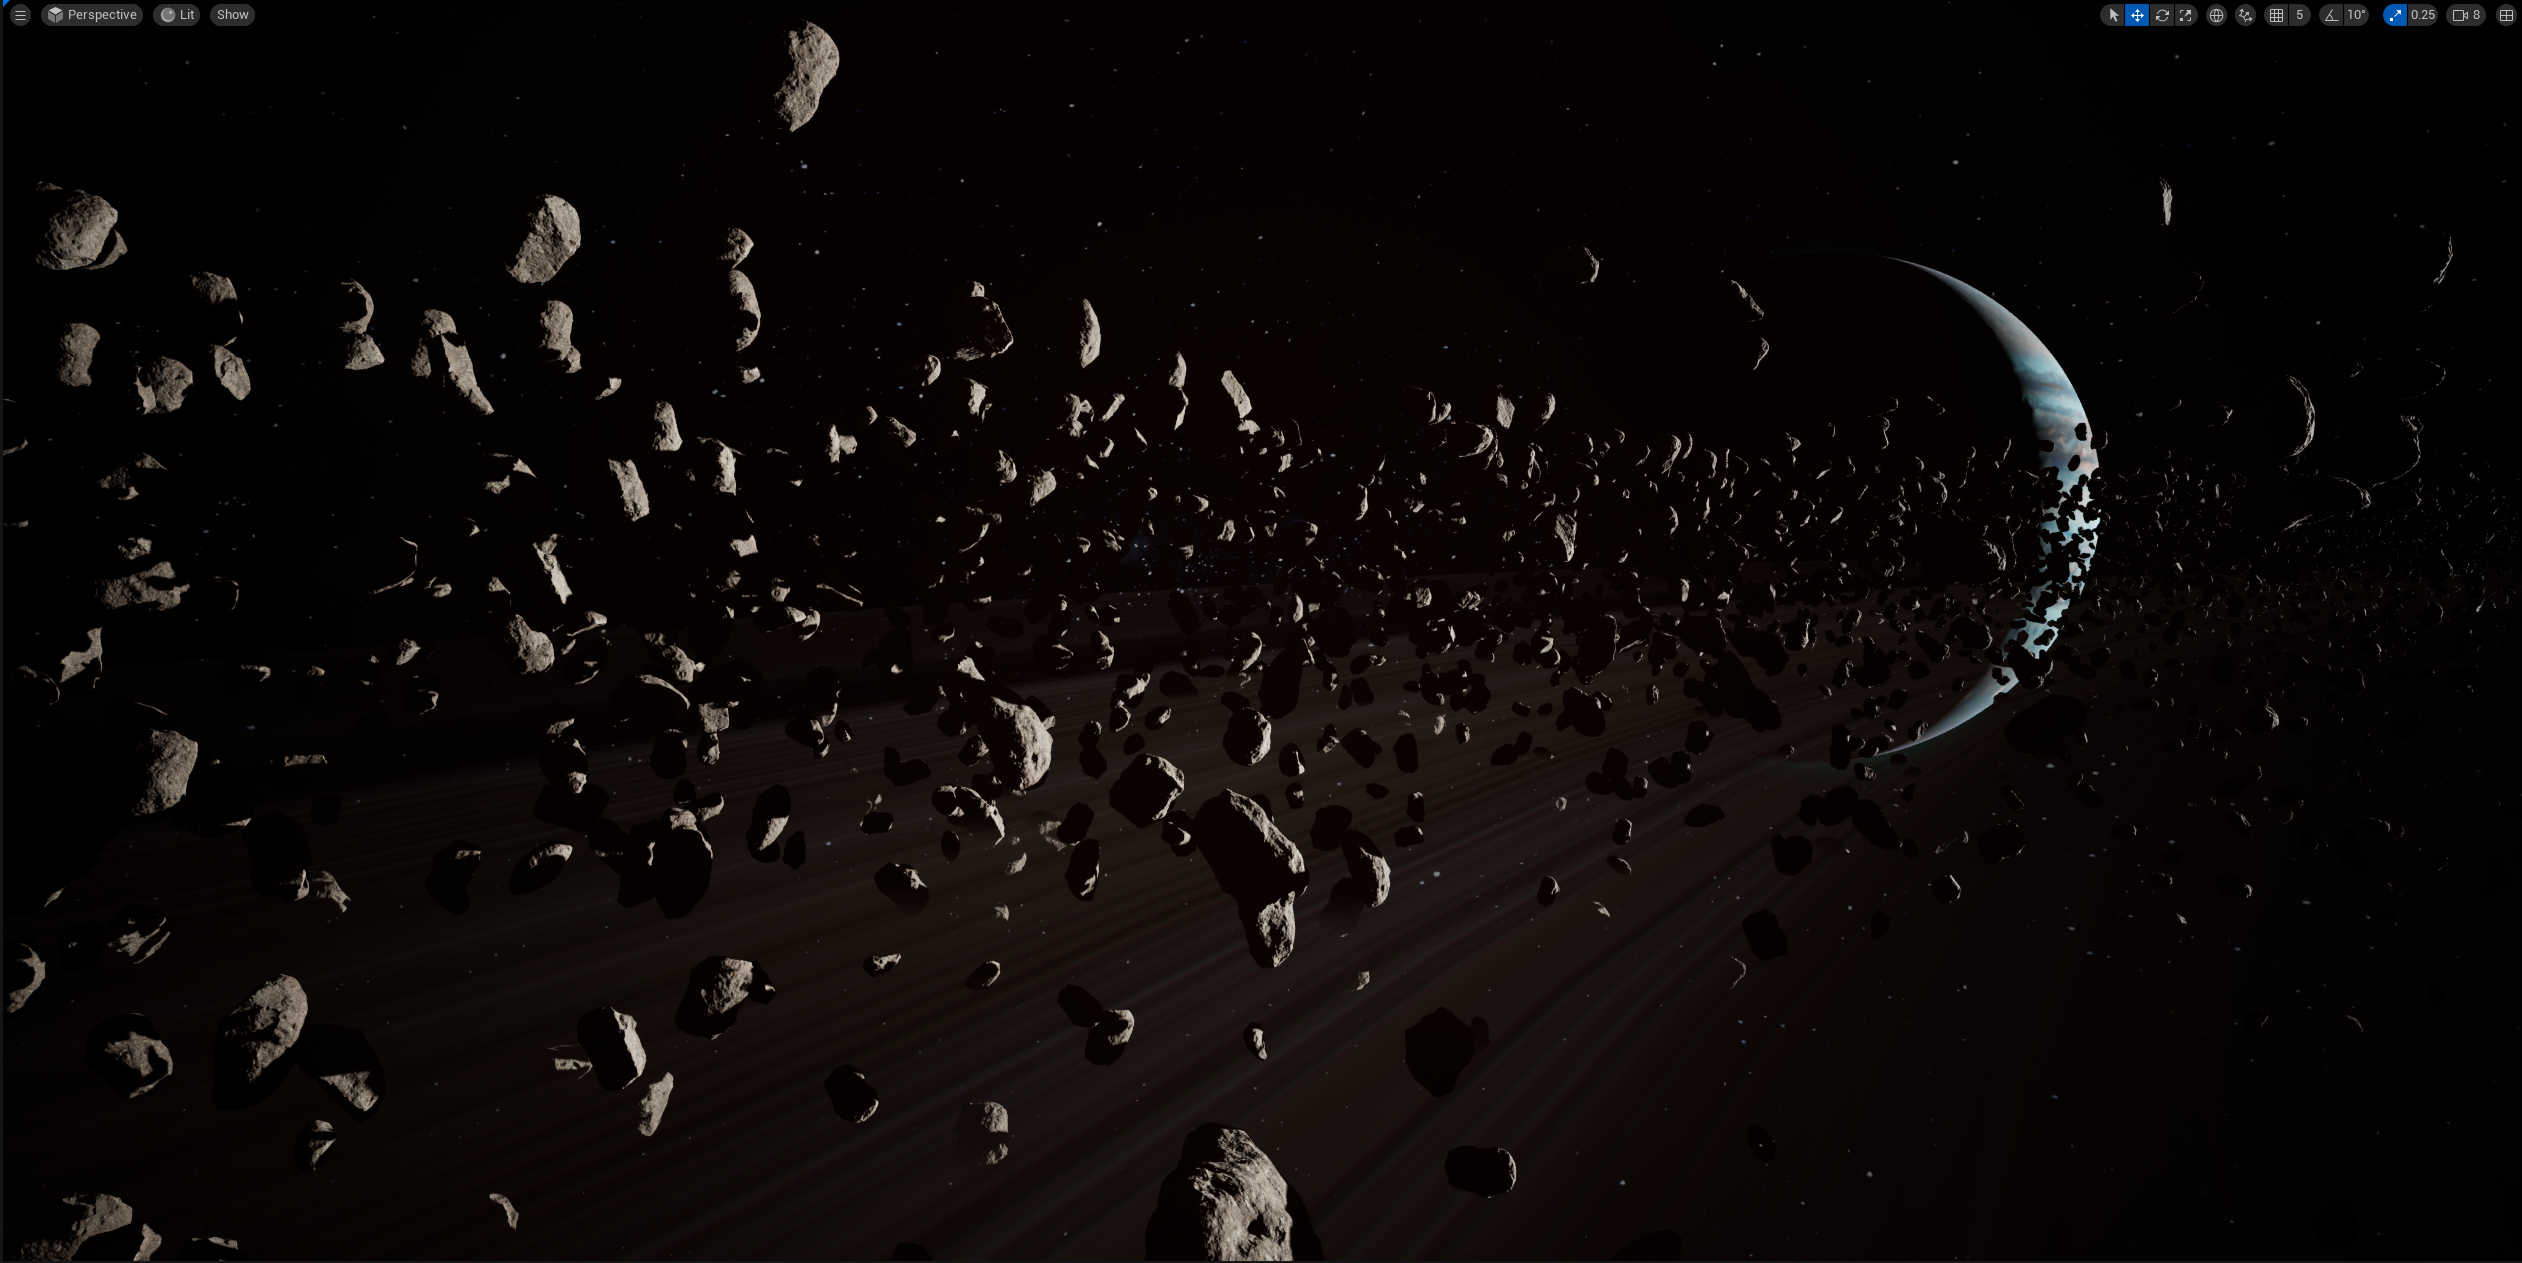
Still From The Final Render.
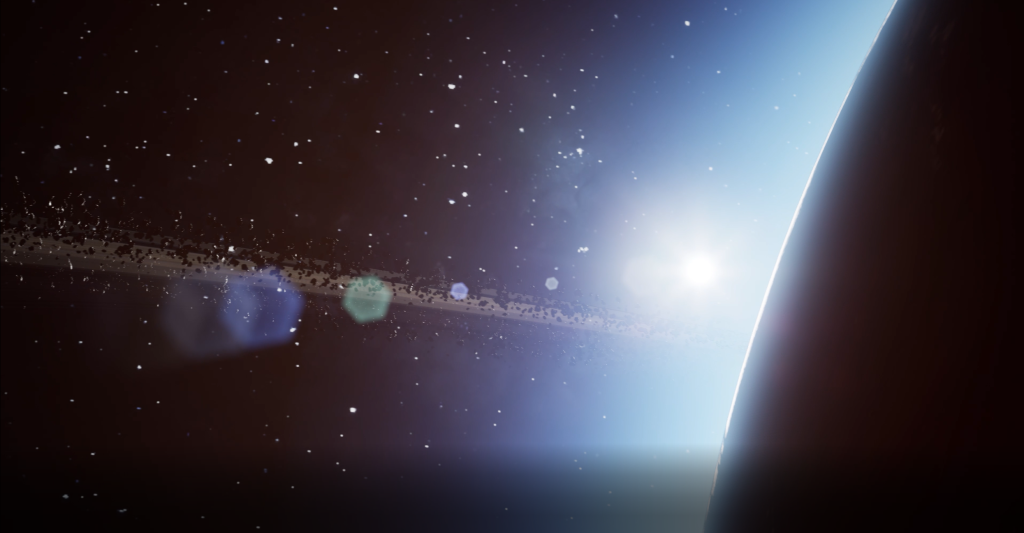
The overall cinematic would be as follows. The scene would open on a gas giant, obscured by focus that fades into focus. The camera would then pan back slightly, as the gas giant and the ring/asteroid field comes into focus. As these come to focus, the camera would be slowly panning right across a starfield, slowly revealing the atmosphere and edge of a planet. The sun would then glare the camera as the camera continues panning. It would then begin obscurring into the planet as it fades to black.
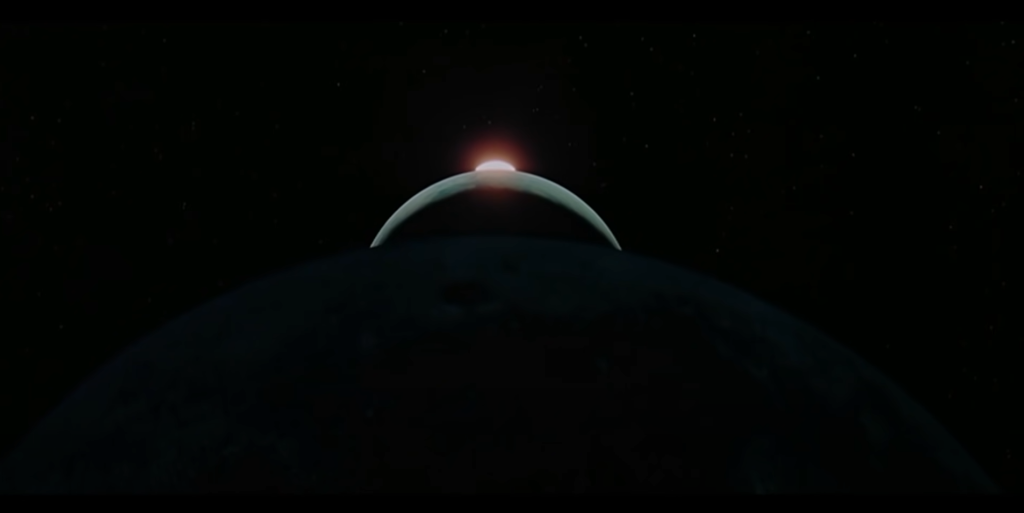
In my opinion, the opening shot and its camera aesthetics are key aspects of a space scene shot. Slow wide angles, blurred objects that slowly come to view, create mystery and grandure. It frames the size of the environment that the viewer is now in. Many Sci-fi films and games use these slow grand shots, such as the opening of the ‘Star Wars’ movies and my direct inspiriation, the ‘Alien’ movies. Even older movies, such as ‘2001 : A Space Odyssey’, opens with a slow fade in from black, to the moon, as the camera pans up above the moon to reveal the atmosphere of earth and the sun directly behind. The camera climbs higher as the orchestral music rises, and the suns height above the atmosphere follows by rising up as well. The sun brightens as it rises above the atmosphere, reaching the climactic end of the scene.
Opening Shots from Stanley Kubricks 2001: A Space Odyssey
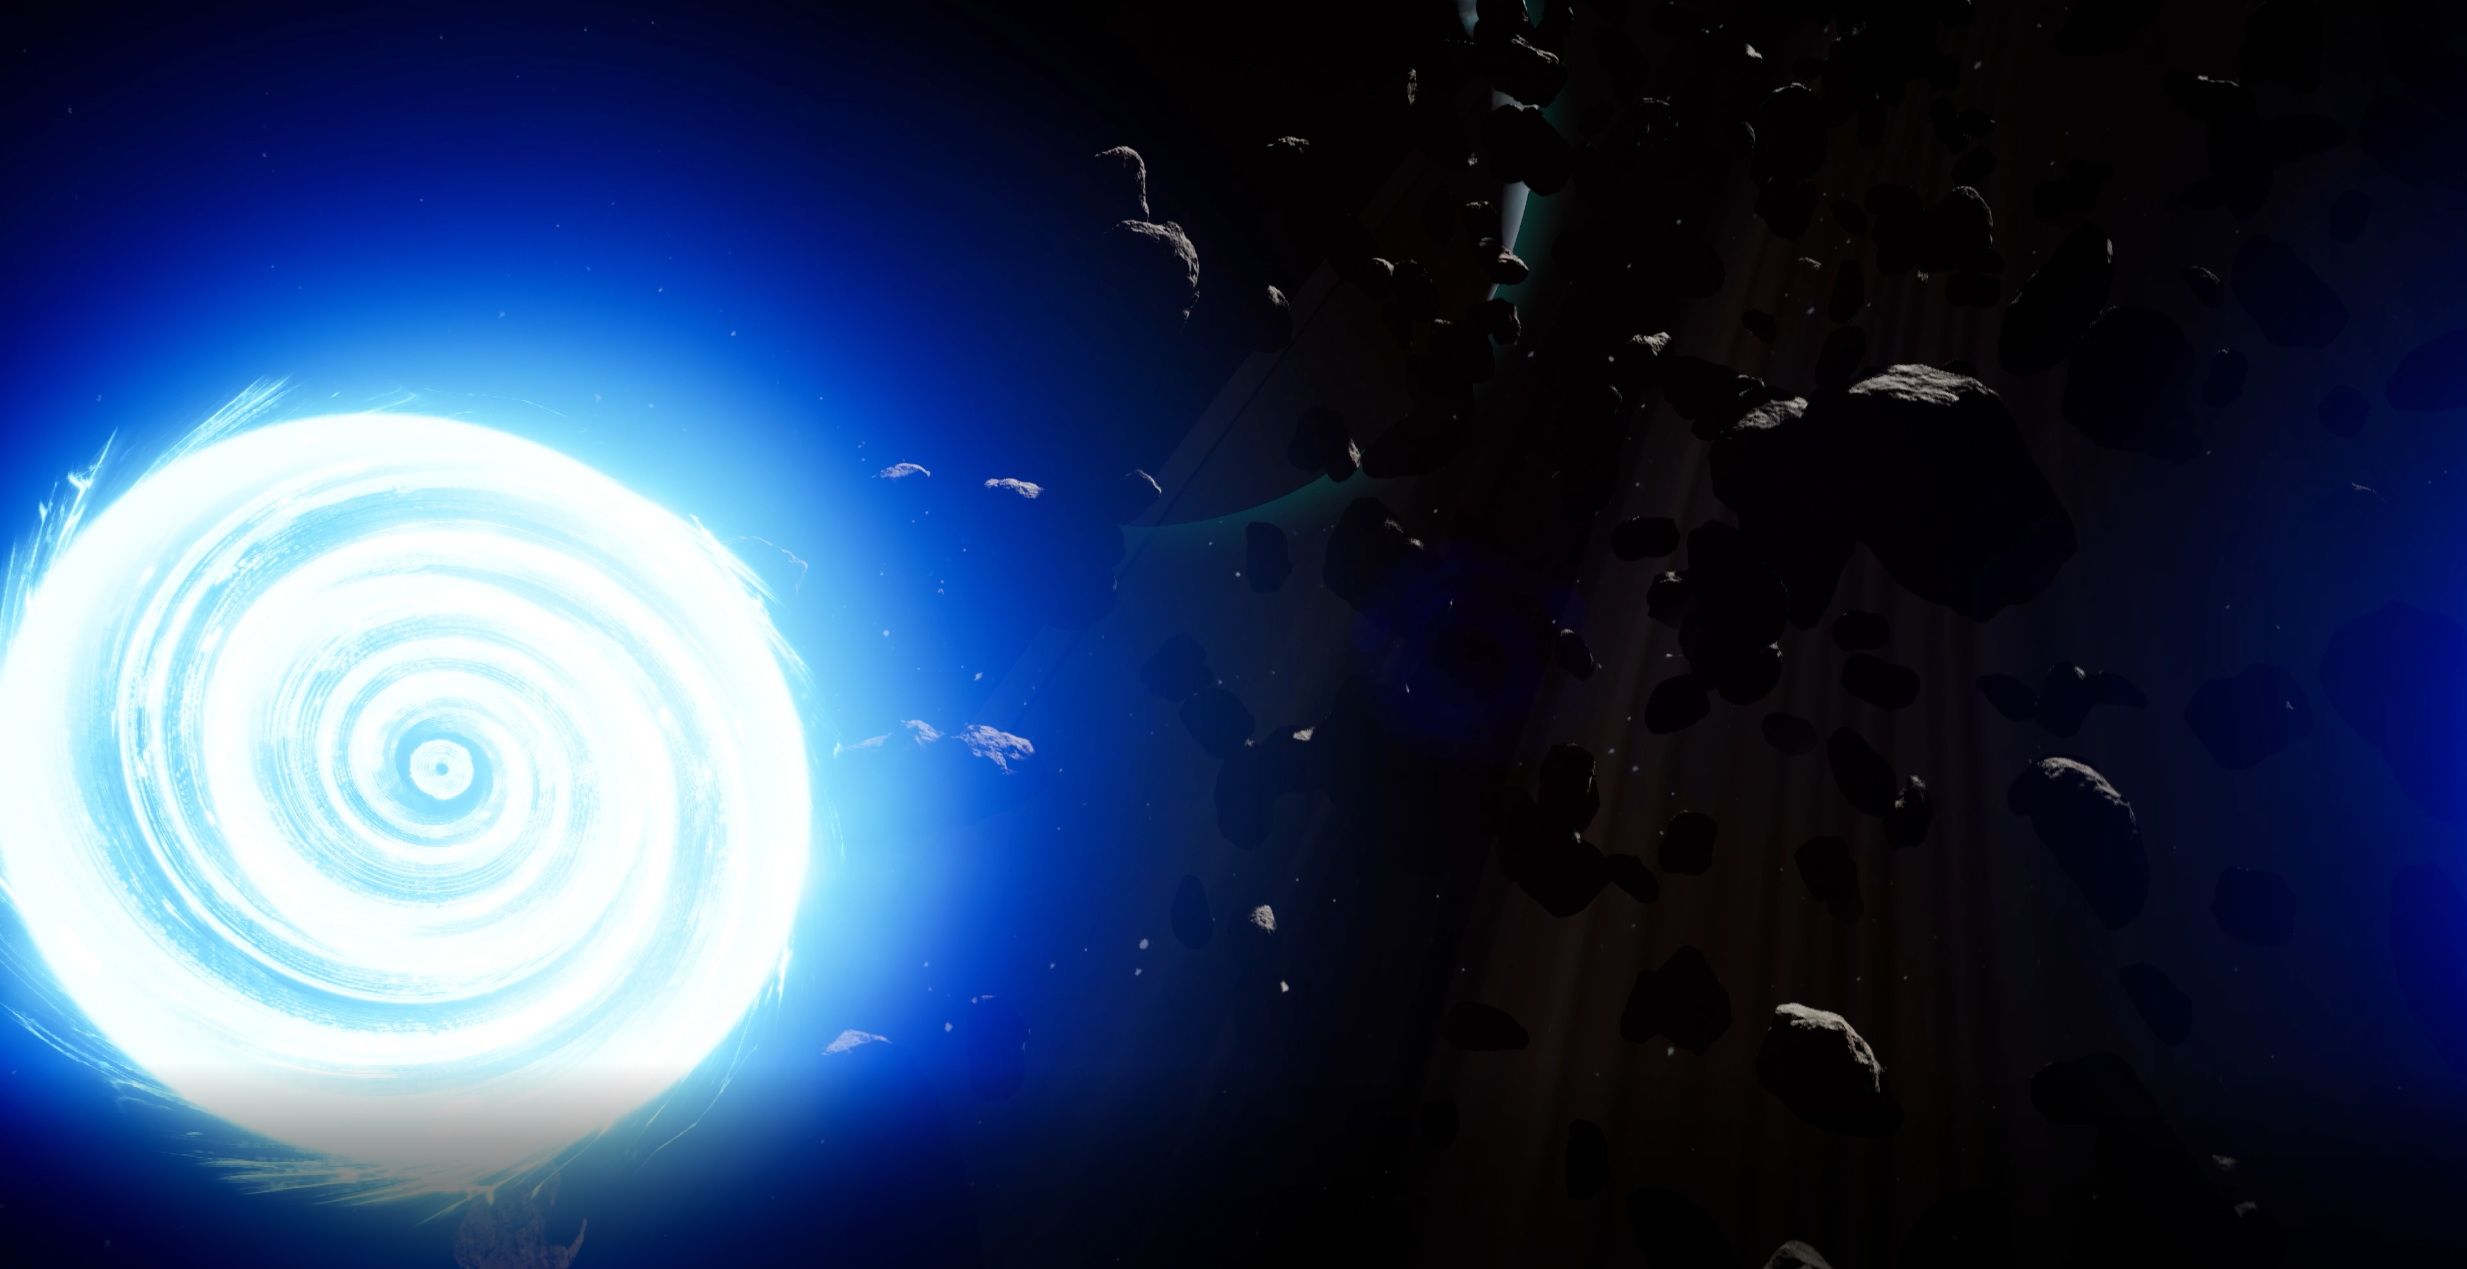
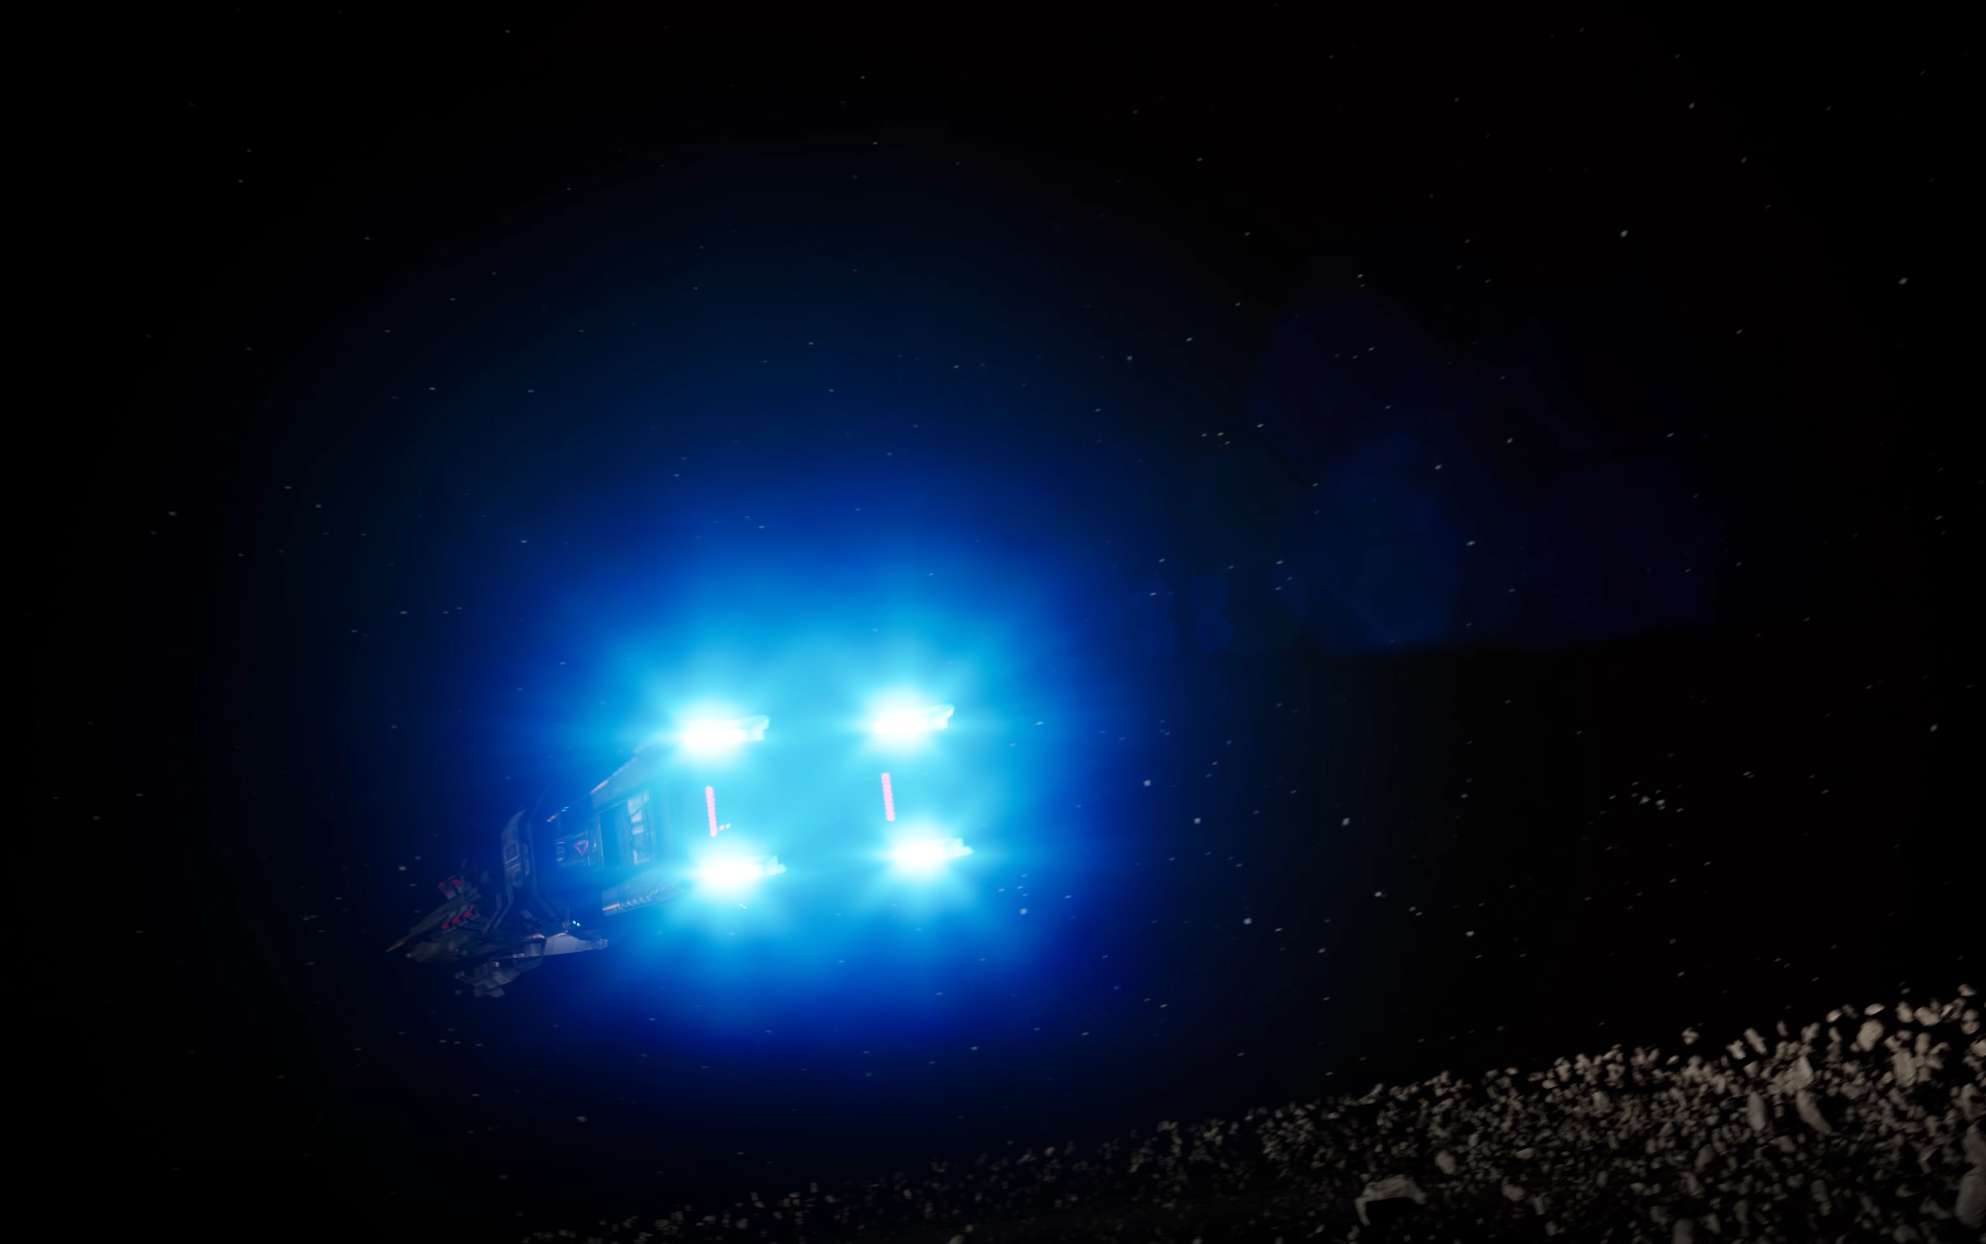
Now the environment is set, the next shots would establish the plot – a key element to the visual. The ship would appear from the portal and begin moving. I overall, wanted to establish un-ease and tension; that this scene, unlike ‘2001’, was more like ‘Alien’ – the viewer is waiting in anticipation. The fade in from black from the previous scene, would reveal the gas giant again, but further away. The camera would be tilted and obscurred as it slightly pans to the opening of a bright blue luminous portal, which grows, expels a space-craft and then shrinks.
The camera would then swoop into the slowly moving ship, moving under the hull as the ship passes above. As the ship passes above, the camera will rotate and track the ship while moving off to the vessels portside rear. This would then allow the next transition to the final shot of the scene, the asteroid. Typically within this scene, the tilting camera angles, coupled with the right audio, will establish a mysterious uneasy transition to the next sequence of events. The colour of the portal (white/blue) will also be very typical of most Sci-fi depictions of a wormhole or portal. This keeps the overall feel of the scene futuristic as well as giving a vast and cold feeling – commonly associated with Space. The tracking shots beneath the hull are also typical of many cinematics and movies centred around space and spaceships. Framing ships in this way, even modern vessels and vehicles, gives a sense of size, power and a subtle sense of action. I also felt that this shot would allow the viewer to have a closer look at the ship. However since the textures where not as accurate as they could have been when looking closely to the ship, I decided the shot beneath the ship either needed to be obscurred slightly by focus, light or darkness. Obscurring with focus removed too much detail which totally erased the point of a close up, while the contrast difference using light just appeared as a subtle lighting change while still allowing the viewer to see the ship to a certain extent. From this, i decided to use a slight lack of light to obscure the textures.
The final shot of this scene would see the spacecrafts engines glow up, then the ship move away rapidly before returning to a normal speed, like it has ‘boosted’ away. The camera would track the ship as it moves off, while simultaneously moving backward itself panning left, revealing the planet from the opening. The ship would seemingly dissapear from focus as the camera moves and the asteroid would then enter frame from the left – slowly encompassing the camera and obscuring all the cameras viewport. This would then allow the smooth out-fade in transition to the next environment and scene, within the spacecraft. I chose to transition a few times using fades, as I felt they added smooth, natural slides into the next frames. I felt that quick cuts, unless used within an action scene, could be quite messy visually and deliver the wrong atmosphere for the scene. Quick shots would disrupt the smooth transitions as well as the required tension and gradual unease necessary for a successful, tense, sci-fi scene.
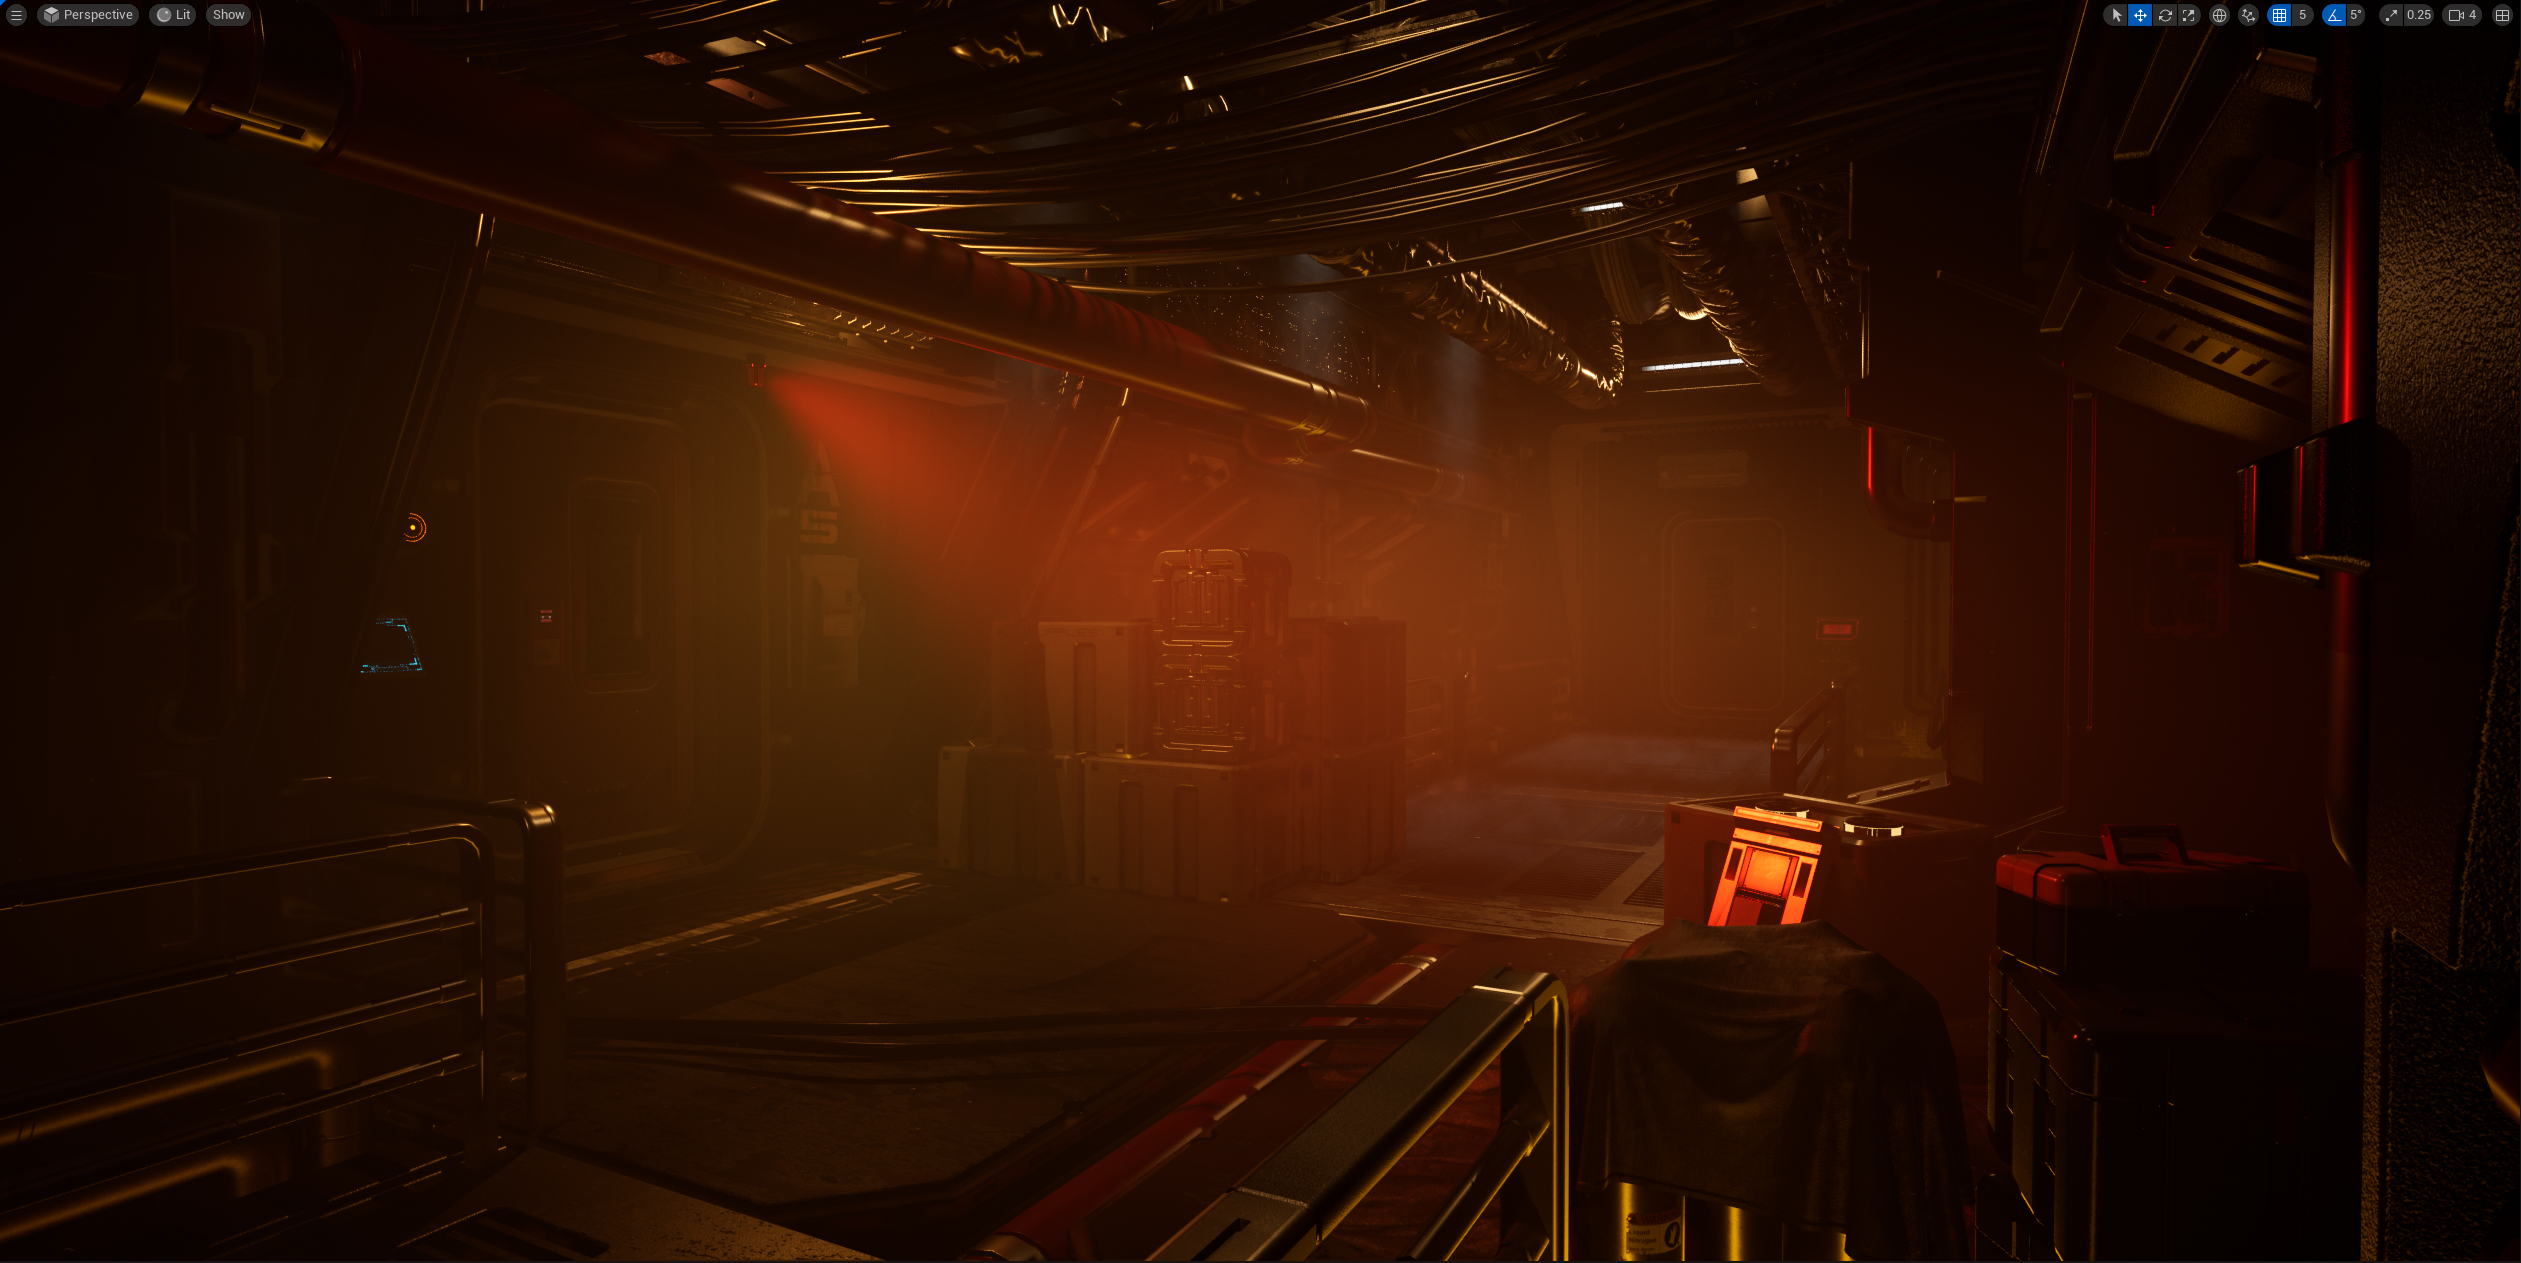
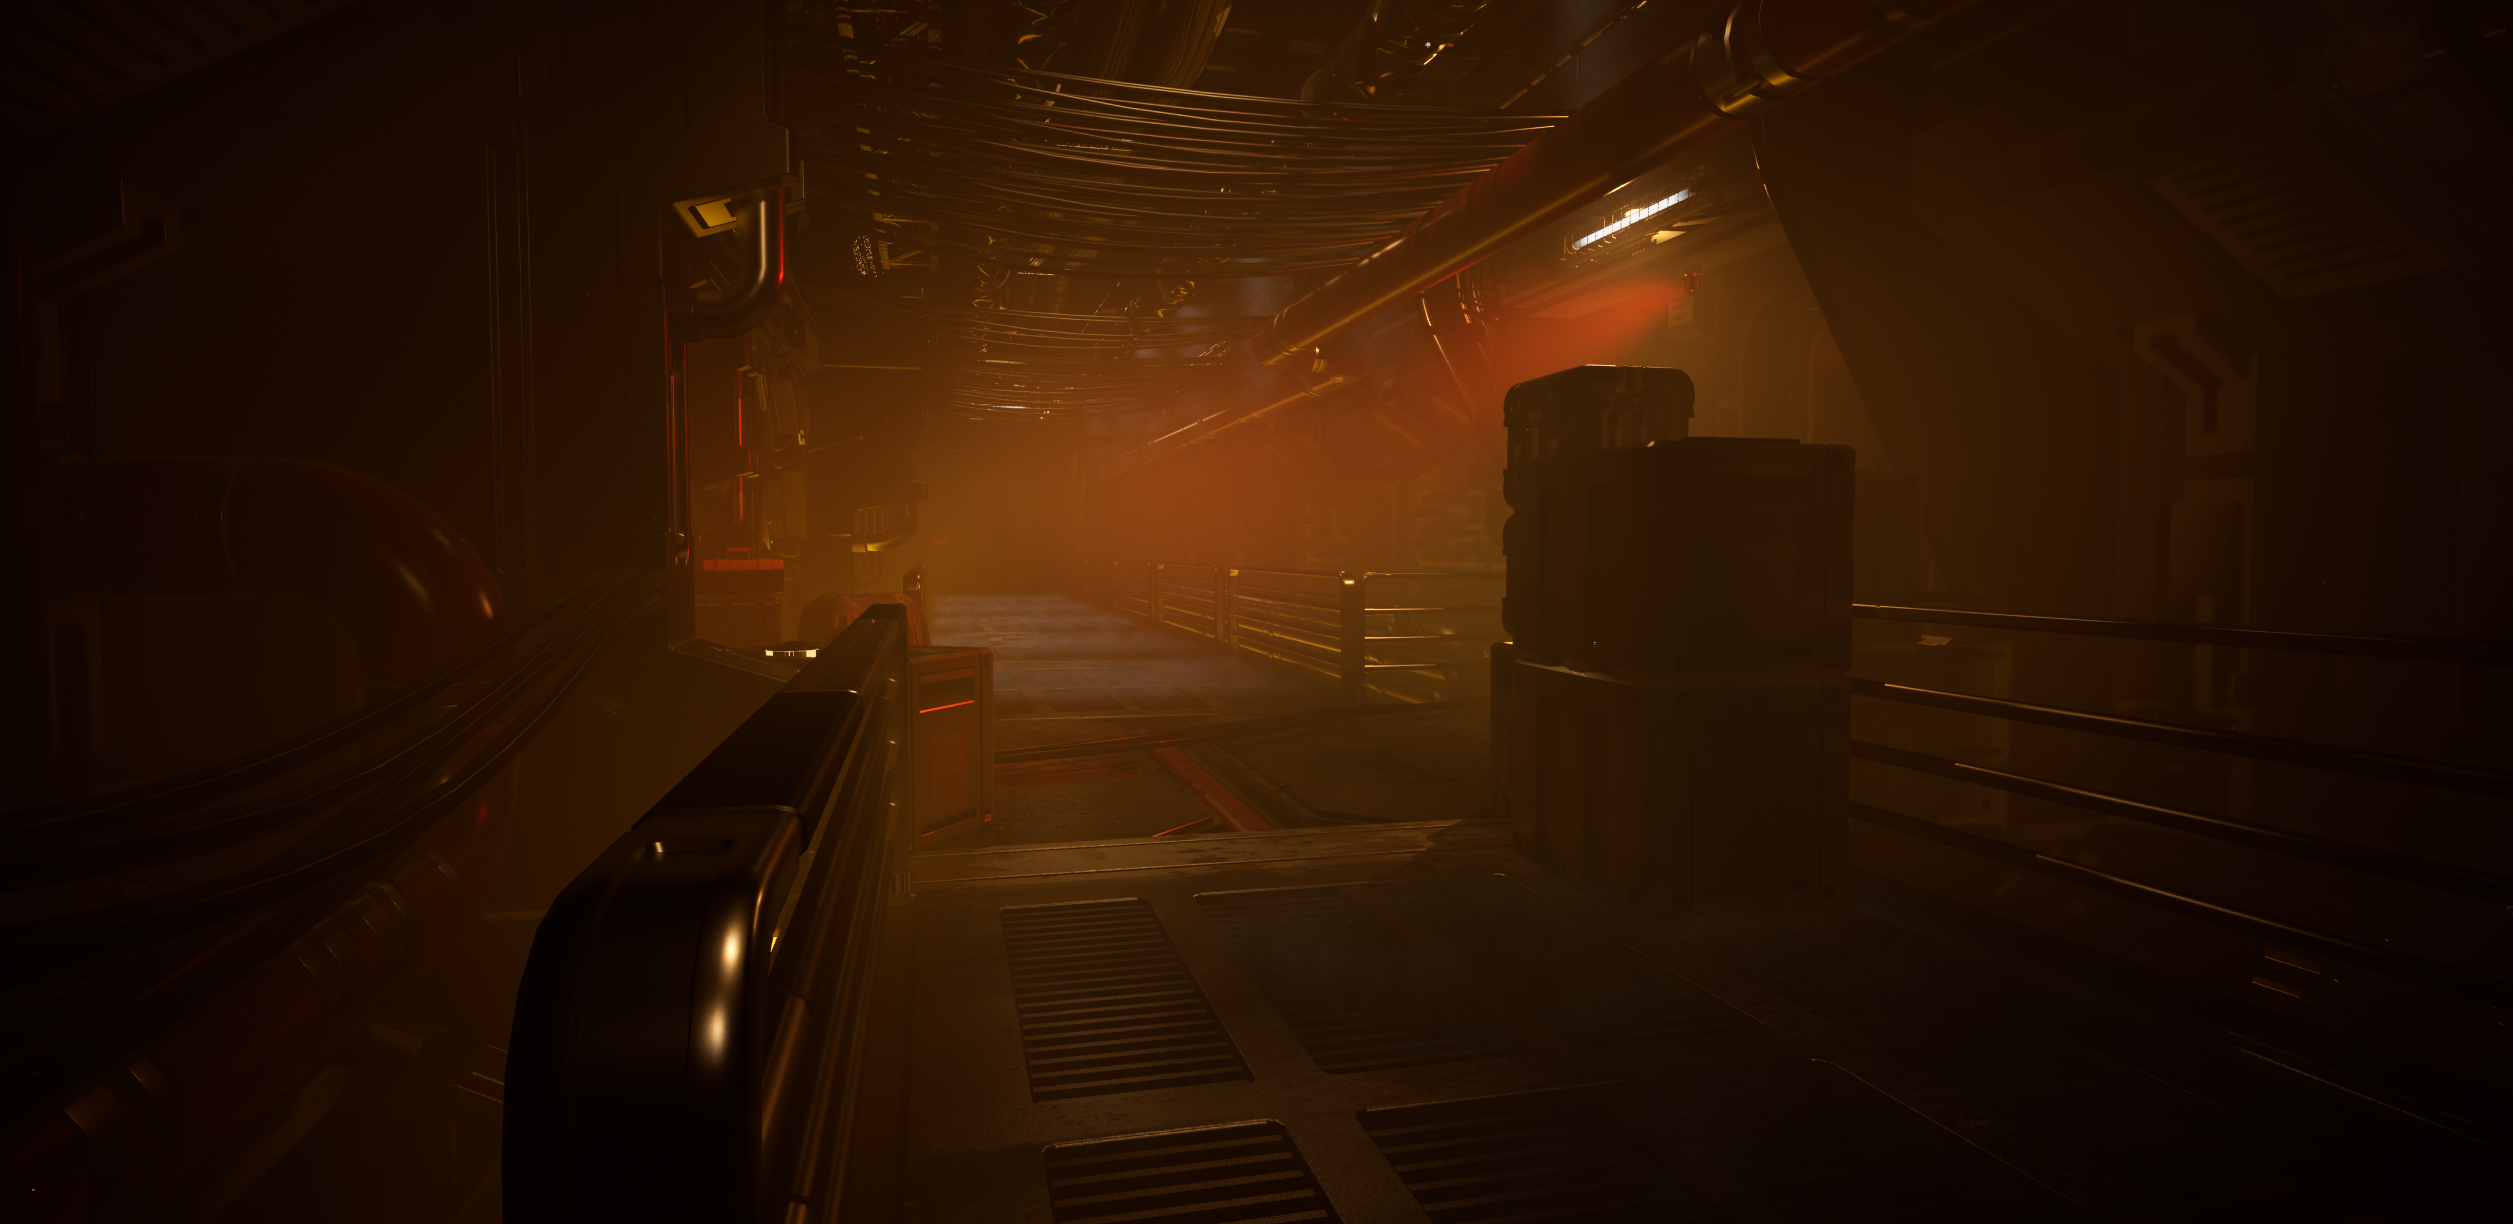
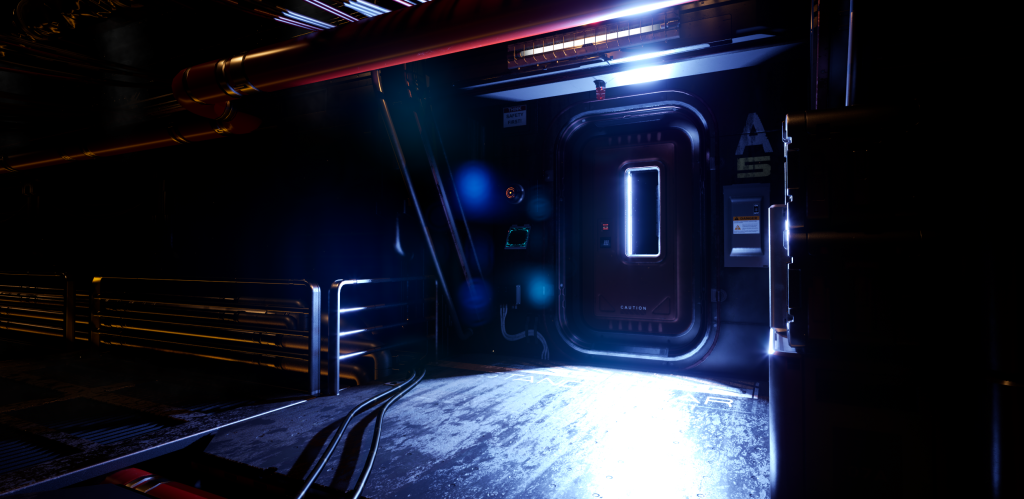
The final scene and environment would take us within the ship, to a foggy and dark hallway, lit by only guide lights and a red strobing warning beacon. The halls would have a thick fog layer to add more light dynamics (such as the visible light shafts cutting through the fog layers and create more feelings of unease and dystopia.) The camera would start at the beginning of the hallway and slowly rise up to reveal the out-of-focus walkway and un-used tech. The camera then cuts to black for a moment. It then fades back into a spiralling camera which rights itself, moving down to the crossroad of the hallway. Once there, the camera rises again revealing an airlock door. At this moment, a bright cold-blue beam of light fills the room and sweeps from left to right. As this bright light hits the camera, the camera cuts to a lower shot of the door, slowly panning back. Once the camera reaches its point away from the door, the camera quick cuts to a close up of the door, as in that instant, a ‘cutter’ begins to slice through the door, showering sparks onto the floor. The cutter then moves around the door frame as the camera pans back, faster this time, stopping when the cutter finishes. The door then begins to fall forward, but as it reaches a quarter of its fall, the camera quick cuts again to the floor to show the door slam heavily into the floor. The camera then fades out to black as the cinematic and the music come to a close.
Visual Effectsand Theming
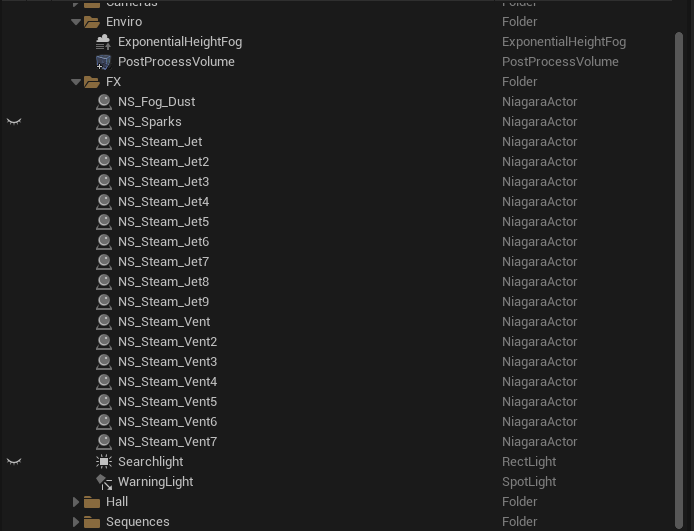
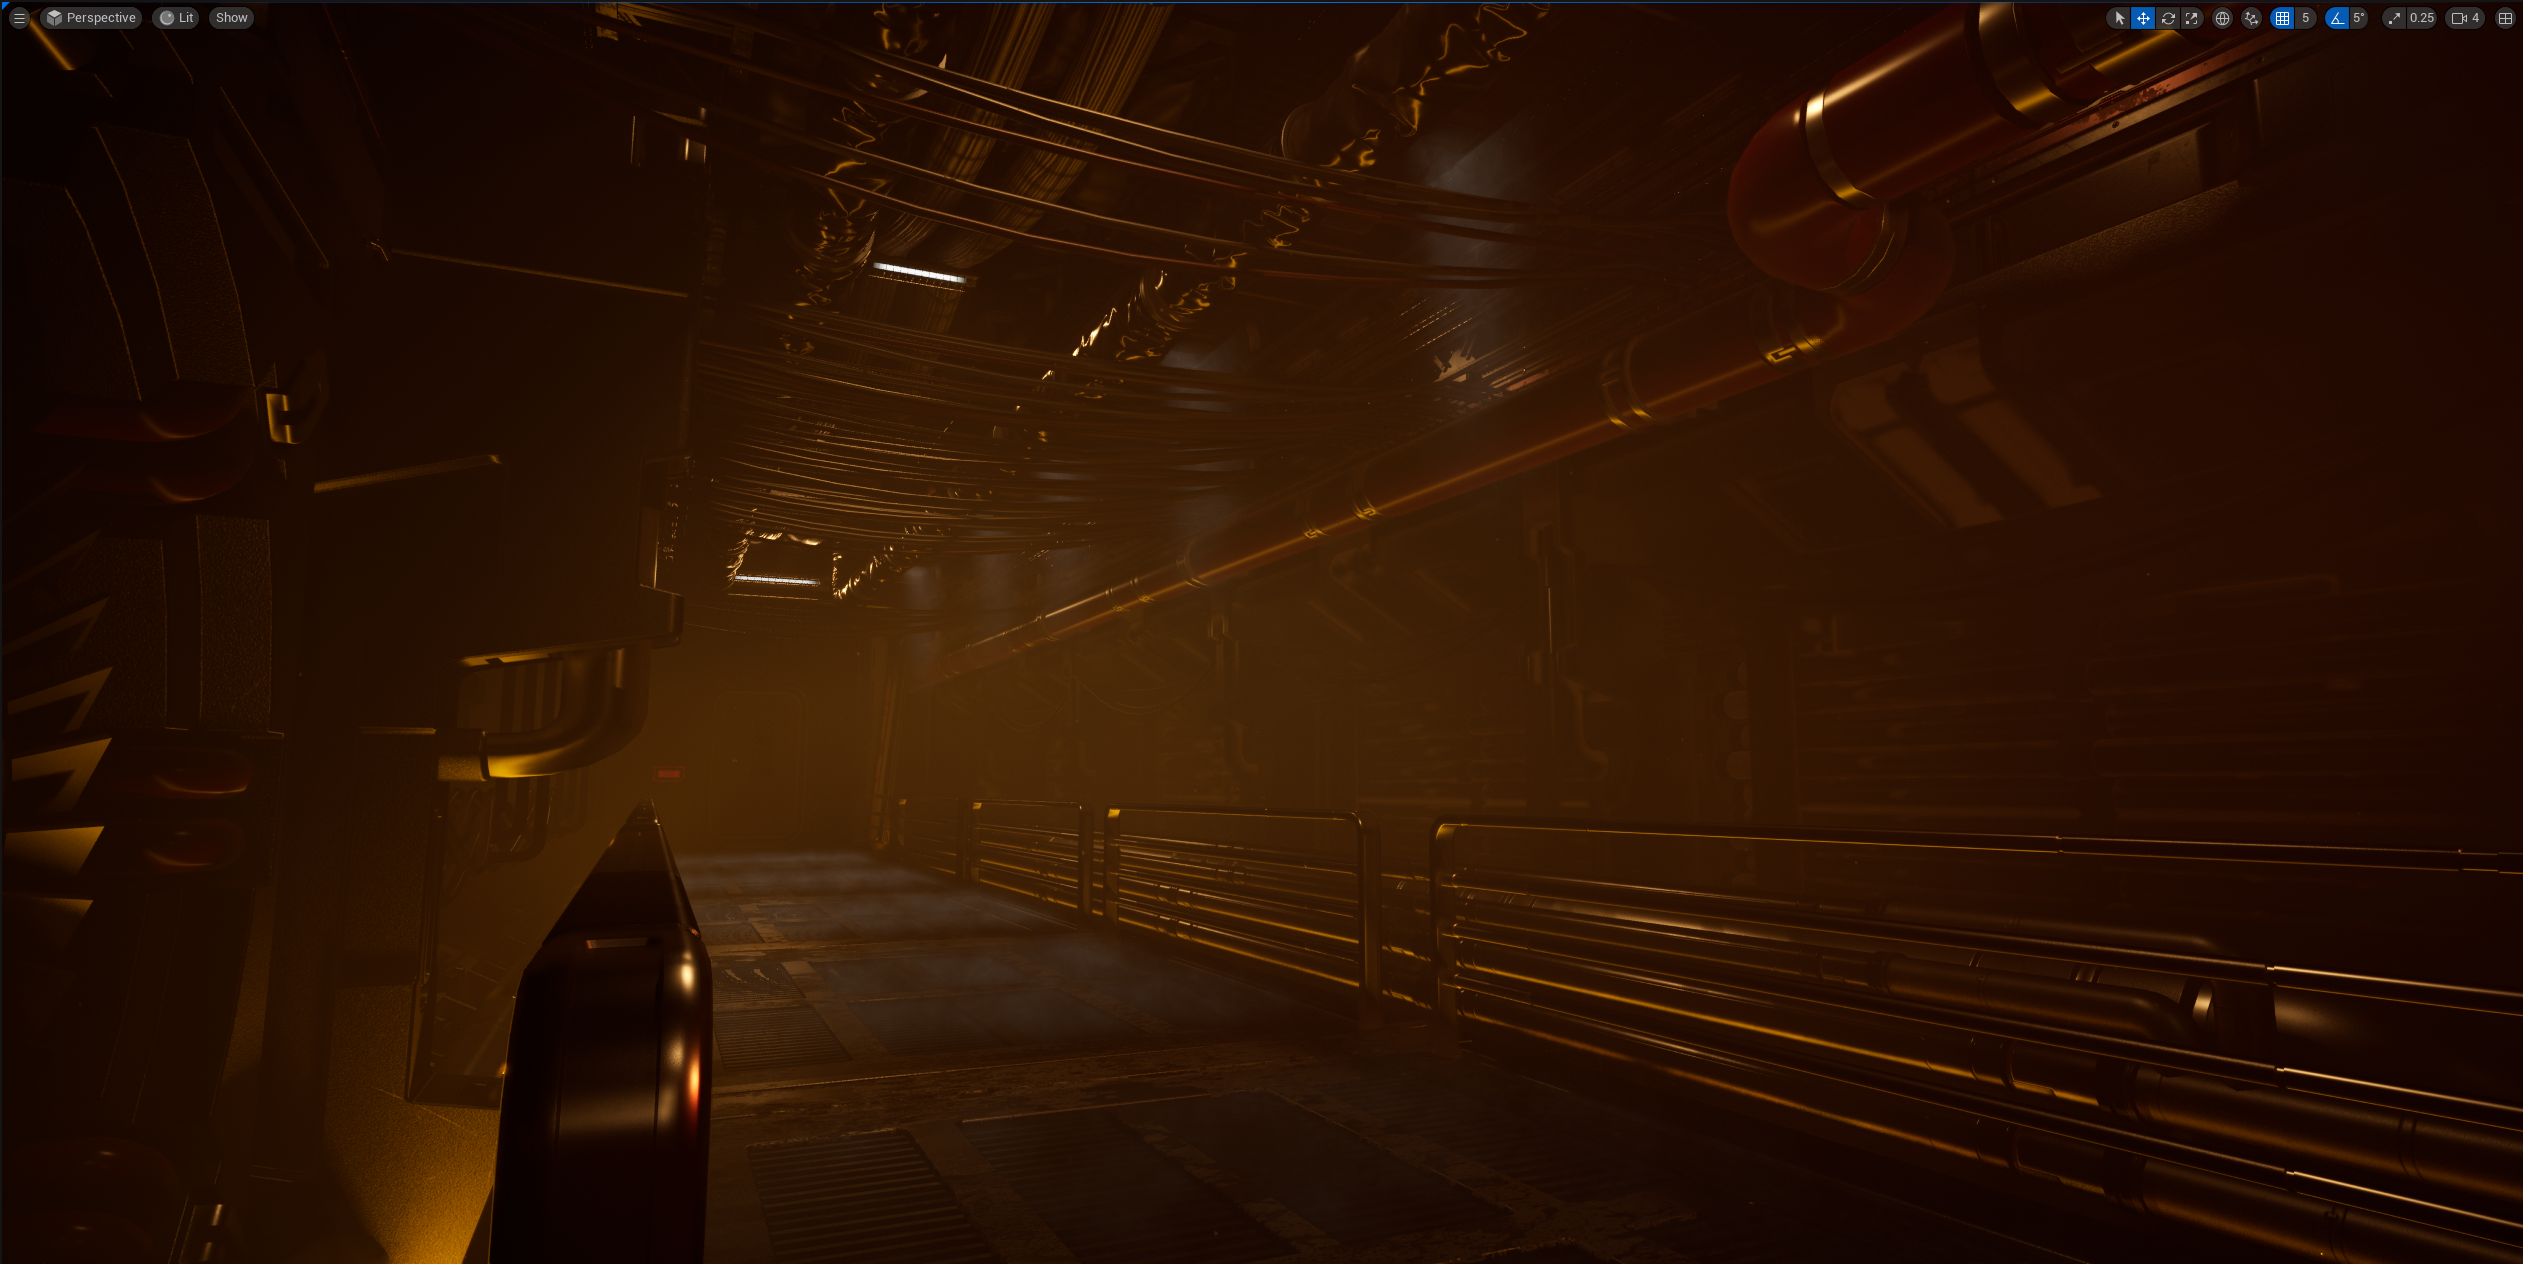
An Overall view of the VFX used within the hallway scene
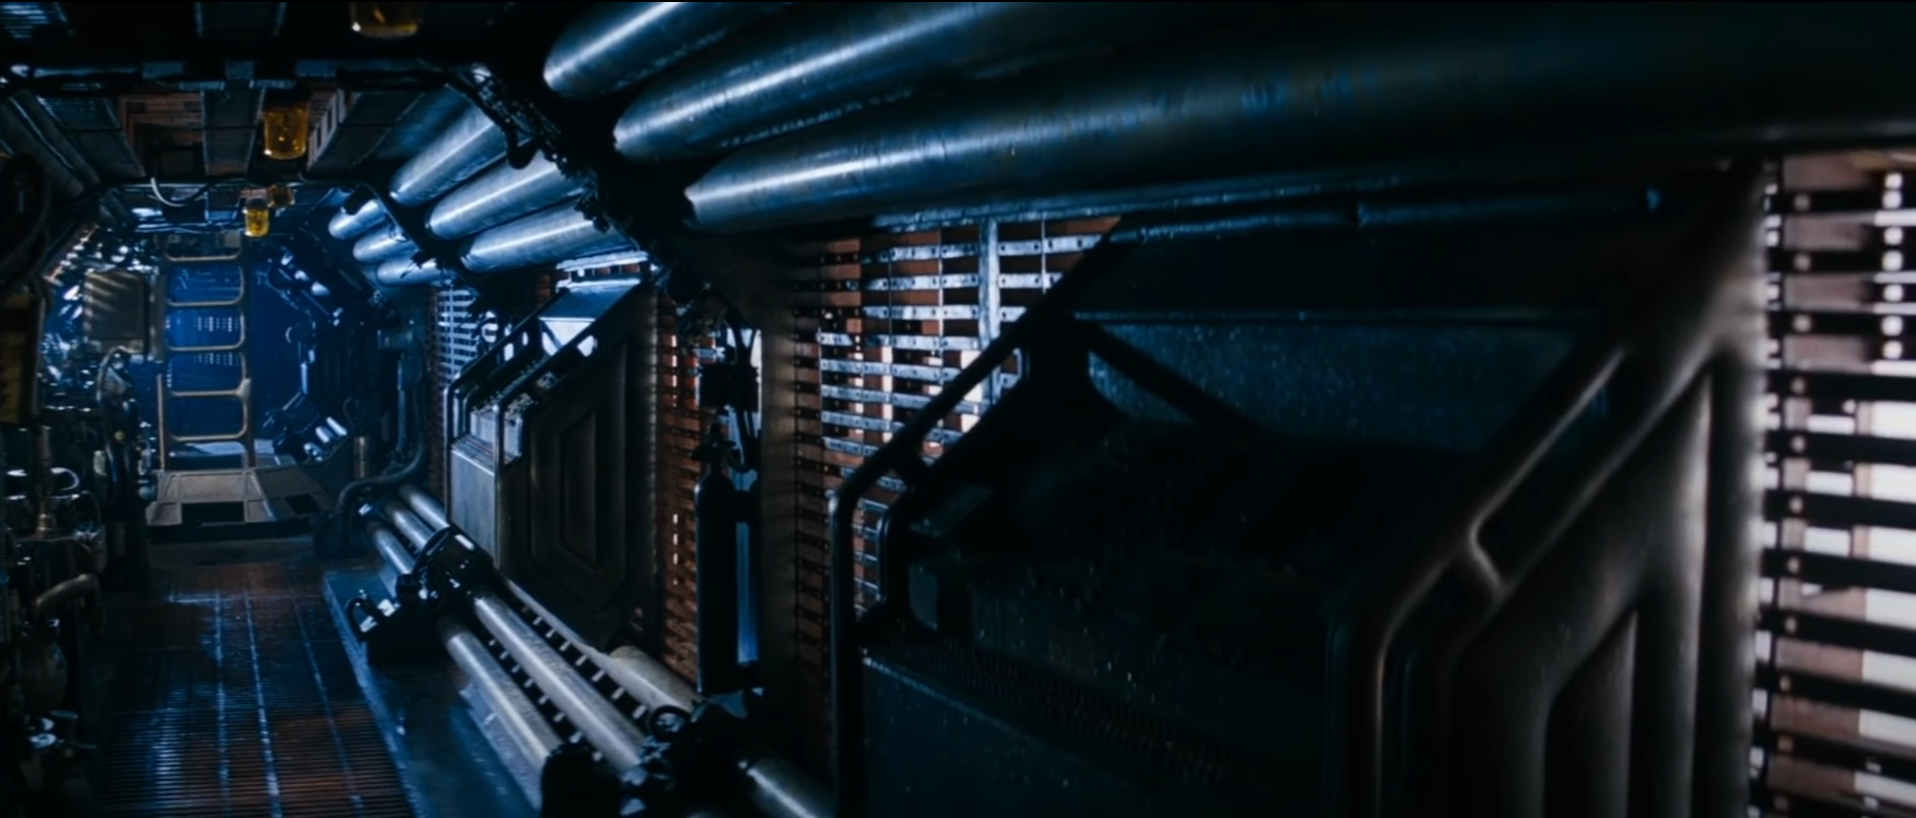
The fog and steam within the environment helps to paint the picture of an industrial type ship, like working within a forge or a factory. In contrast, a well built, clean ship, would have us see lots of white, clean looking textures, with bright white lights to illuminate the areas and provide a bright clinical and futuristic looking environment. I found this type of design to not suit the atmosphere which I desired for my cinematic because it was too clean, warm and inviting, I required a more cold, industrialized theme. Looking at the design elements of other ships within movies, such as ‘Alien’ (1979), I found the interior of the ‘Nostromo’ to be quite clean in some areas such as the command centre and medical where as in others, such as engineering the design takes on a more industrial approach. The hallways and such are narrow and ladened with pipes and other tech. Its design still hints that the ship is industrial in nature, the hard edged, large technology of the 1970’s lending to this aesthetic. ‘The Nostromo’ is a towing ship, that tows a huge refinery and its minerals. It is thereby equivalent of a modern Tug boat, which are in themselves, quite industrial and bulky looking. This reasoning also played quite heavily into the decision making when it came to searching for a spacecraft model for my scene. I knew I wanted a ship which did not look too futuristic and clean. I needed a vessel which was boxy and human in nature. The ideal would of been to create my own, but time constraints meant that learning, doing and implementing this process would have cost too much time.
Various tutorials I used for effects
Creating Steam
(Ashford, 2022)
Creating the Moving Textures
(Aspland, 2022)
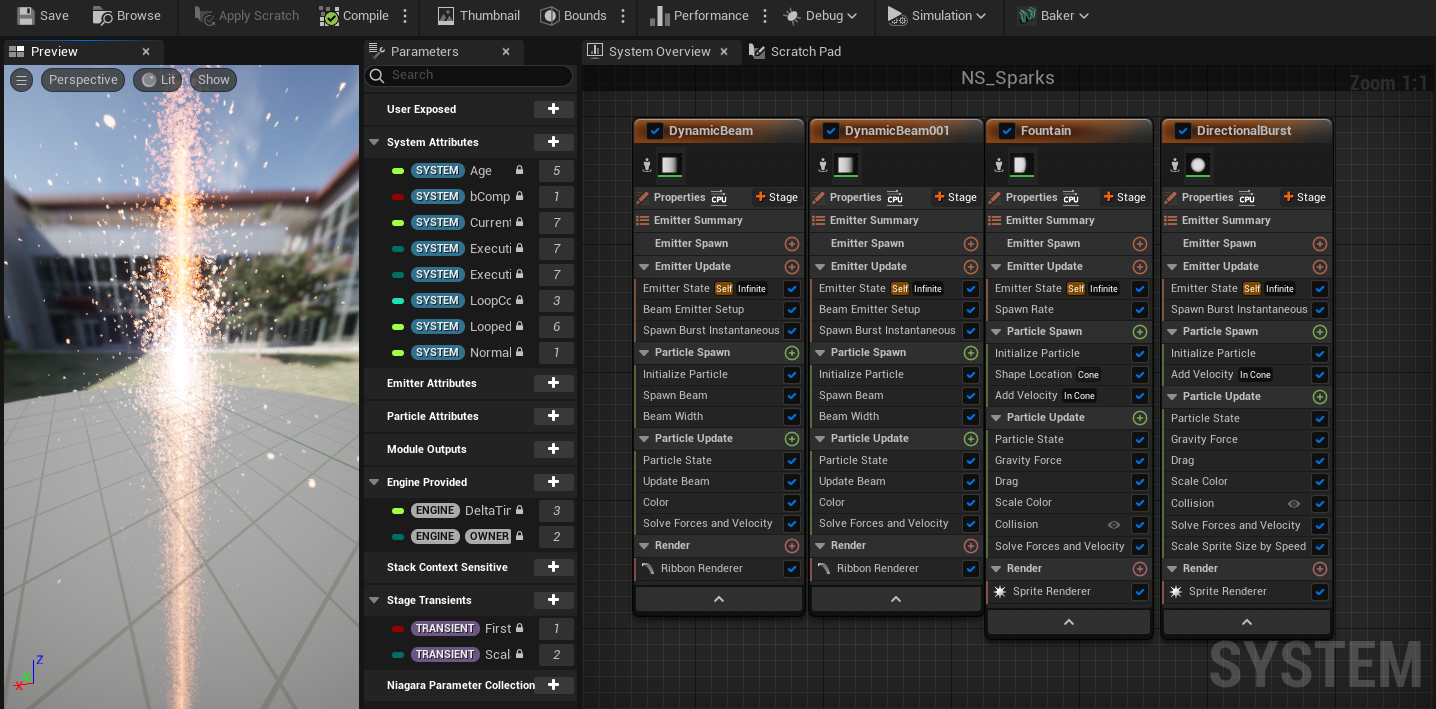
Creating Sparks
(Enabled, 2021)
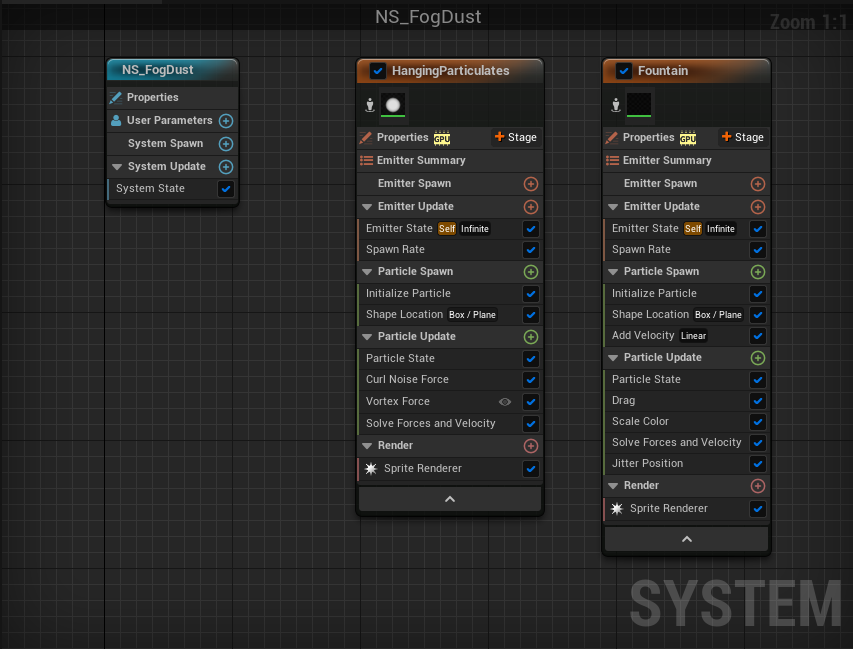
Creating the Fog and Dust Effects
(Gono, 2022)
A portal tutorial which helped me build on top of the courses tutorial
(8fifty2torials, 2018)
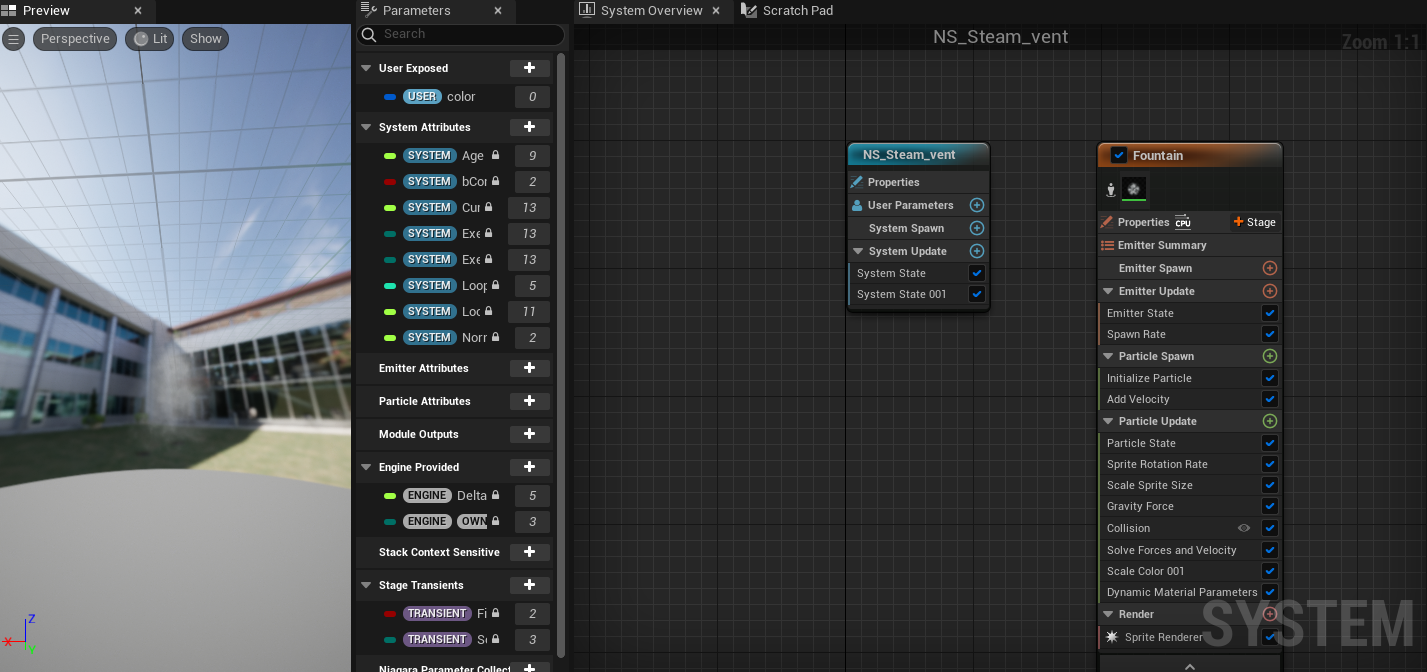
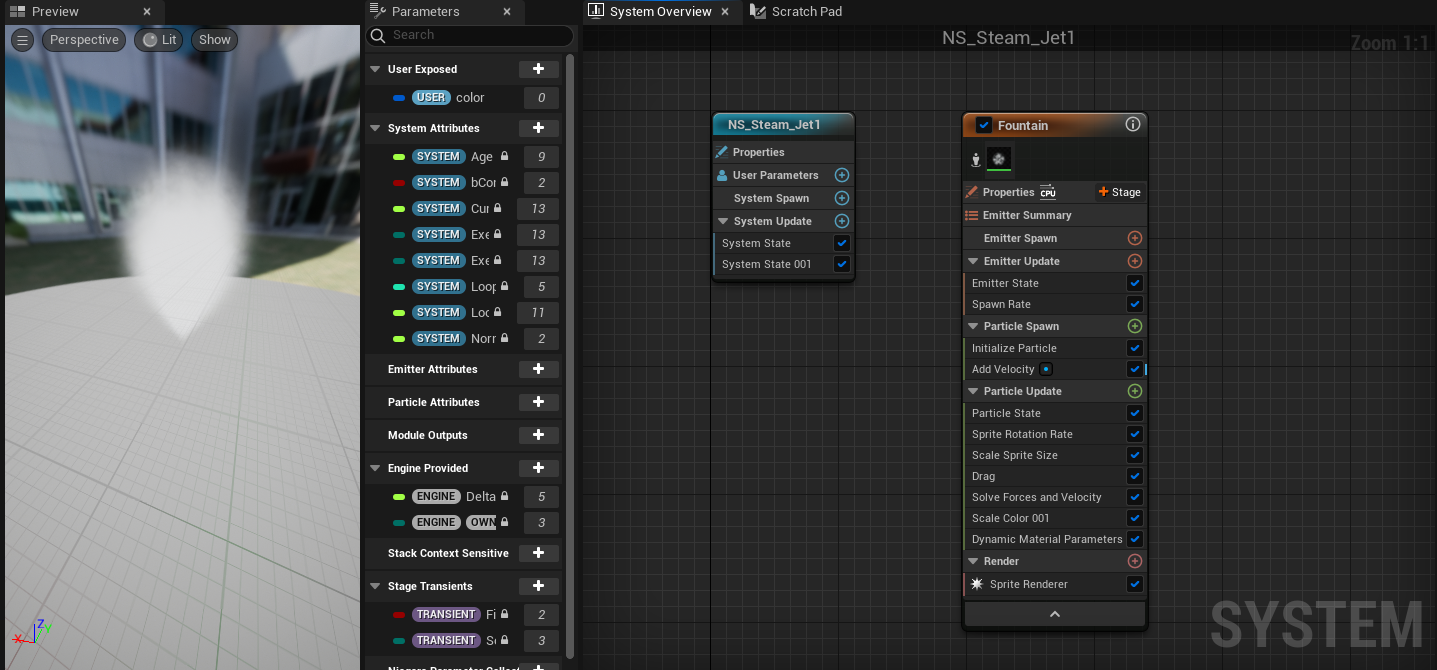
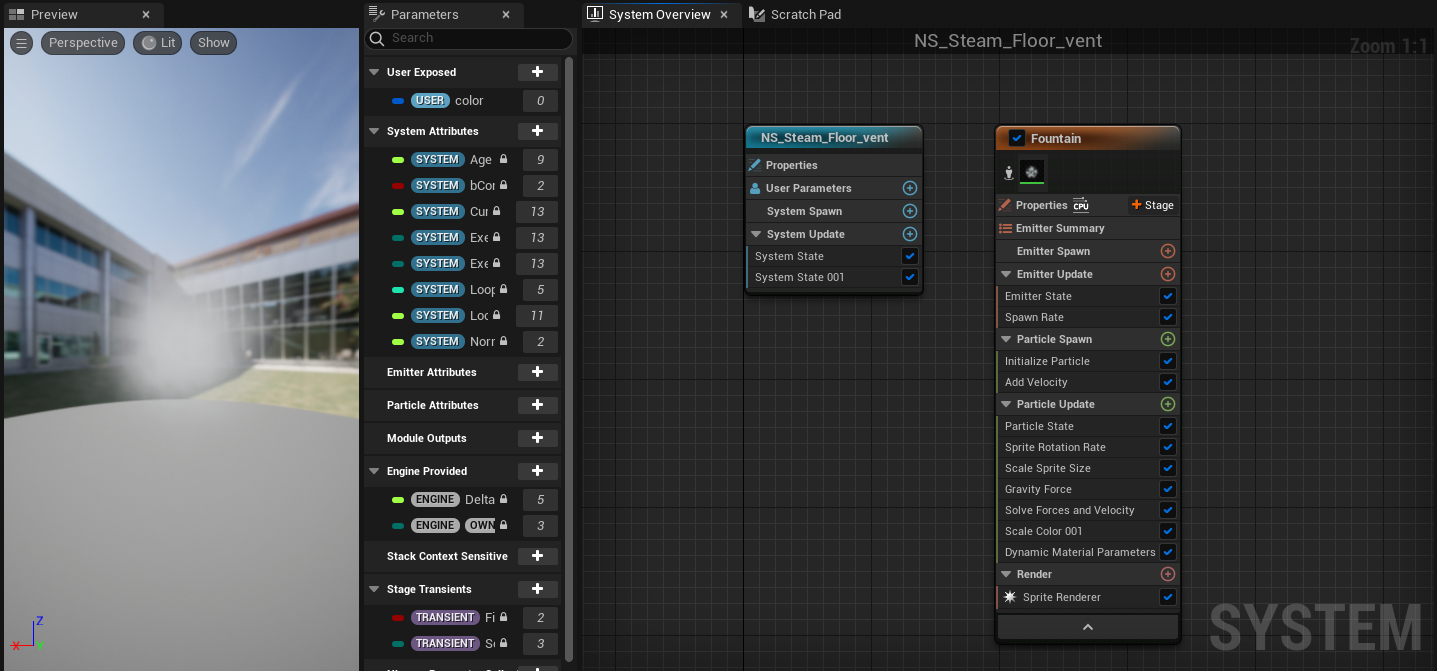
The Fog/Dust Niagara Emitter setupSteam Vent With Gravity Niagara setupFloor Steam Vent Niagara setupThin/Less Dense Steam EmitterWide/Billowing Steam Effect
I began in Unreal, by creating the overall space scene. I used multiple tutorials to help me learn the methods of creating these types of scenes and adapted them to suit my idea. If i was to explain every action i took, it would require me to write a significant amount, so i can only summarise that the knowledge i gained was from University lectures and Instructional videos. By following these videos and lessons, it gave me enough knowledge of Unreal, Niagara, sequencing and blueprinting, to create these scenes, effects and assets.
This Series Helped me in the creation of the entire space scene.
(Arghanion’s Puzzle, 2020b)
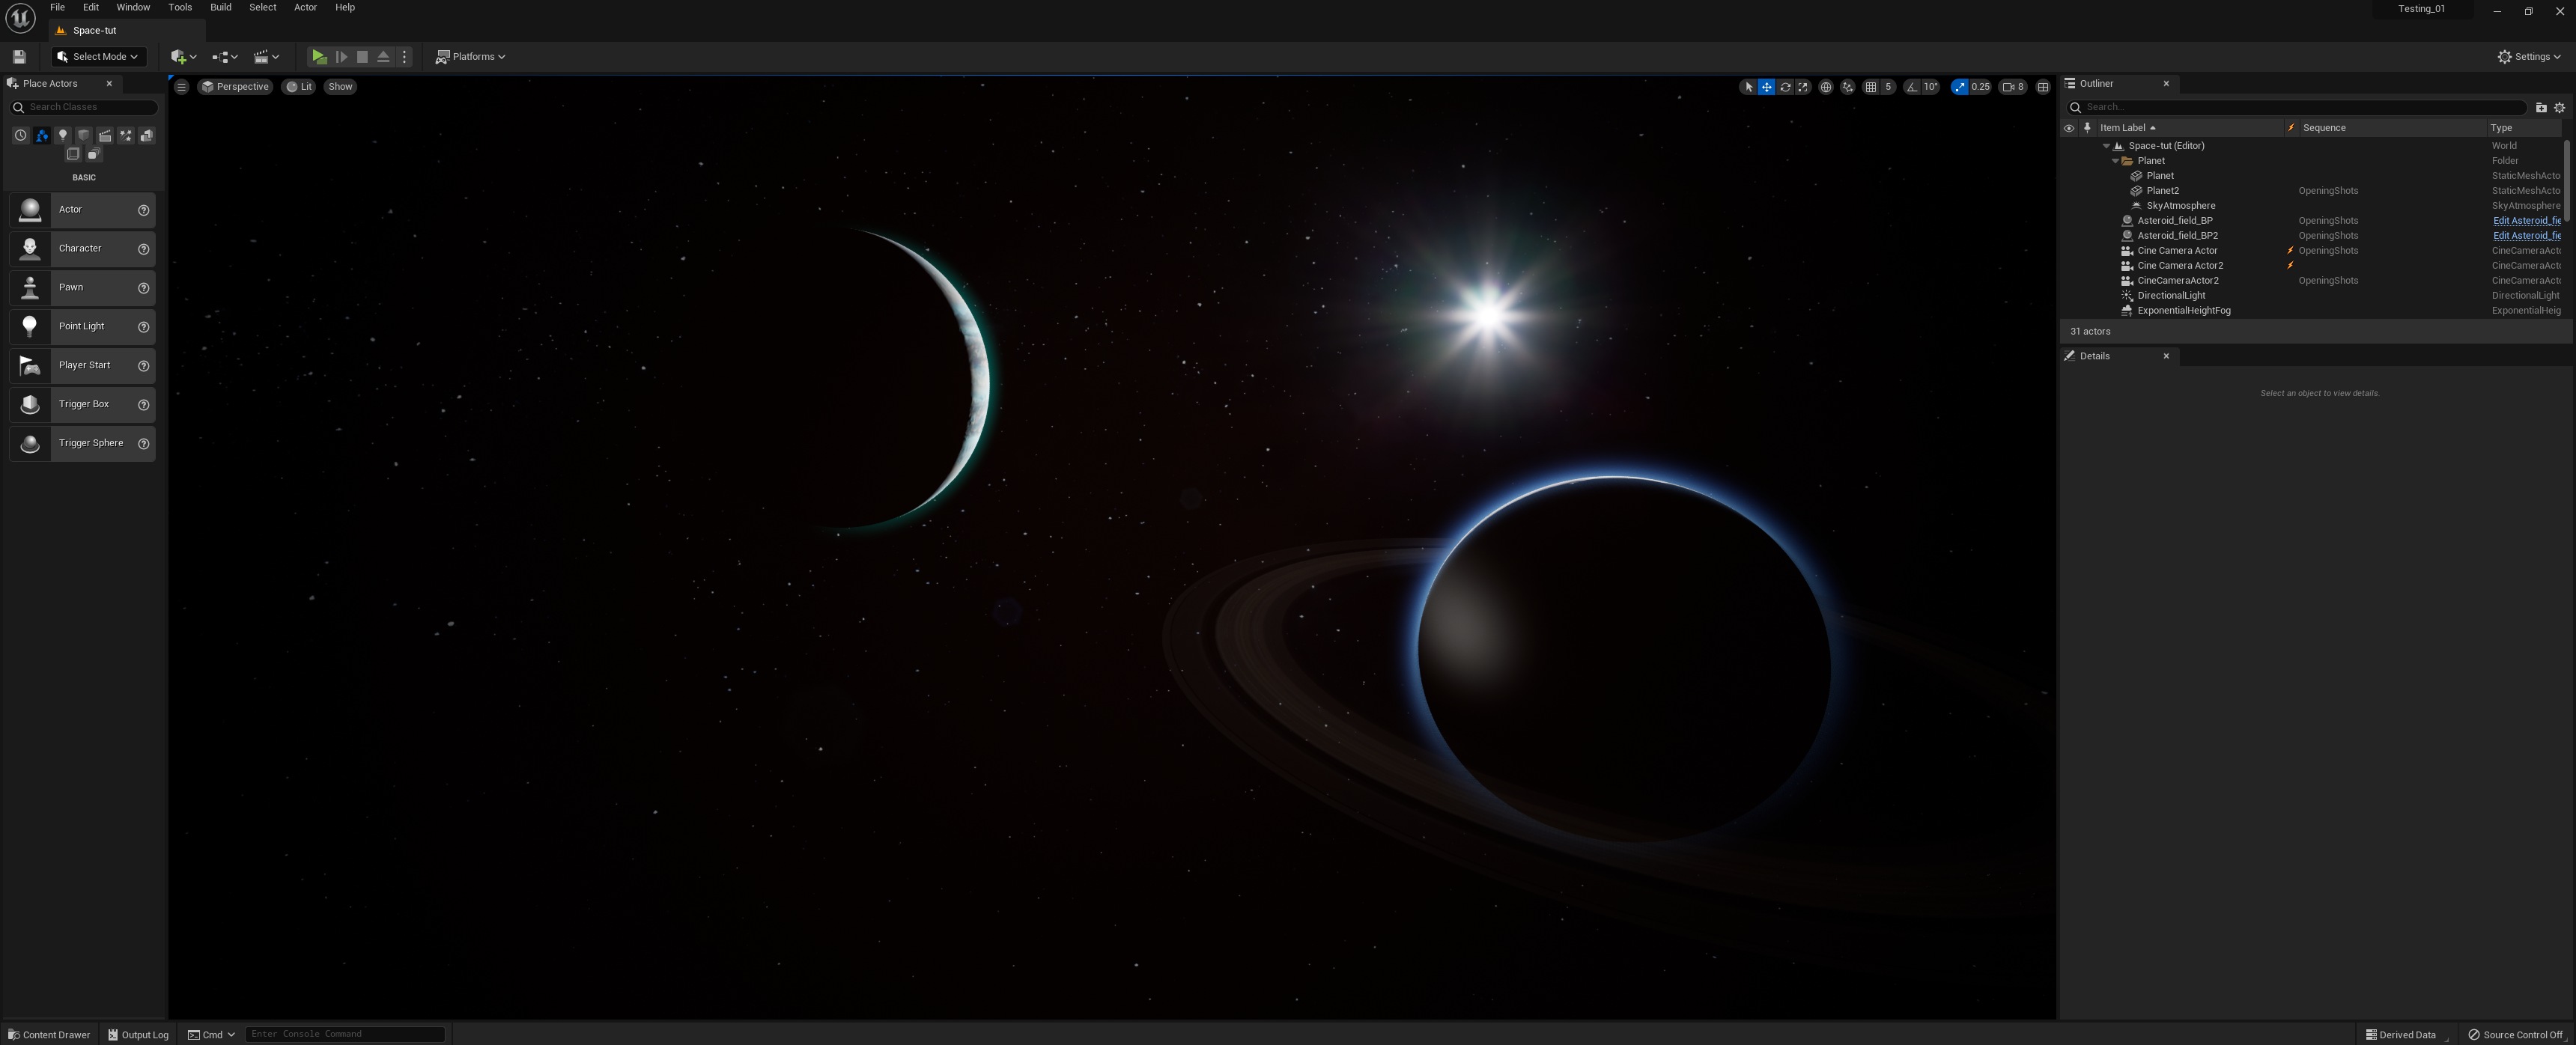
The Overall Scene (Complete)
After I had the basic scene set up, I moved on to creating the more intricate details, such as clouds and more importantly an atmosphere to the planets; I wanted as much realism as I could achieve.
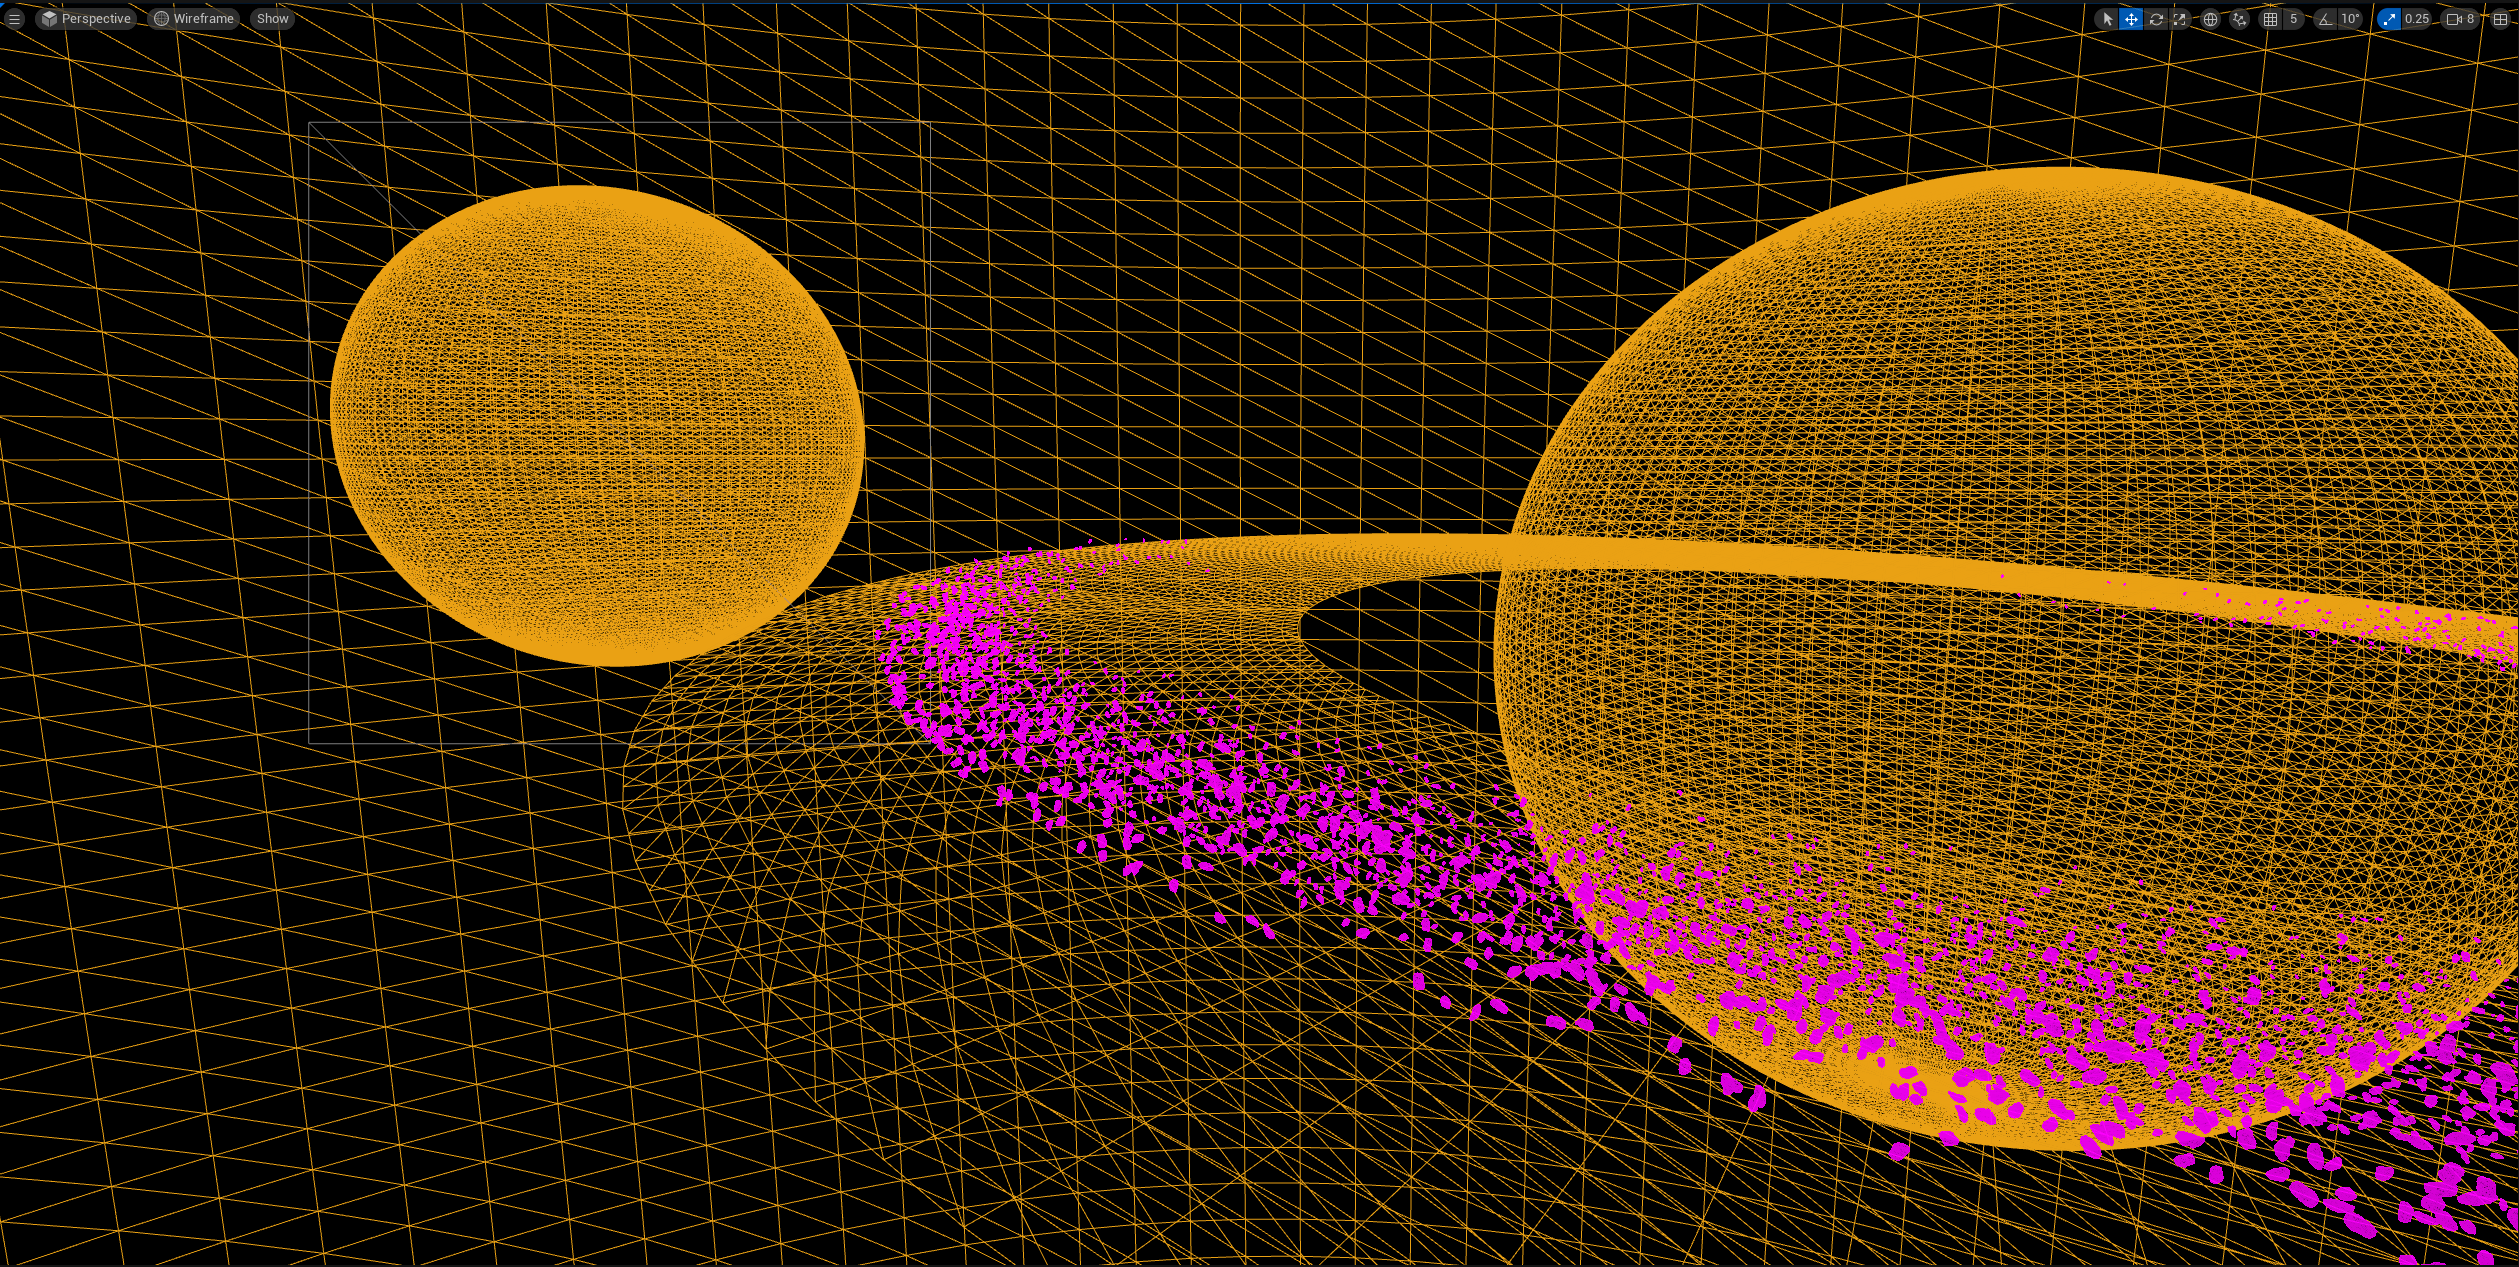
After creating the atmospheres and cloud movement, I looked at the overall scene and thought that it still looked empty. The scene had two planets, but no intrigue. I wanted the opening, sweeping shot to have enough to keep the viewer interested and captivated. I felt the planets alone were not enough amnd so I then began to search for a way to create a ring or asteroid field. I found multiple tutorials on the creation of these visual effects within Unreal and followed them to create my own asteroid field and ring.
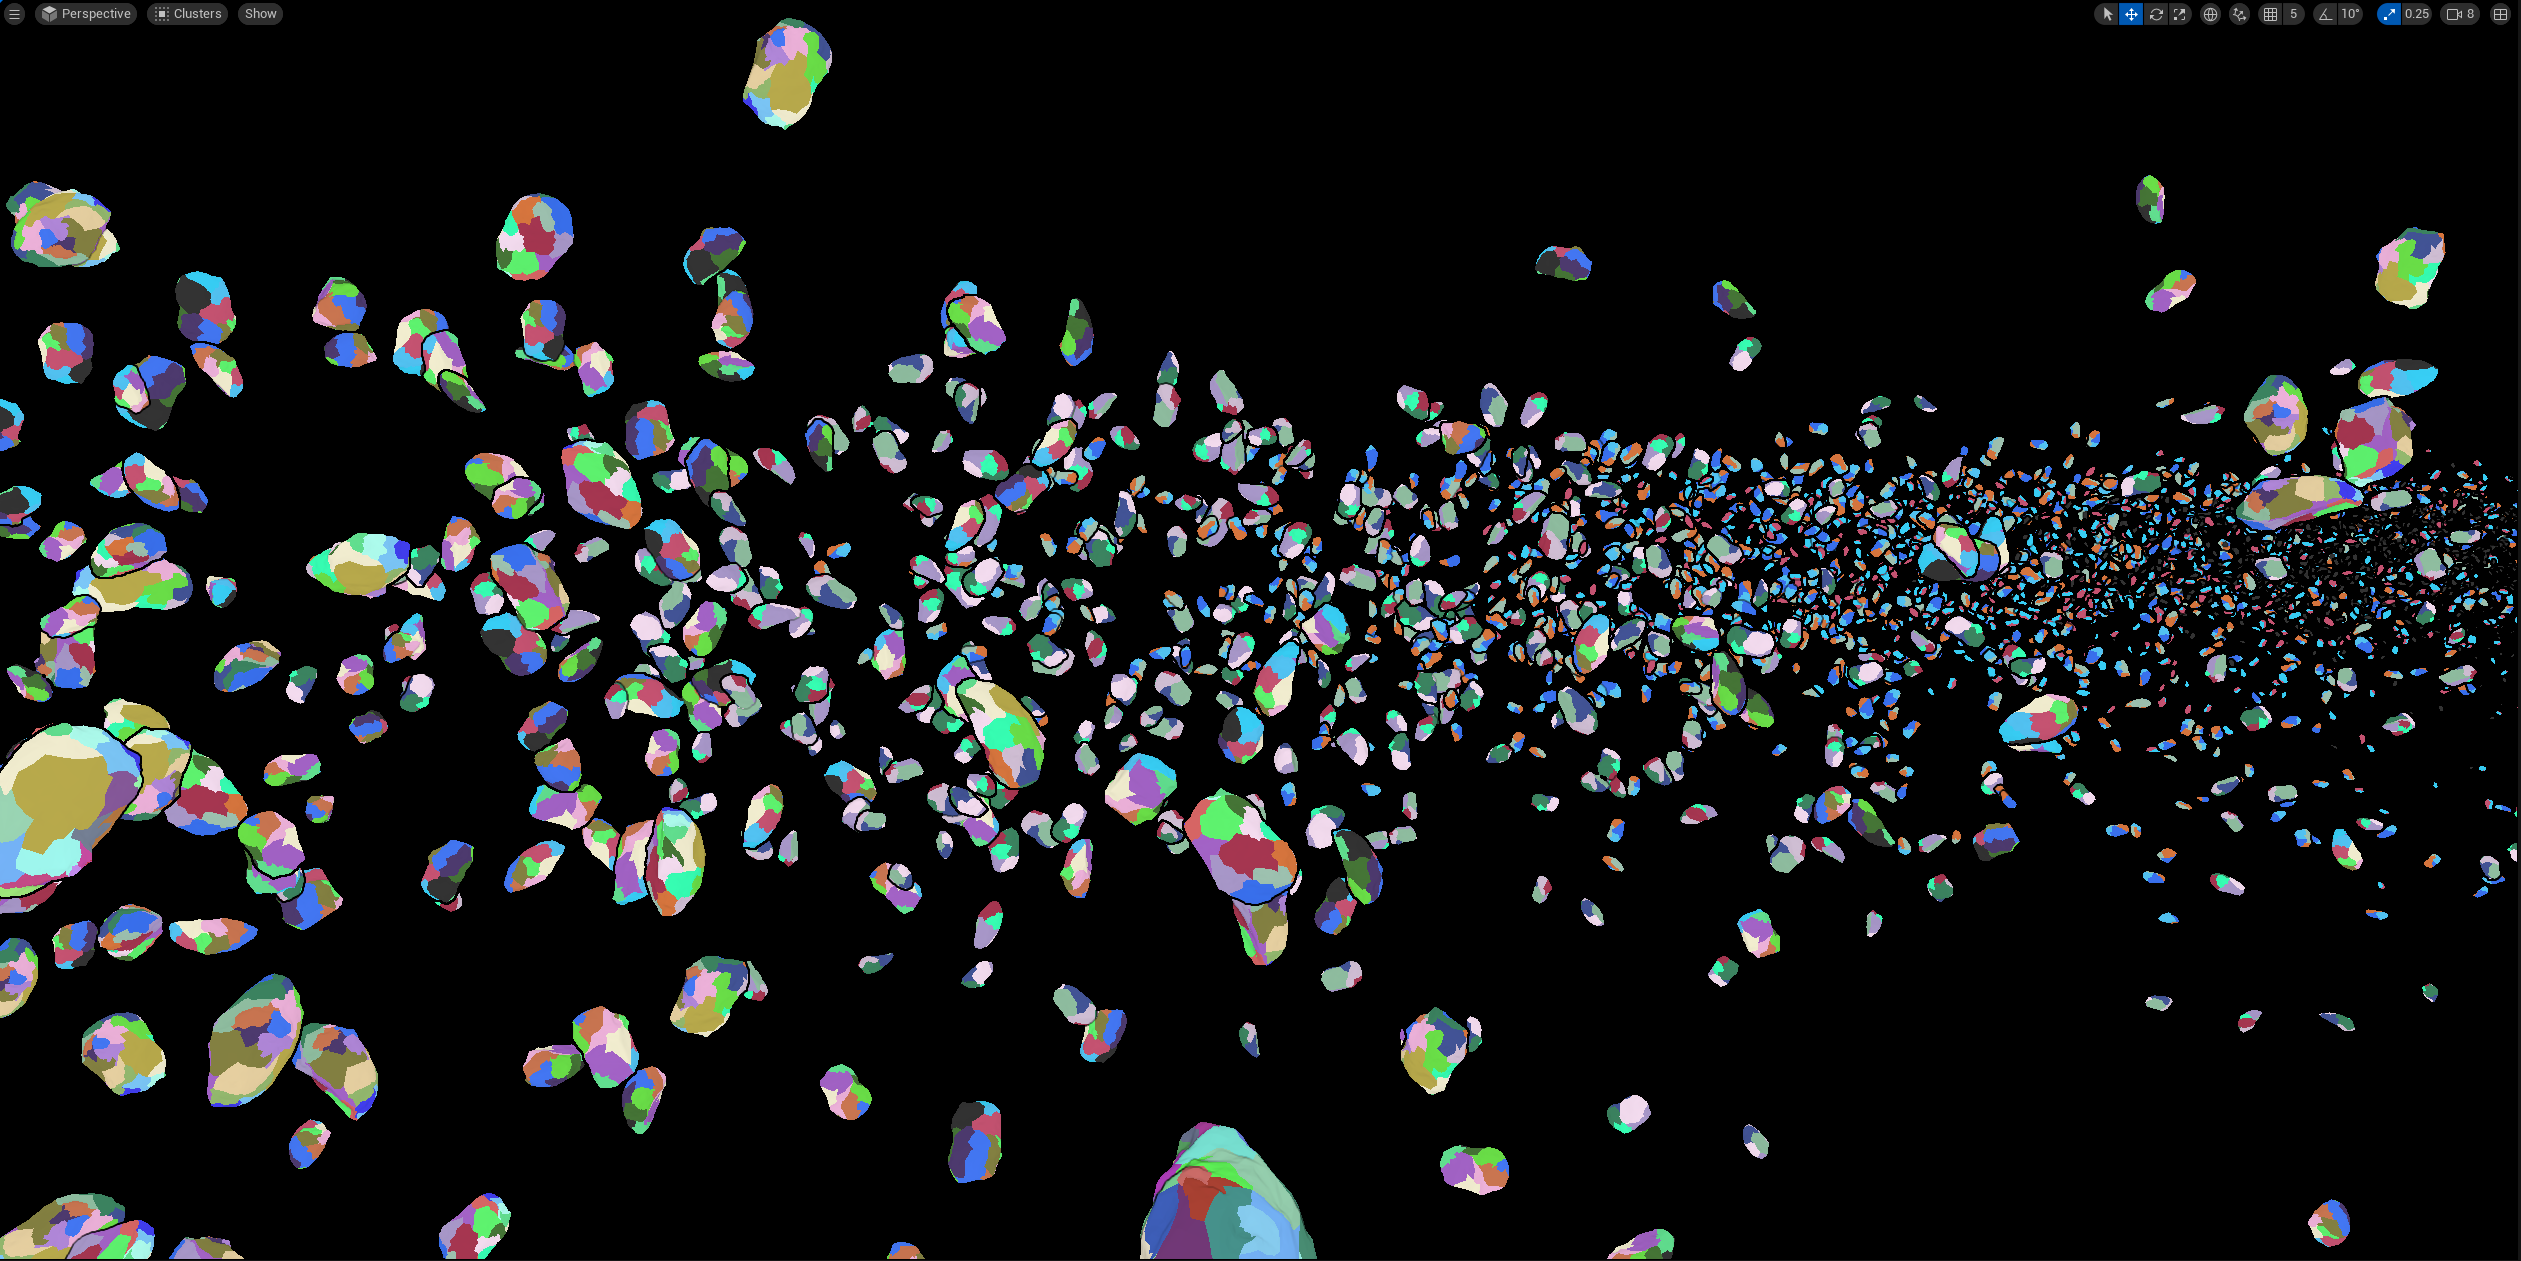
The asteroids where created using Nanites. As field required thousands of instances of the same randomised rock, the engine would not of handled the count. The tutorial suggested two methods, nanites for performance or particle effects for a little more realism. I opted for the nanites as I had never explored these before. Overall they turned out great, having them individually rotate would have been better, however I was still satisfied with the results.
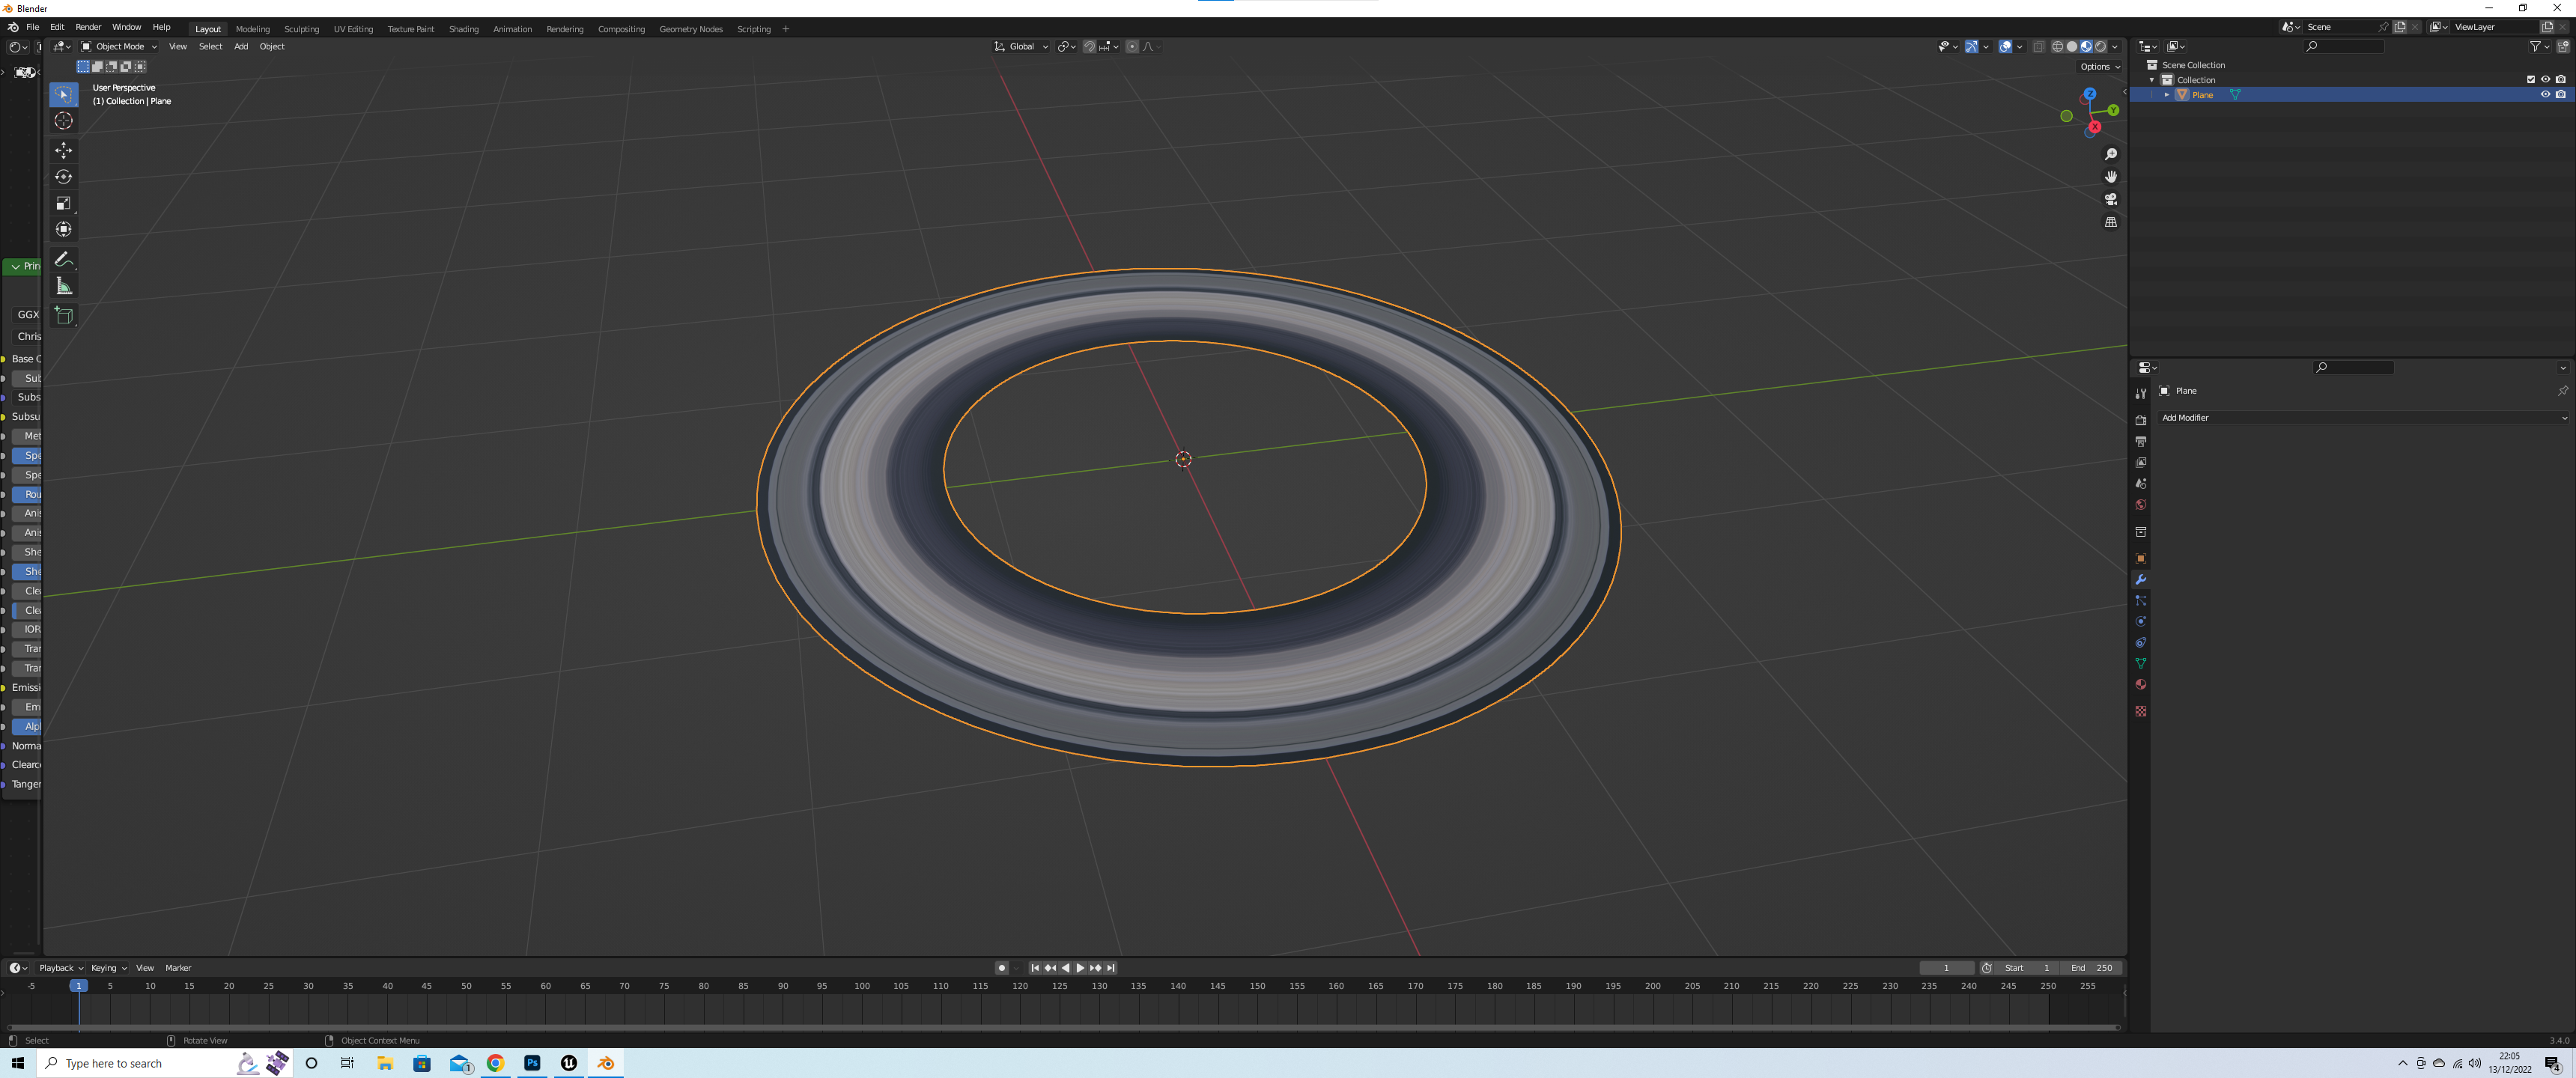
The ring was not the most difficult, however it necessitated the use of a 3 dimensional program to create the ring. As the texture of the ring had to be transformed around the disc, layering it traditionally within Unreal yielded the wrong result. Once the ring was created and within Unreal, I had to create a material, to control its opacity and color to give it an accurate look of a planetary debris ring.
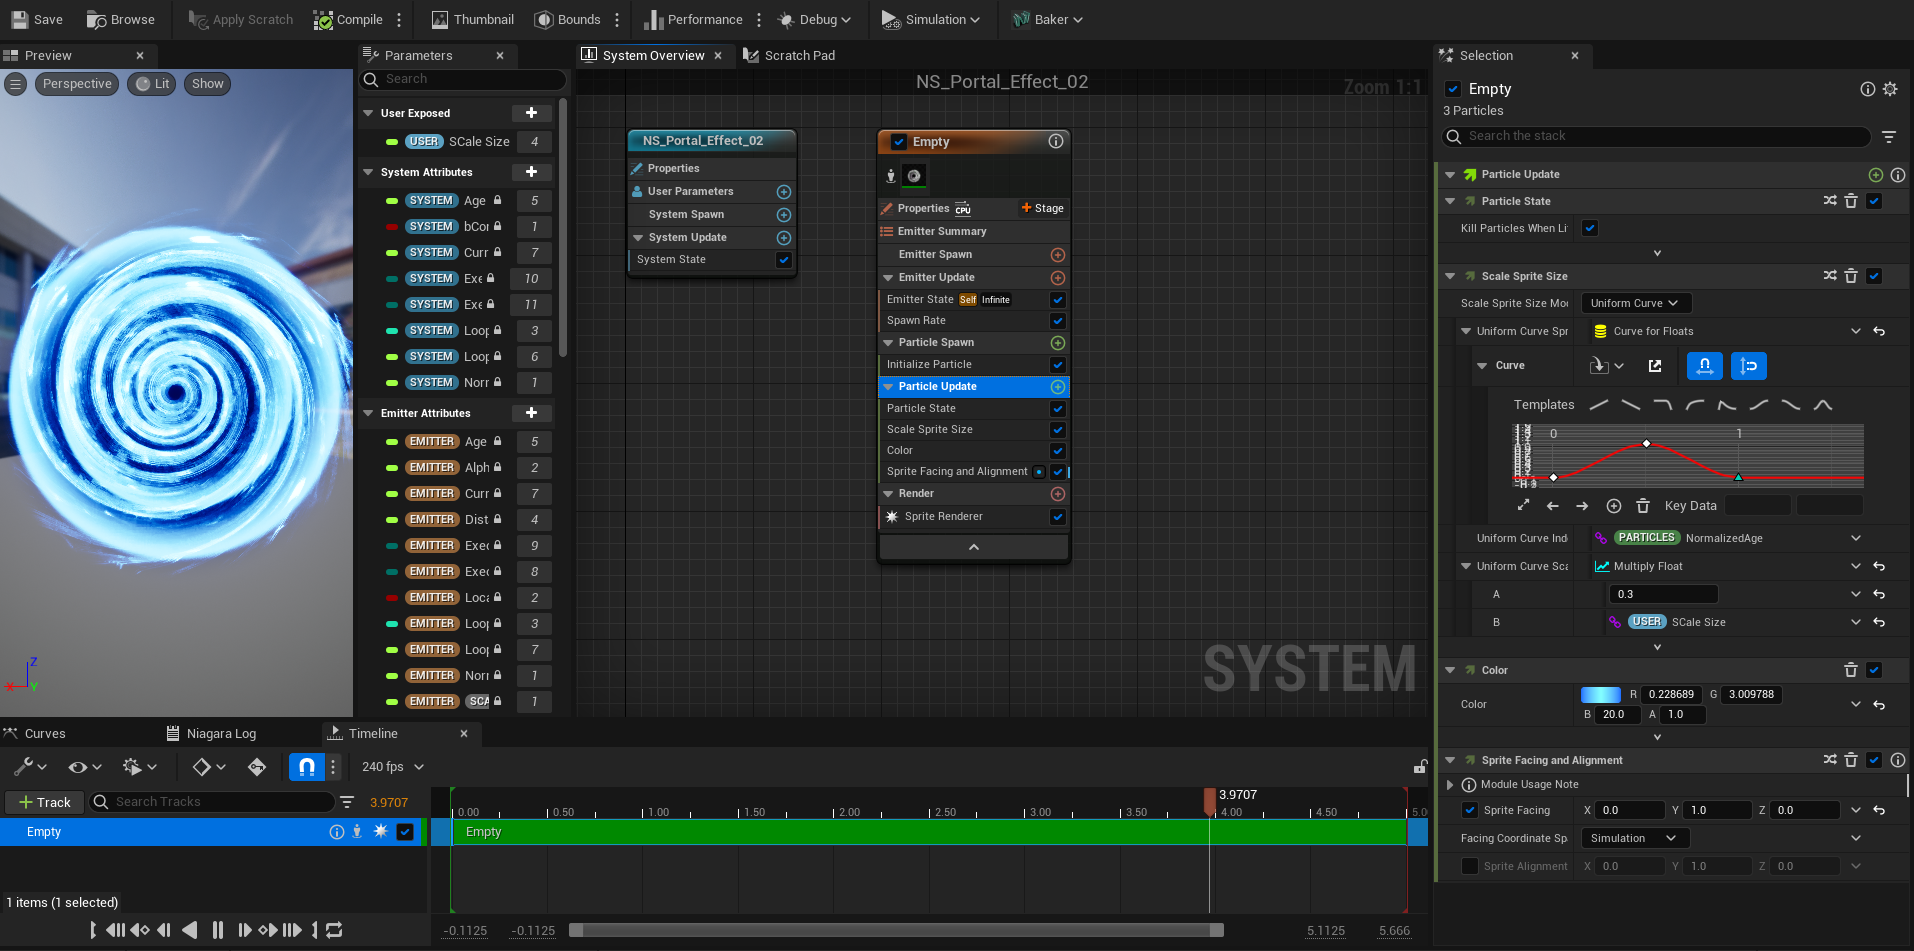
The last thing to prepare was the Portal, i had already created this (and the other effects) in a seperate project to practice and assure myself before inserting them that they worked. The portal was created following my tutors guidance and a tutorial he had prepared for the group. The portal wasn’t exactly how i needed mine, so i tweaked the materials and certain parameters within the emitters, to achieve the grow and shrink effect i required, as well as the rate of rotation.
The portal openingPortal EmittersPortal Material BP
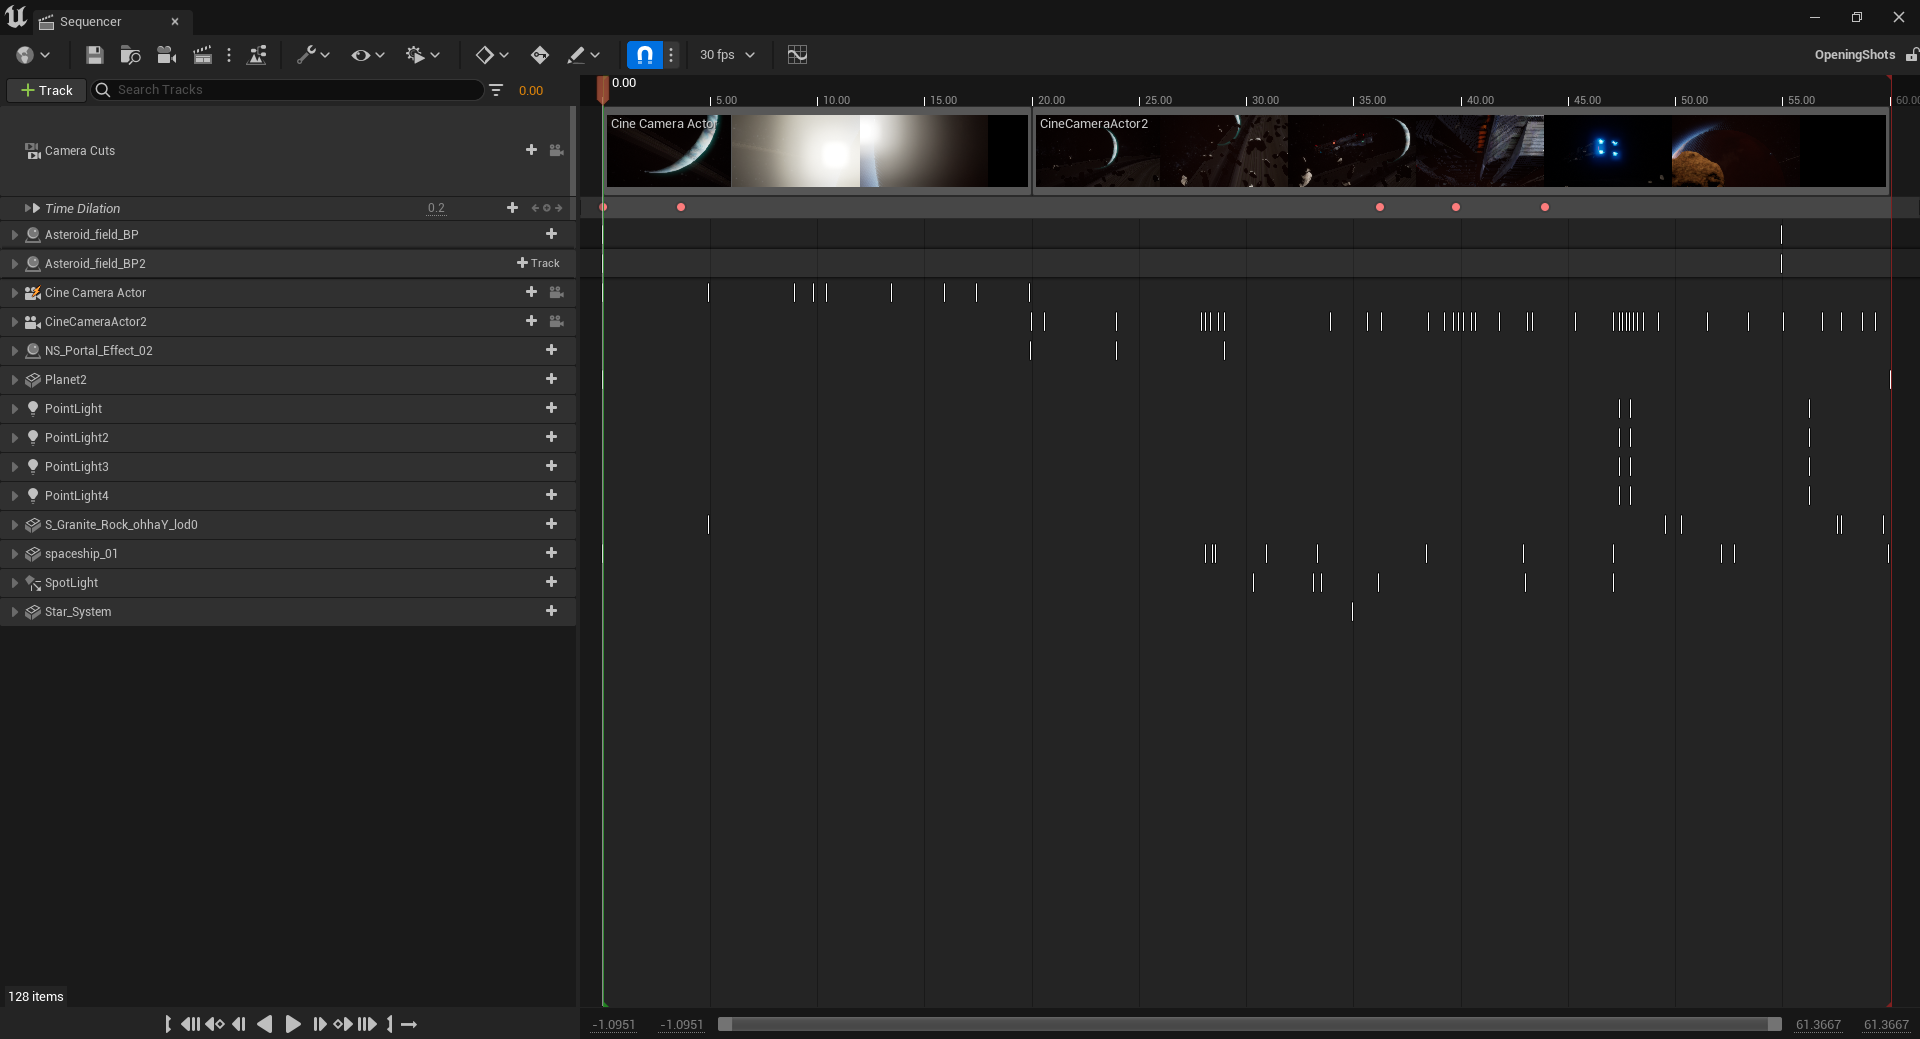
Filming the space scene.
Space Scene Sequence
Once the scene was created and the VFX in place, I had to then begin the process of setting up cameras. I opted for using the cine-camera actor – I found it simple and efficient to use while sequencing shots. I found by simply possessing the camera, piloting it and keyframing the new position to be the easiest process and allowed me to film any type of shot I needed without the use of other cameras. For example, for panning shots, I needed to change the keyframe to the desired place, rotate the cameras axis to end point of the pan and key the frame. From there I could adjust the length of the keys to slow or speed up the camera panning and adjust the curves to finalise the movement. The same principle applied for tracking shots. I would simply pilot the camera and add the keyframes to the transform values, focal range, focus depth, even lighting. Close ups and wider shots where created by adjusting the focal range value within the sequencer during certain keys.
A Tutorial i used for familiarizing myself with Unreal cinematic creation
(BeardGames, 2022)
The sequencer allowed for infinite possibilites, the more I explored it, the more ideas I generated. For instance, I could animate the ships scale, so as it appears from the portal, the ship is stretched for a few frames, a split second when played. By adjusting the scale and keyframing, then setting the value back to normal and keyframing it a few shots later, I could make the ship appear to stretch and shrink in an instant. Also, at the time the ship emerges, the viewer can notice a quick jumping backwards of the camera, which then returns to normal. This was a happy accident within the keyframing process of the cameras location. Once I had watched this back, I ultimately decided this minor keyframing error was a lovely touch, simulating the viewer jumping backwards in surprise as the ship emerges suddenly from the portal. I used the sequencer to add many more effects. By adding lights in areas (such as the underside of the ship) as the camera passes under, the light, bokeh and lens flare intensity is increased and decreased as the camera passes under, to simulate the eyes adjusting to a very sudden bright light. The same idea applied for the engines. As the ship ‘boosts’ away, I was contemplating on the best approach to simulate the engines igniting and firing up. I had thought of making a Niagara system, a flame that would grow then shrink, but instead, opted to try a more simple approach. By simply attaching a light to each engine port and like the underside shot, increasing intensities of various values, the light would make it appear as though the engines have suddenly emitted lots of energy. The last attribute I changed was the colour of the light to match the engines already blue emissions. Once I had watched it animated, I was satisfied that this simple effect gave me the exact result I needed, with little effort.
The engines ”firing up”
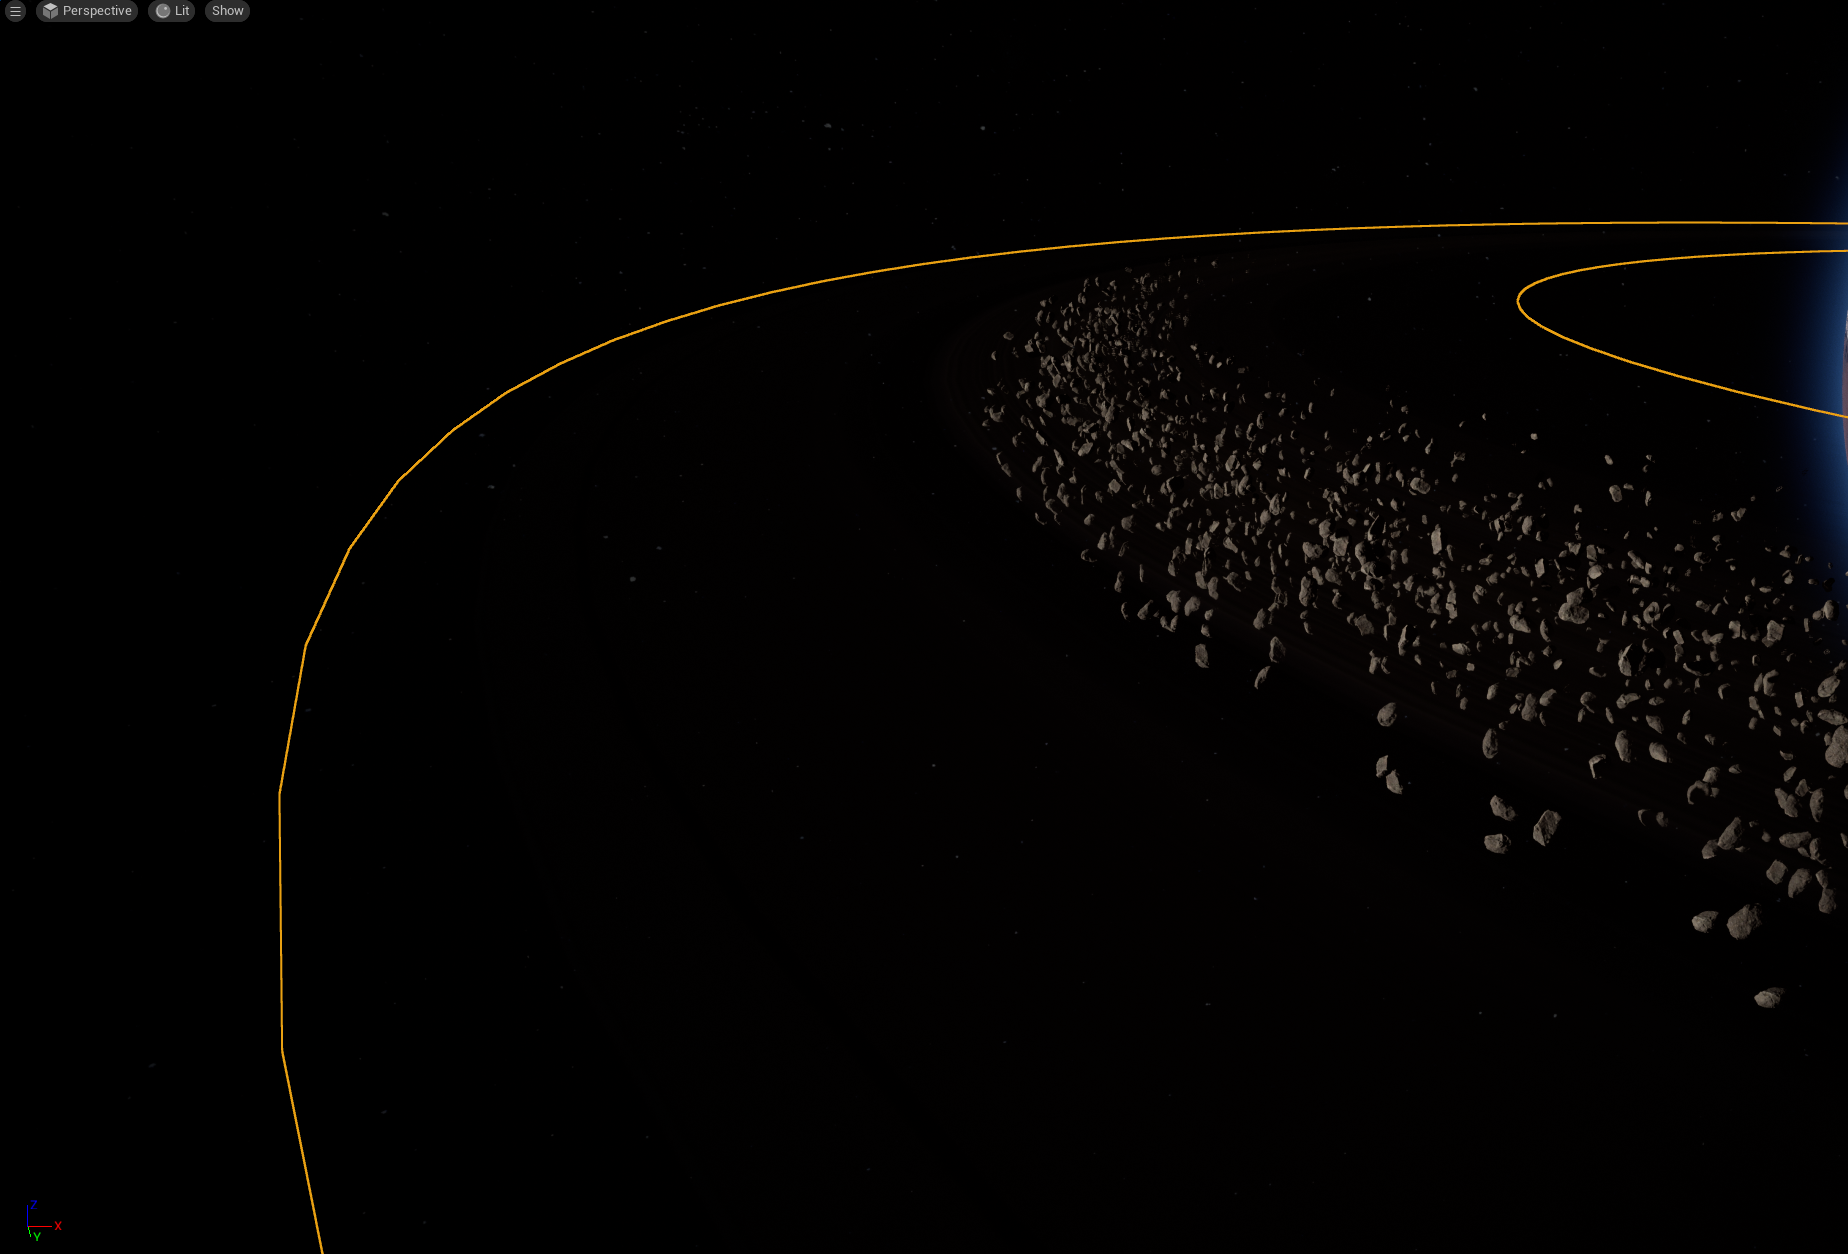
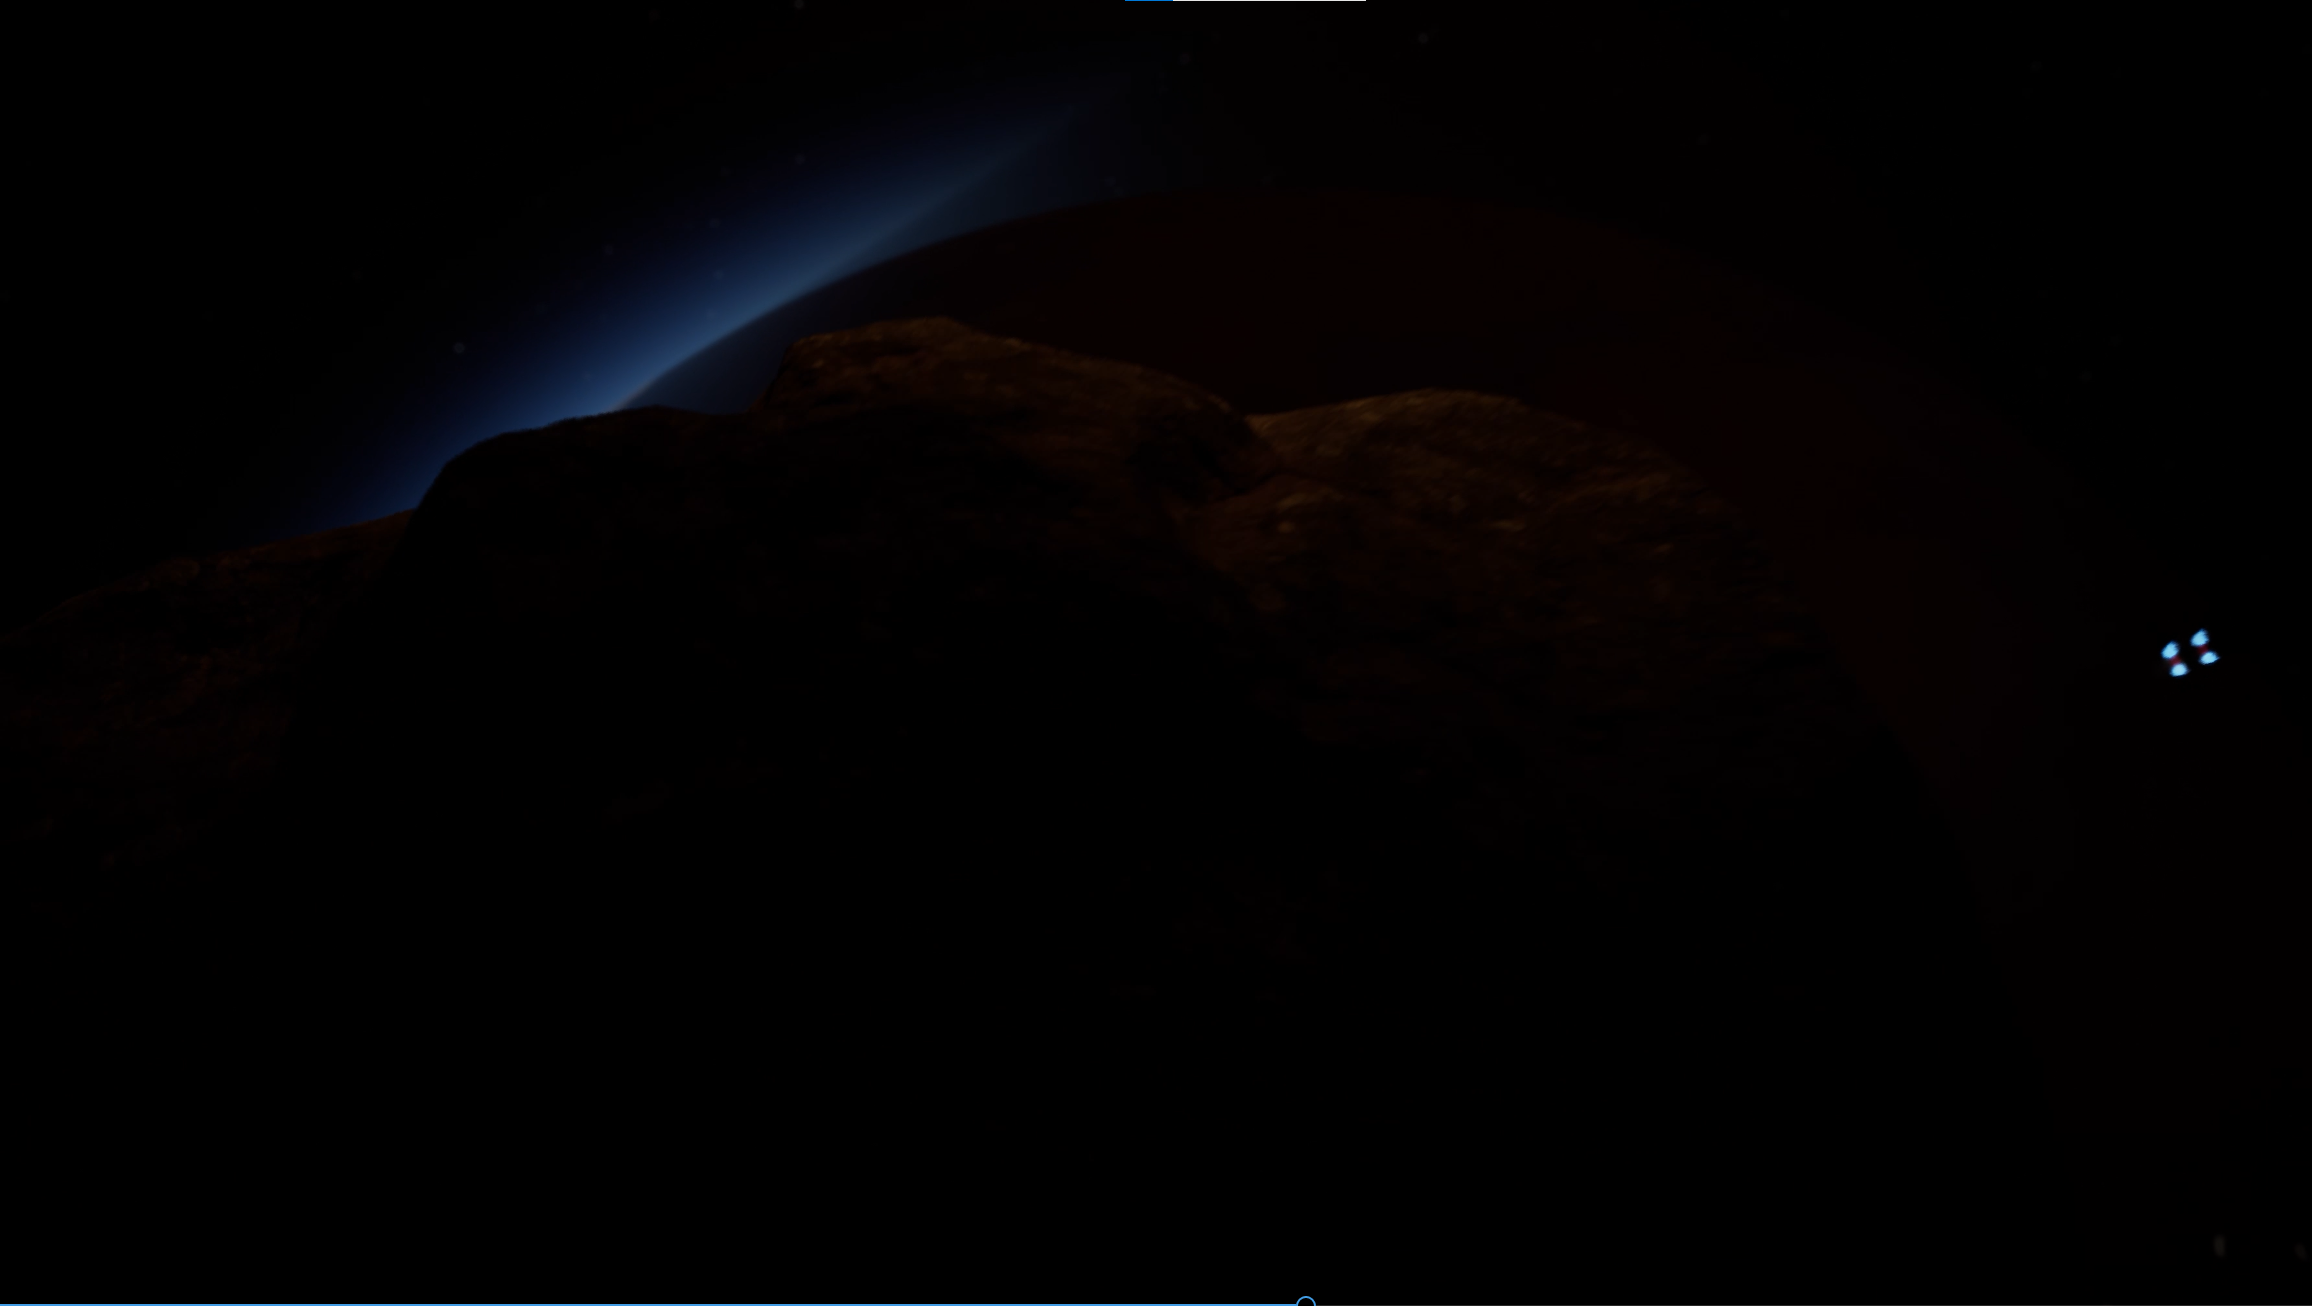
For the last mechanic of the scene, I required an asteroid to obscure the camera to allow a smooth transition to the next shots and environment. Because I already had a high-quality Megascan of a boulder for my asteroid field, I just re-used this asset as a single actor and added it to my sequencer. Once in the sequencer, I just keyframed its transform properties, making sure there was natural spin to the asteroid as it approached the camera. As the asteroid encompasses the camera, I reduced the brightness within the sequencer – to aid the fade effect and remove the viewer from seeing any low quality texture on the asteroid. I felt an asteroid obscurring the camera was a natural Sci-fi transition, having established the viewer within a debris field already it fit the theme well.
The Asteroid beginning to obscure the camera
Creating and filming the hallway
The hallway was designed entirely within a new project as much of the old scene was not needed, such as the sky maps, lighting and effects. It also made it easier to discern from lists of redundant actors, textures, VFX and sequences, a fresh project allowed for more control and management of the scene. It also meant there was no lighting or post processing effects from the previous scene to interfere in the new scene. I imported what was needed to build the scene, using Kit-bash packs off the Unreal marketplace I had downloaded and purchased. I then began the process of re-making any VFX systems I required for the scene, such as atmospheric fog and dust, steam, moving steam and the acetylene cutter. I followed many tutorials for creating the effects, and through this i had learned a base knowledge of the Niagara system and how it operates. From this I was able to create the acetylene cutter effect by breaking down the real thing into parts of an emitter. I had searched previously to see if there was any tutorials regarding this effect or something similar, however there was none. So ultimatley I had to create this myself, as this effect was integral to the cinematic.
The design of the hallway was inspired mainly from my Pinterest boards, Alien and freeflow imagination. I had no specific detail in my mind of how the hallway would be populated, only that I knew what I wanted the layout to be. I built the hallway using the Kitbash pieces from various packs and once I had the overall layout, began randomly poulating it with pipes, vents, wires, tech, crates and such. Once I had a hallway which I deemed fit for the aesthetics which I was trying to achieve, I began to add the effects I had already created such as the steam vents and fog. From here, I began to add the lighting, opting for rectangle lights for the floor lights and spotlights for the ceiling lamps. The rectangle lights created a more realistic long light (which a spotlight or pointlight could not achieve.) Also, the lighting had to be balanced so the scene was lit enough for viewing, but still dark and foggy enough to obscure and create unease.
Alien (1979)Final Hall Scene LeftFinal Hall Scene Right
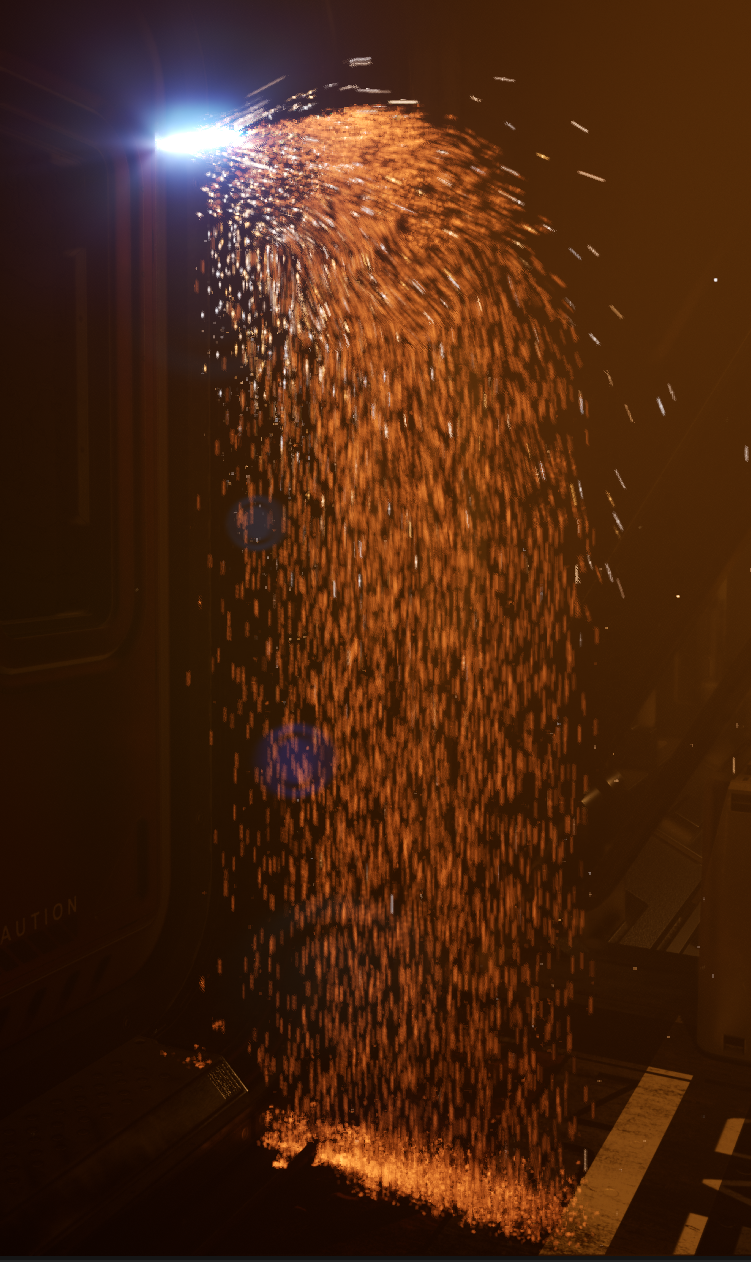
Creating the Cutter effect
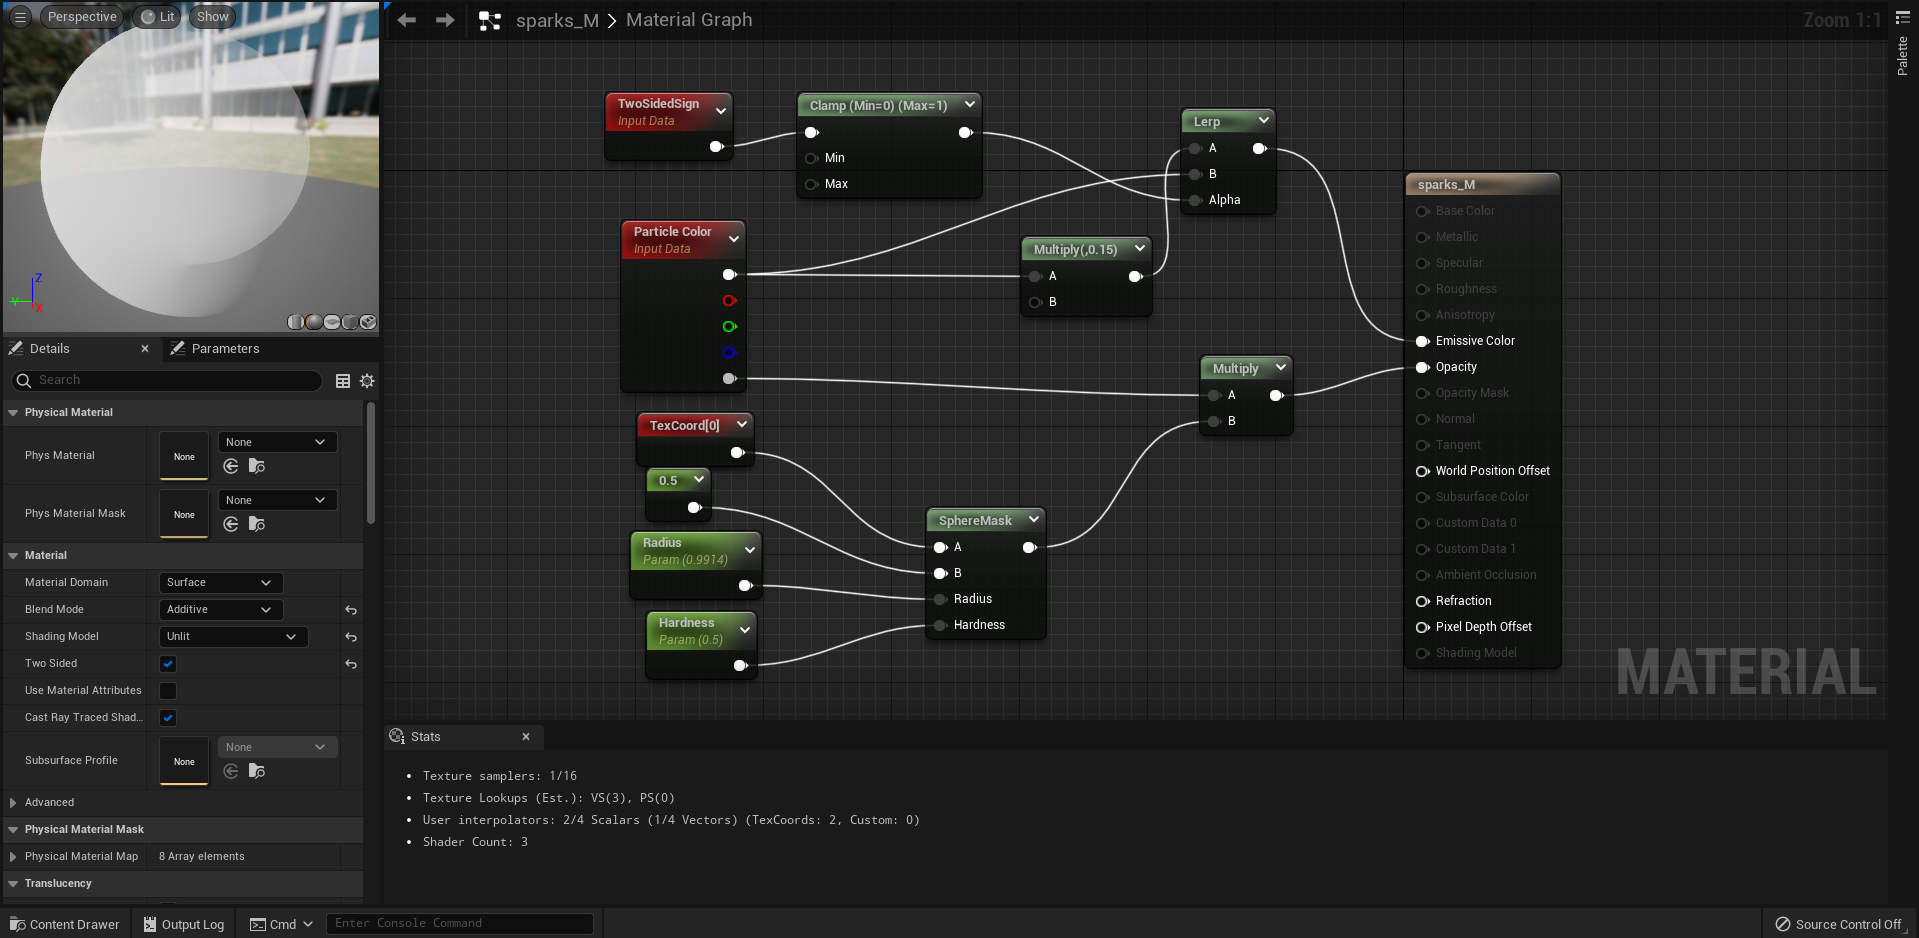
I could see from reference, that I needed a flame – made up of a bright white light and an inner blue flame. I needed sparks and more importantly, a slag dripping effect, to simulate the metal melting and burning away. I found footage of such a process and began to try and replicate this within the system. I started with a blank blueprint and added to begin with a beam emitter. This emitter would simulate the flame effect. I changed the shape and size of the emitter until it was flame like. Next, I added randomisation to the attributes to make it flicker, grow and shrink. I then changed the colour and increased its overall colour value so it appeared to glow. I also randomised the glow, so the flame would appear more natural and alive. From here I duplicated this emitter, then simply shrunk and changed the colour to create the inner blue flame. Next, I had to create the slag effect, as the system would not look desireable without it. I started simple by creating a spark effect and then increasing the spawn rate exponentially because realistically, the real effect is thousand of sparks falling slower than usual as theyre heavier and more dense than a regular spark. However within the system, they shot out horizontally and didn’t quite fall, so I increased the drag and size by speed rate to make them loose their velocity quicker and fall more naturally. Increasing the gravity rate also helped, however too much or too little made the falling seem less realistic. The size by speed added a nice elongating effect to some of the particles by having also randomised this variable. Another randomisation, was the colour of the slag between a hot yellow and orange, and the overall size of the sprites. After some tweaking of values, I had what I considered an acceptable effect simulating metal being cut. In addition, I believed it required one last touch and that was random, energetic sparks flying off in various directions. For this I created a simple spark effect using my previous knowlege and added it to the base of the emitter, giving them more velocity and less drag.
The Cutter Effect Up CloseNiagara Emitter SetupSpark Material BPCutter Setup
Towards the end of the video, the viewer might also notice the subtle imagery of the emergency beacon, lighting up the hallway number on the wall. This was just to add more information to the scene and a way for the viewer to visualise where they are. The rising shot that reveals the datapad at the start of this new scene also adds this background information, positioning the notion for the viewer, ‘If there is life aboard this ship, or has there been?’
Filming the Hallway
When it came to setting up the cameras and filming the hallway, I found it to be easier now I had already practiced. Many of the same principals applied, I required more cuts in a shorter time to amp-up the tension and atmosphere. Using the cine-camera actor, I postioned my three main cameras and began setting up and keyframing there shots. The second shot of the take sees the camera spiralling, simply done by keyframing the camera actors roll within its attributes, using the curve editor to fine tune the transitioning. Another interesting transition is the blinding of the light which allows the camera to be moved to another position in an instant as to set up a new shot. The viewer cannot tell as the entire viewport is blinded, much the opposite to a fade out and in using vignette. There are alot of ‘Dutch angle’ techniques used throughout my scenes, as traditionally, the ‘Dutch tilt’ portrays psychological unease and tension in the subject matter being filmed. It is a professional and well used technique and aided my scenes positively.
A Dutch Tilt shot from the cinematic
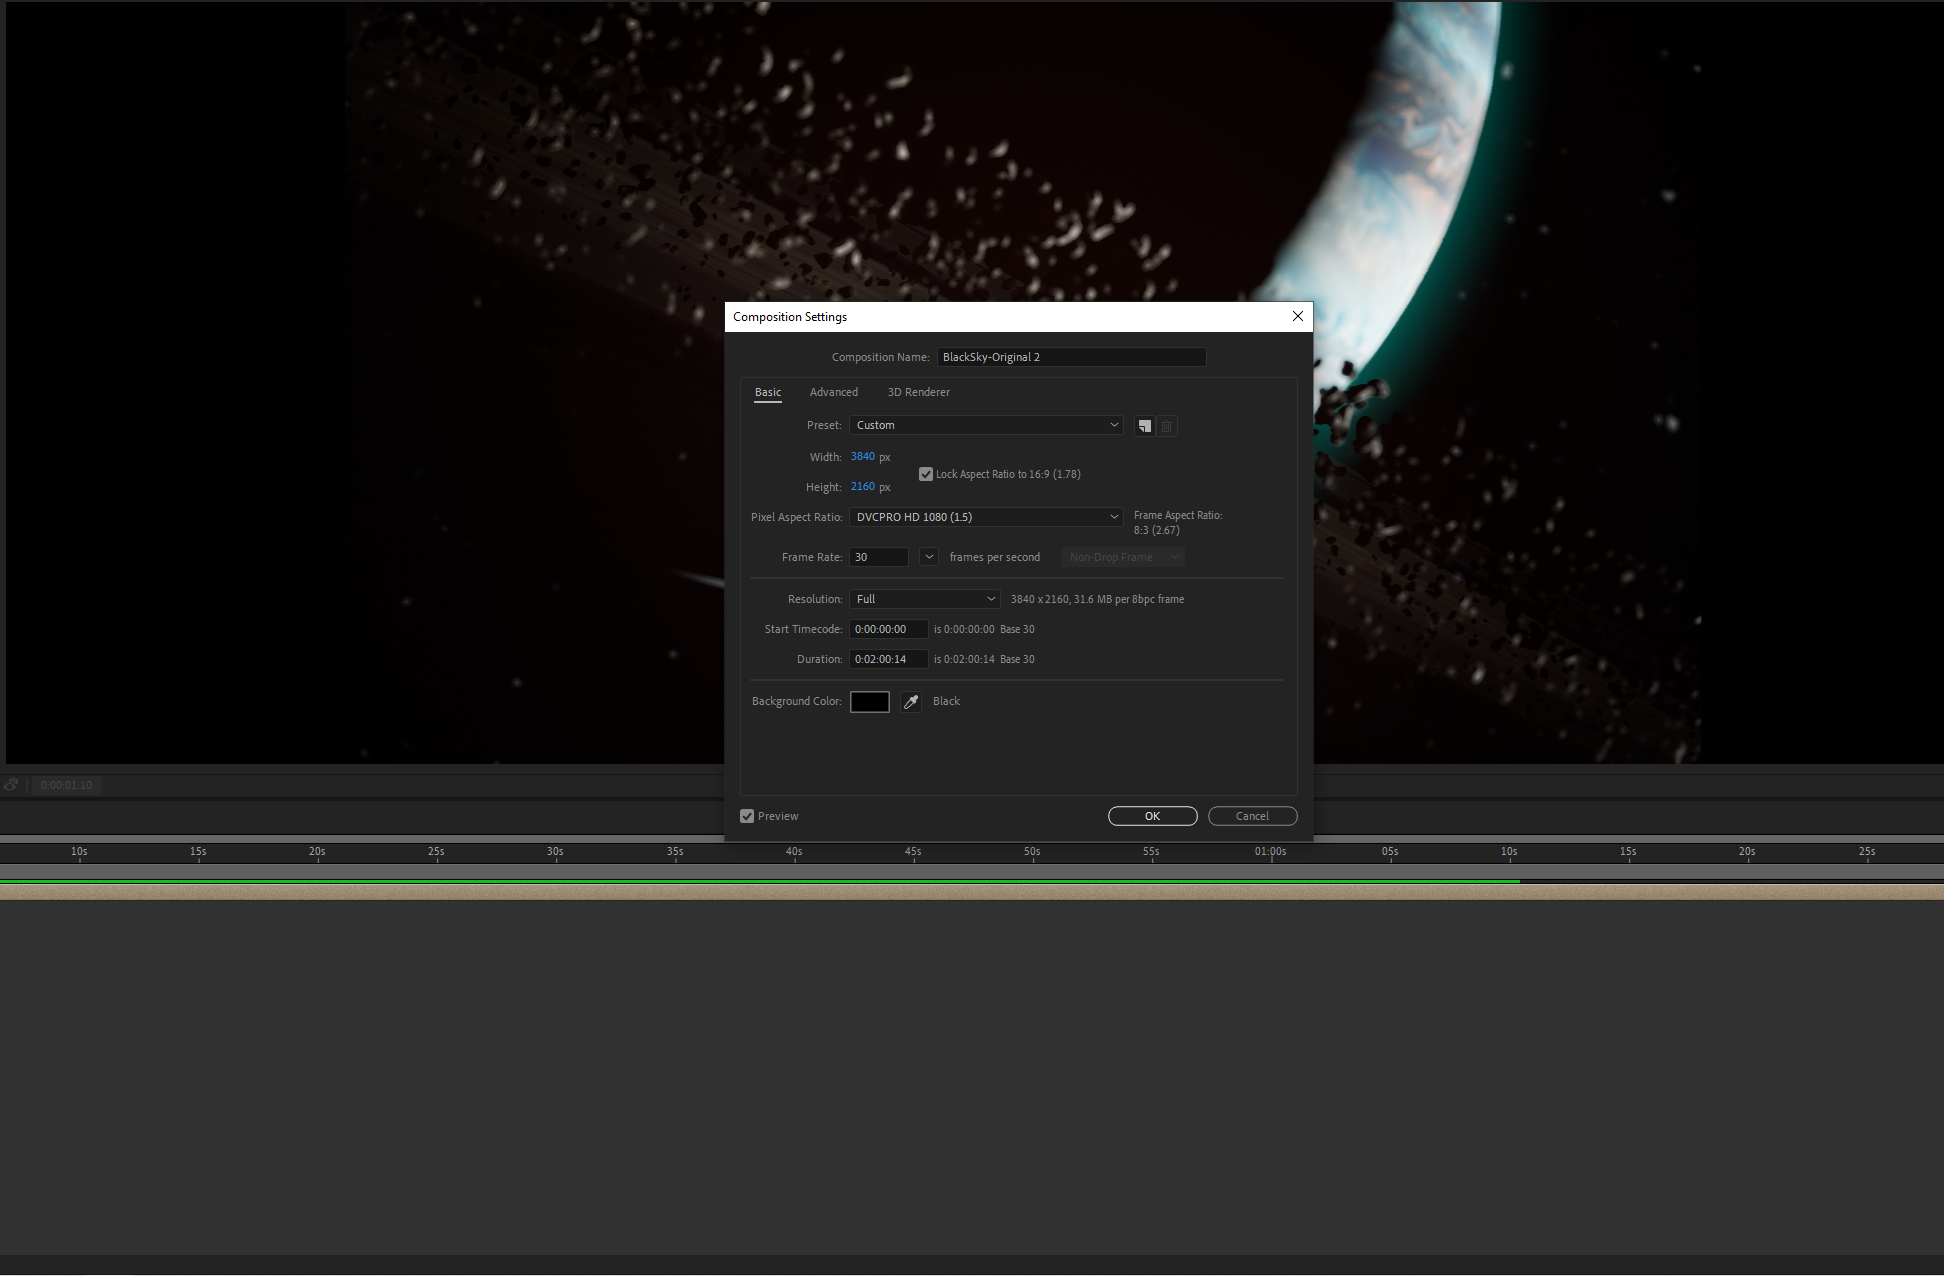
Post Processing
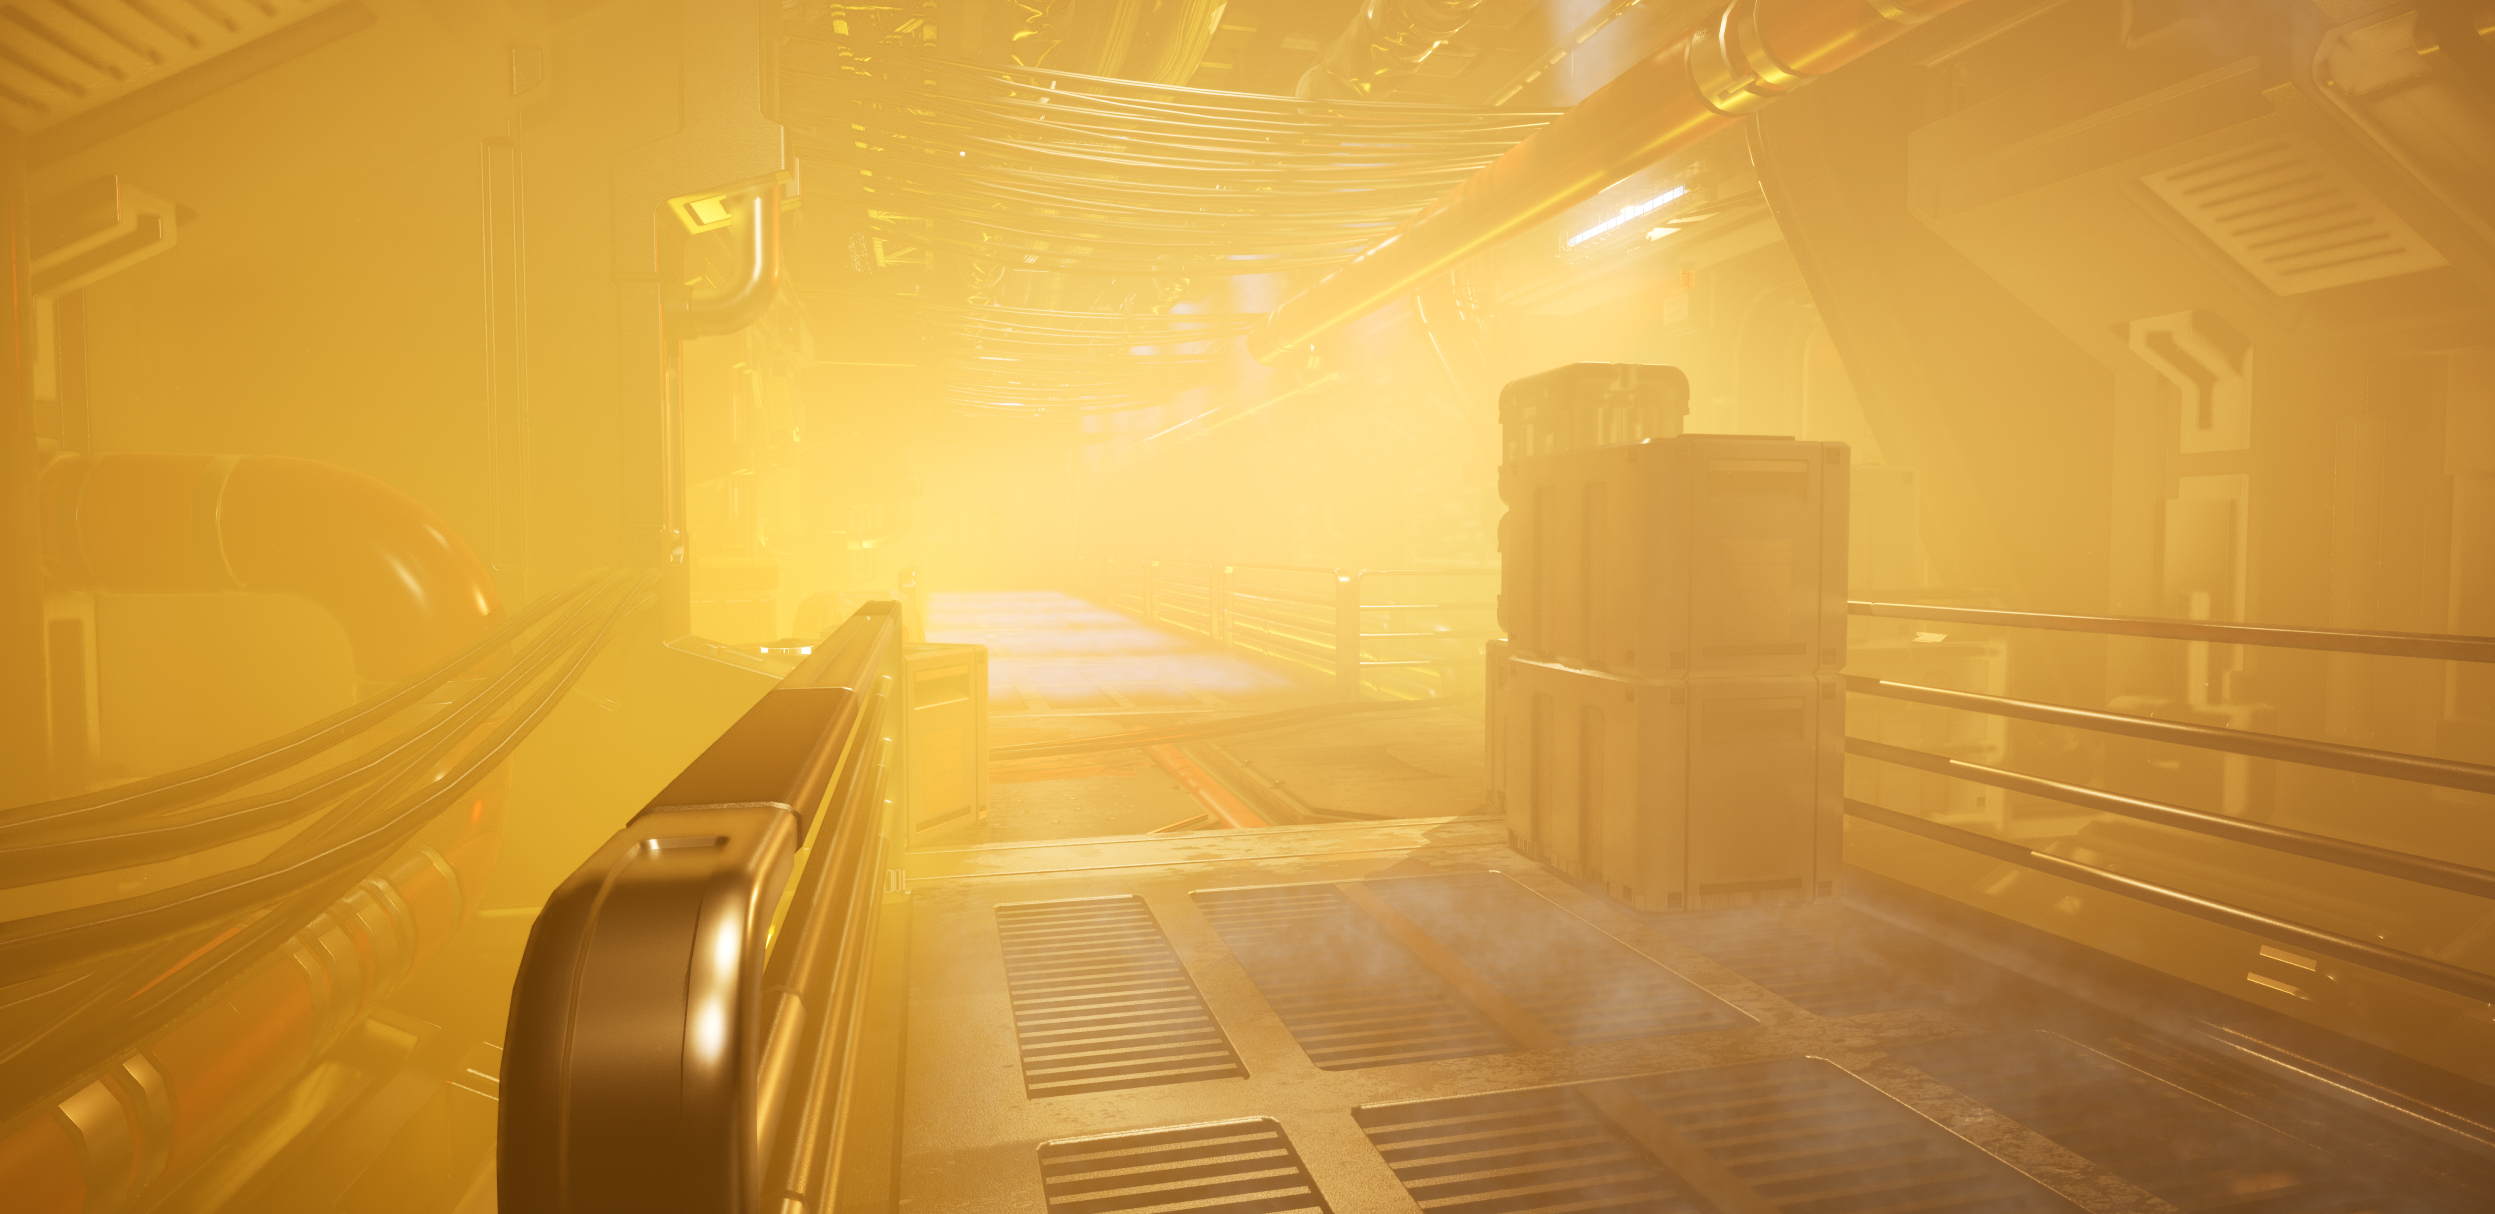
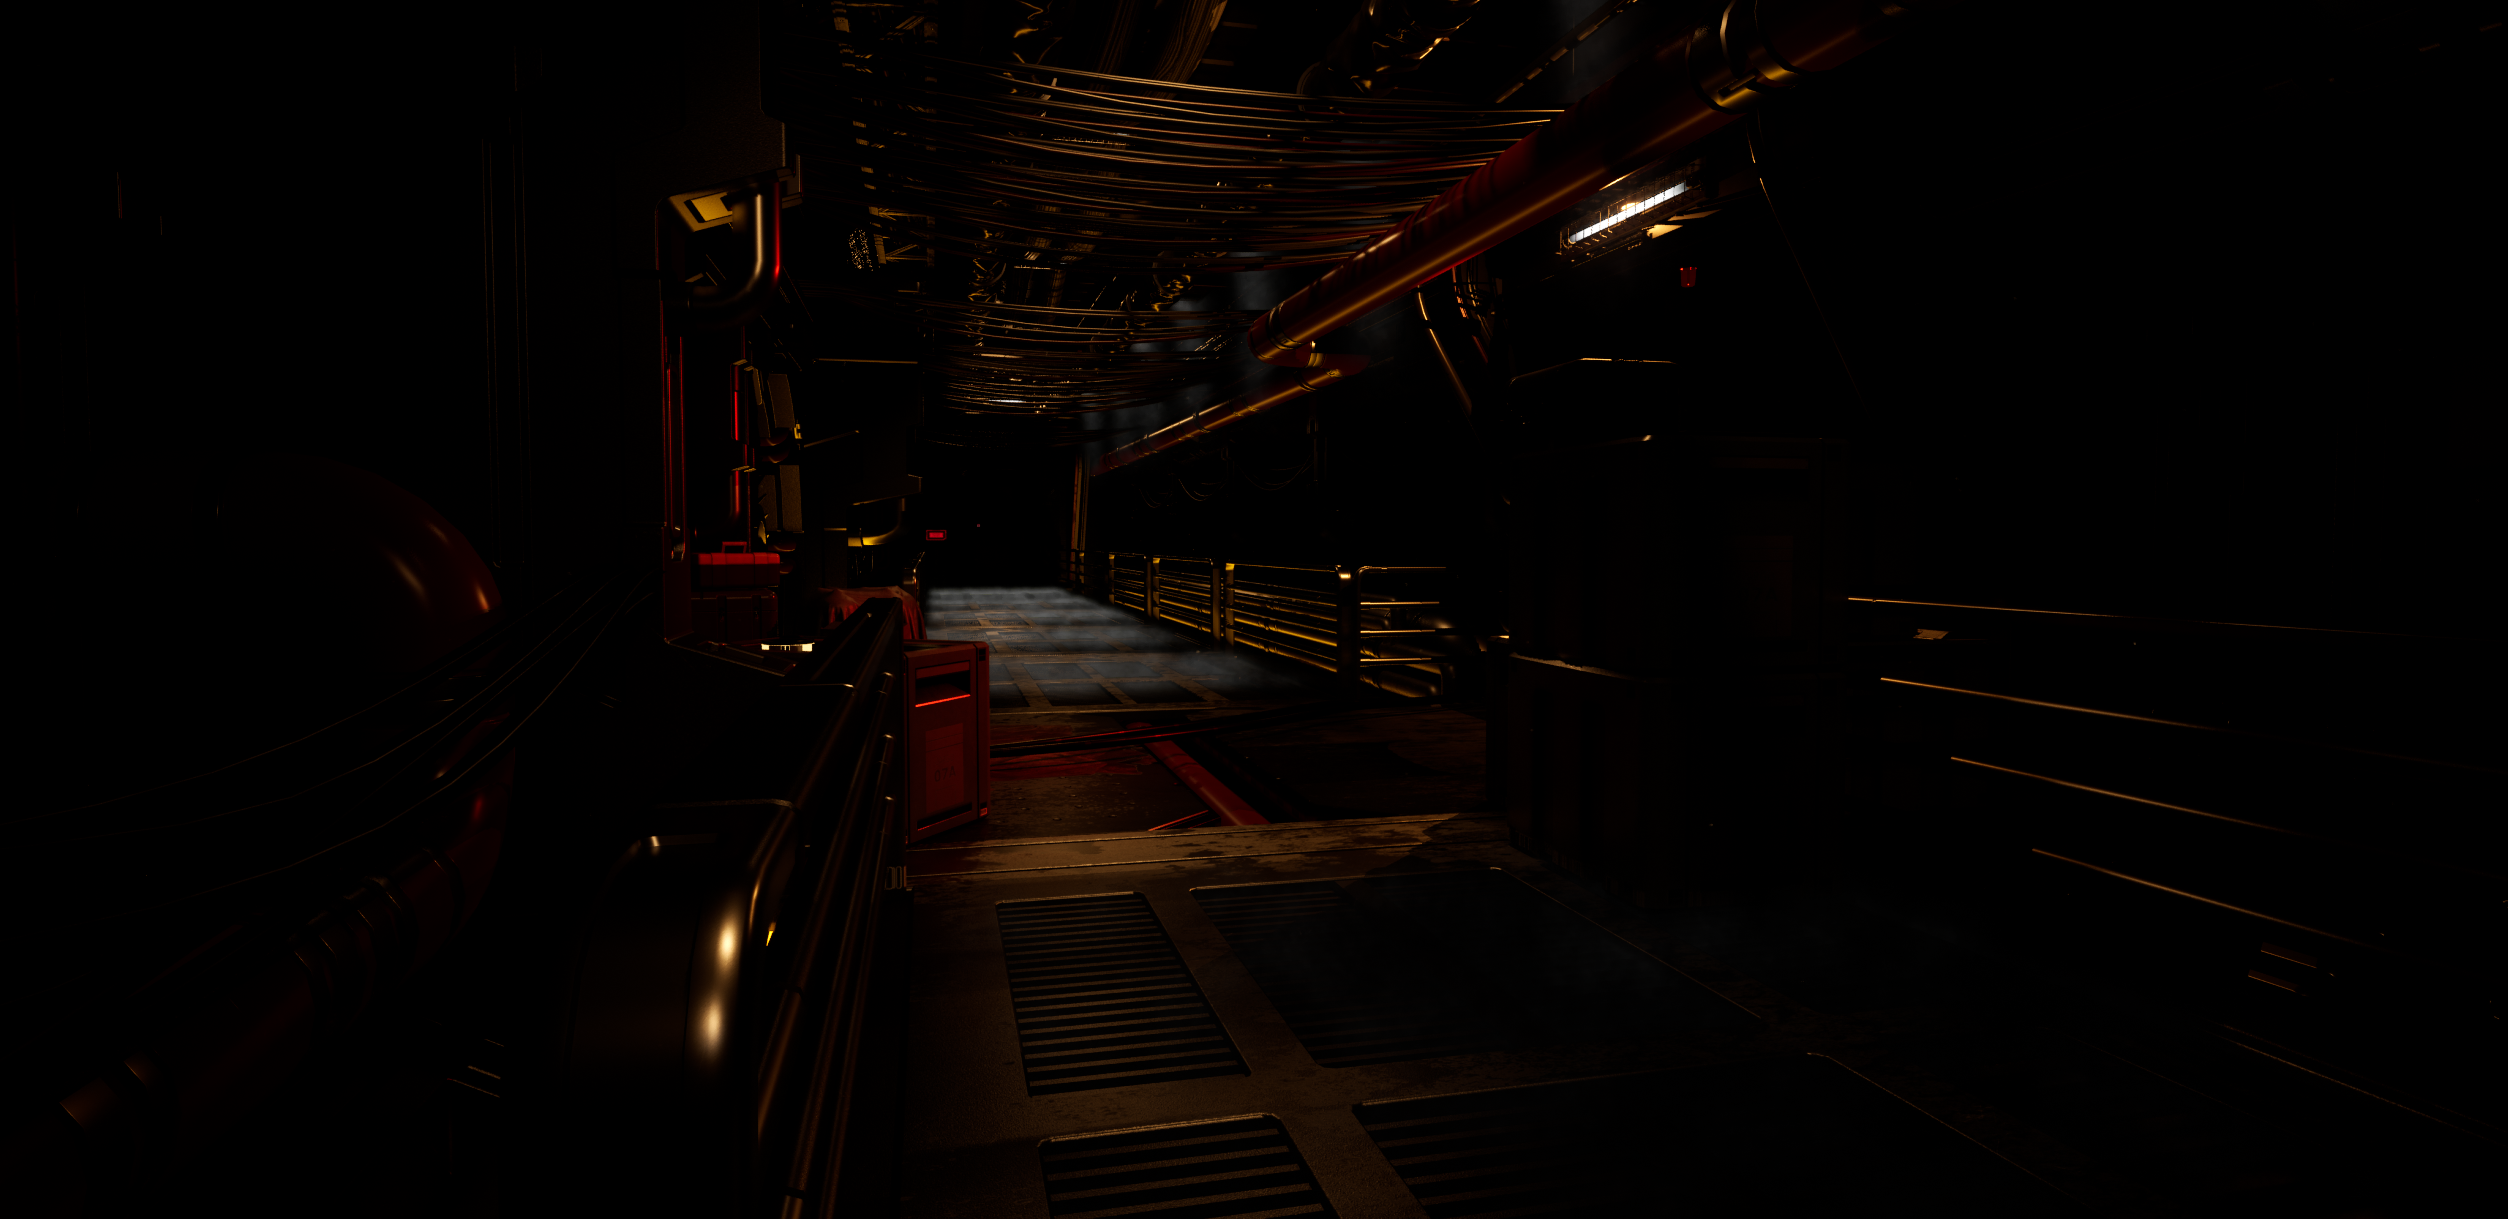
To frame the overall scenes and correct the lighting, post processing was required. I decided on using the post processing within Unreal as opposed to correcting within After Effects afterwards, i just felt this was easier and allowed smoother control of the lens effects. I applied a vignette to either scenes and both scenes relied heavily on the control of convolution, brightness, atmospheric fog and lighting to create the overall atmosphere encountered throughout the video. For example, i have captured images of the same frame with various post processing filters enabled and disabled.
All Effects enabledAuto Eye Correction Disabled With no Brightness control and fog enabledAll effects enabled, no Atmospheric fogAll effects enabledNo fog enabled
As you can see, the fog added incredible detail and atmosphere to the scene and many lights and shots looked completely flat and dull without it, i would say it was the most integral component to the effects.
Rendering
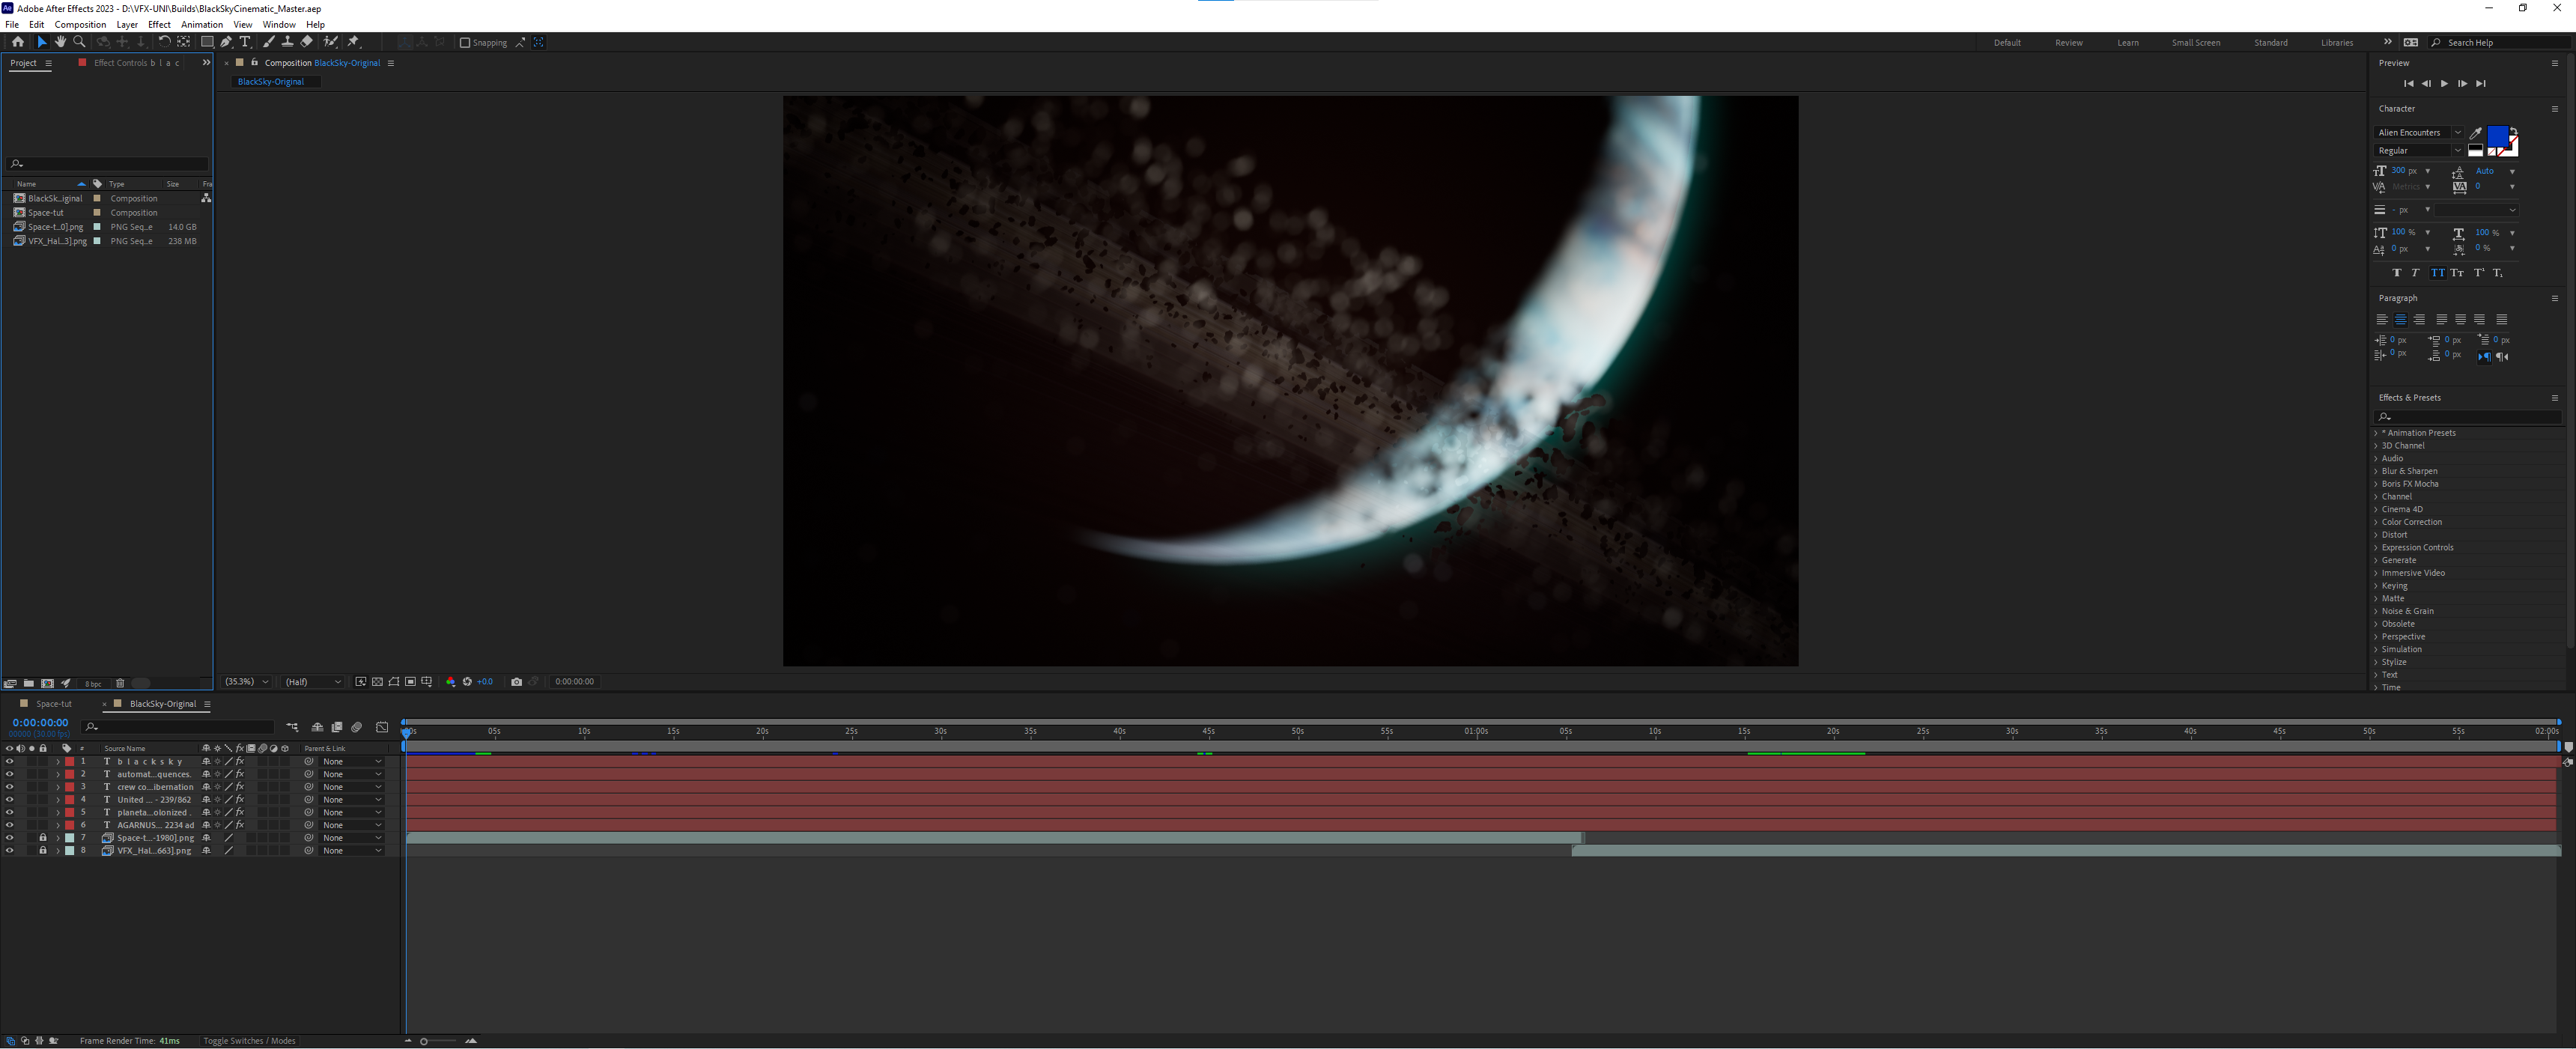
Rendering the shots was in itself a learning experience. I trialled many approaches, the first being: the format I output sequenced images as, either PNG or EXR. EXR format is the quality usually used by the films industry and retains all the quality of the original picture. However, it is a very large format, one minute of footage equated to over 87Gb and was very long in the rendering process. The second, PNG, retains alot of the detail and unlike EXR is far less large in terms of file size, however again, one minute of footage was 11Gb (still large but at this size manageable.) I opted for PNG format for both sequences and once they had been rendered out, I took them over into after effects where I would sequence the images and add the finishing touches – such as lighting corrections and image overlays like animated text.
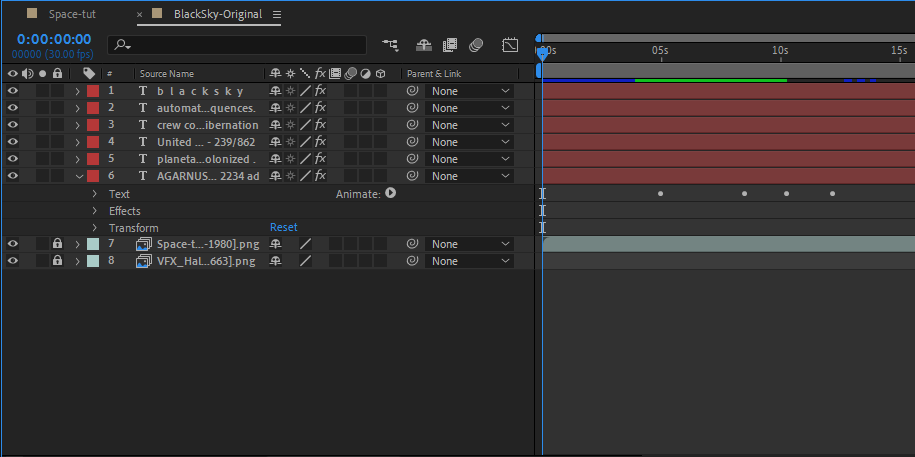
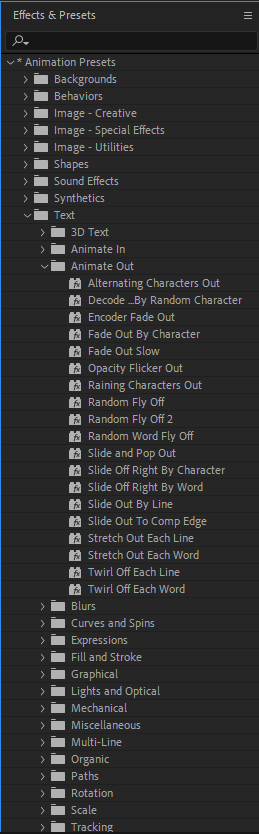
Within after effects, I implemented animated text to add to the narration of the scenes. I watched a short tutorial provided by Adobe within the program, in order to learn how to do this. I added the text, chose a preferred font which I had previously downloaded, adjusted the colour and value, then chose a pre-made effect from within after effects (the decoder) and keyframed the lengths, just like in Unreal. There were many to choose from and Adobe Bridge allowed the viewing of the animations before implementing.
Tutorial for animating text within After Effects
(Keyframe Academy, 2020)
Creating the End Text
(Yofitasari, 2020)
After Effects Overall CompositionAfter Effects Text AnimationsAfter Effects Text Animation Pre-sets
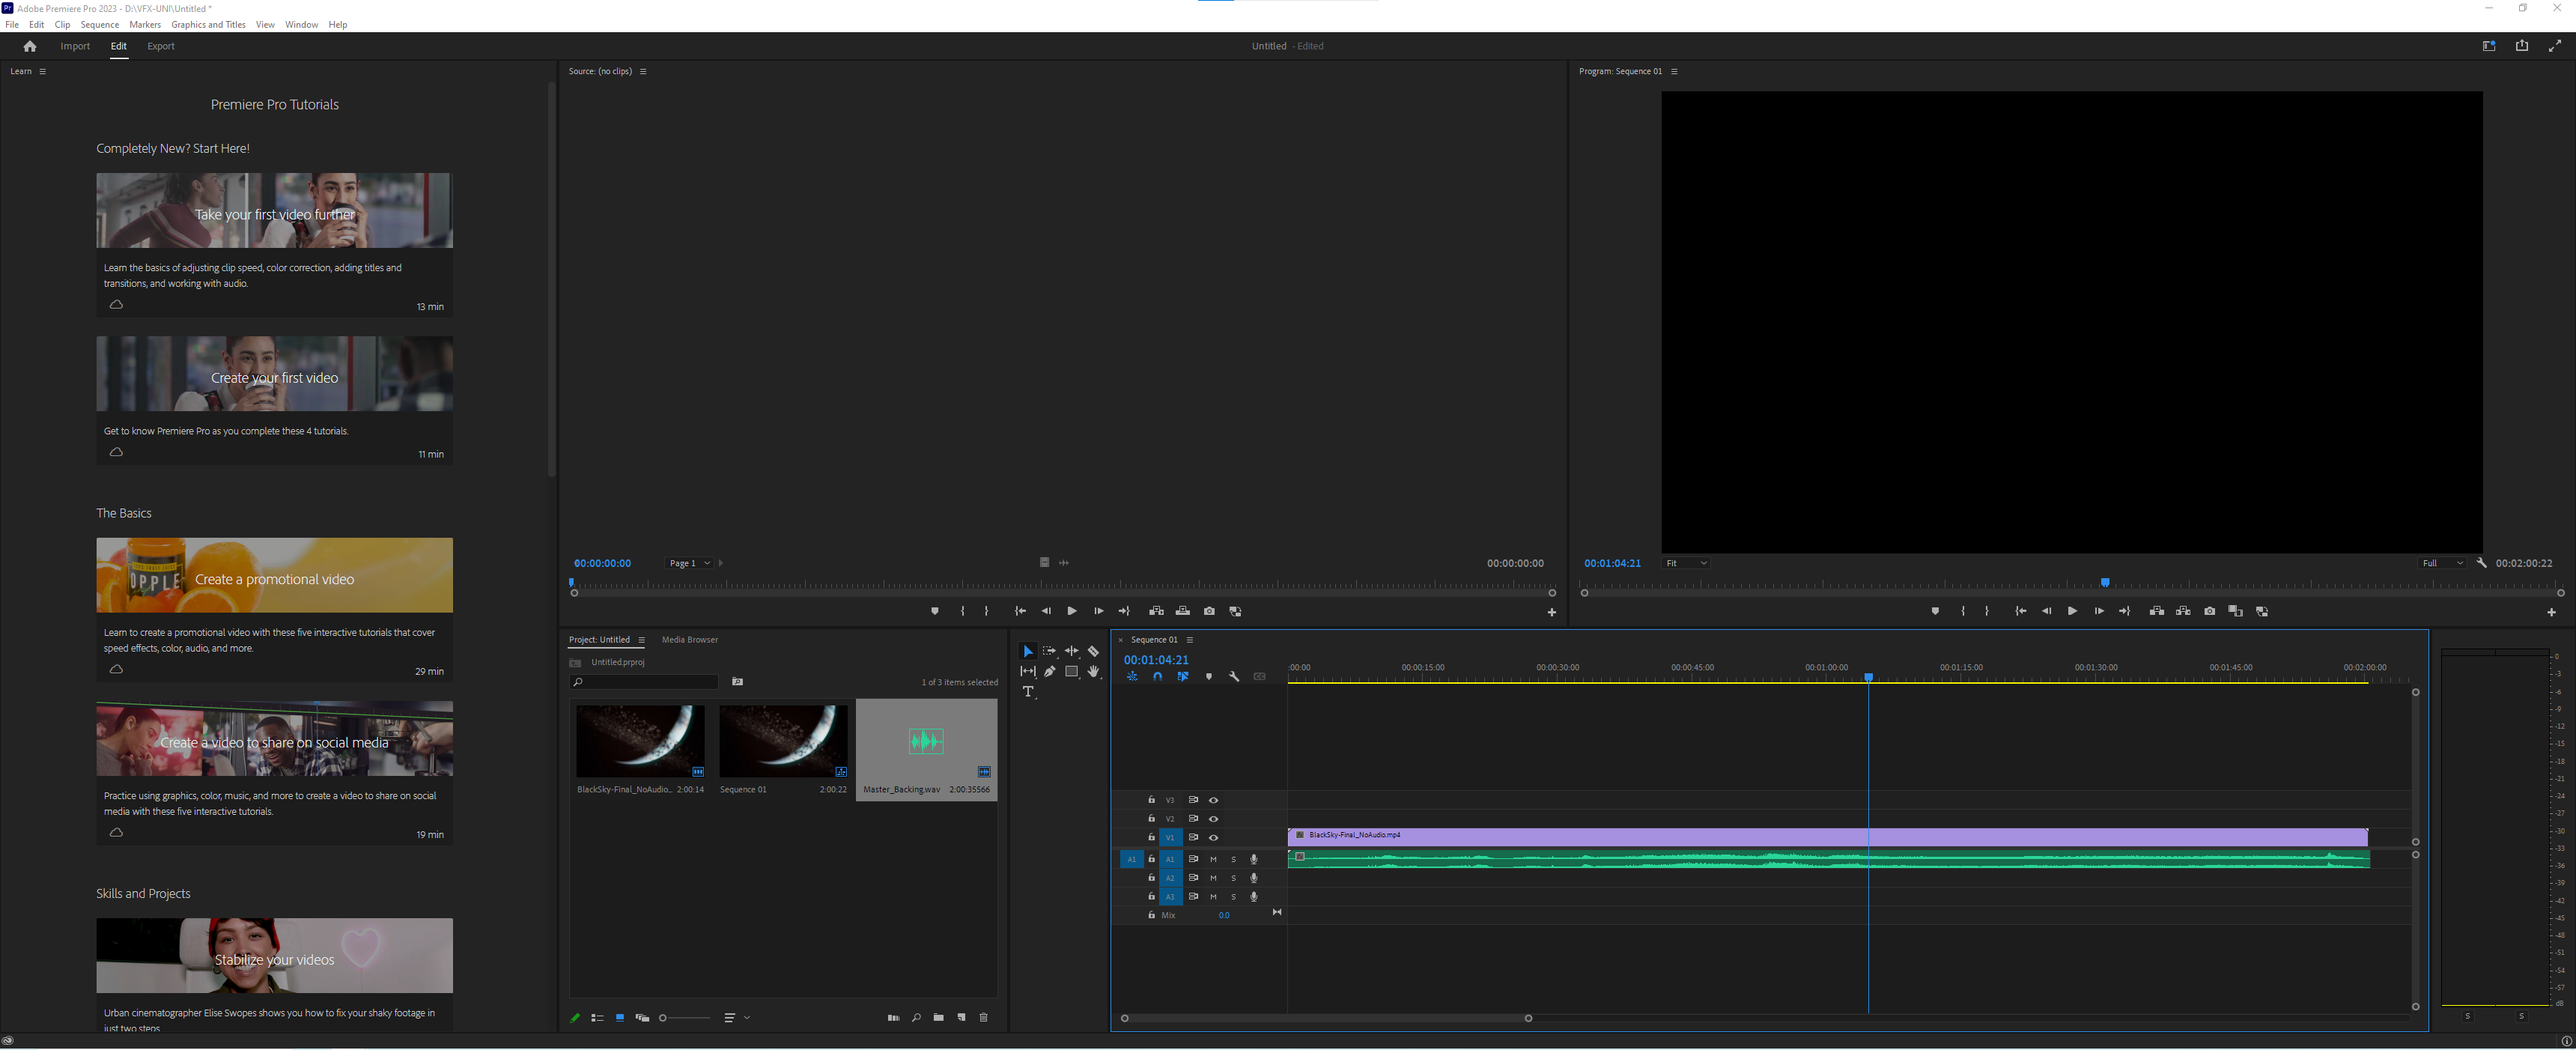
Once the texts where implemented and the image sequences adjusted, I exported the sequence out to Adobe media encoder, using the H264 preset. There where some modifications within this however, such as increasing the bit rate to render a higher quality video (at the cost of file size.) I rendered many videos out, trying different settings and bit-depths to fine tune between a quality video and a manageable file size. Once I had the video which I believed was of a decent quality but not too large, I took this over into Adobe Premiere Pro, where I would add the soundtrack to it later. Within Premier Pro, I did not have to wait for the sequence to render whilst viewing it like in After Effects, as it was now an MP4 and easily re-playable. This made it easier for the next task of creating sound effects and a soundtrack for the movie as I would have been constantly stopping, starting and tracking through the footage in order to know at what exact points sounds and features needed to be added.
Removing noise from the render
(Surfaced Studio, 2018)
Rendering Out Through Media EncoderPremiere Pro – MIxing Video and Audio
Designing and creating the audio
This helped me narow what instruments and sounds i needed to re create this atmosphere.
(McCaulley, 2020)
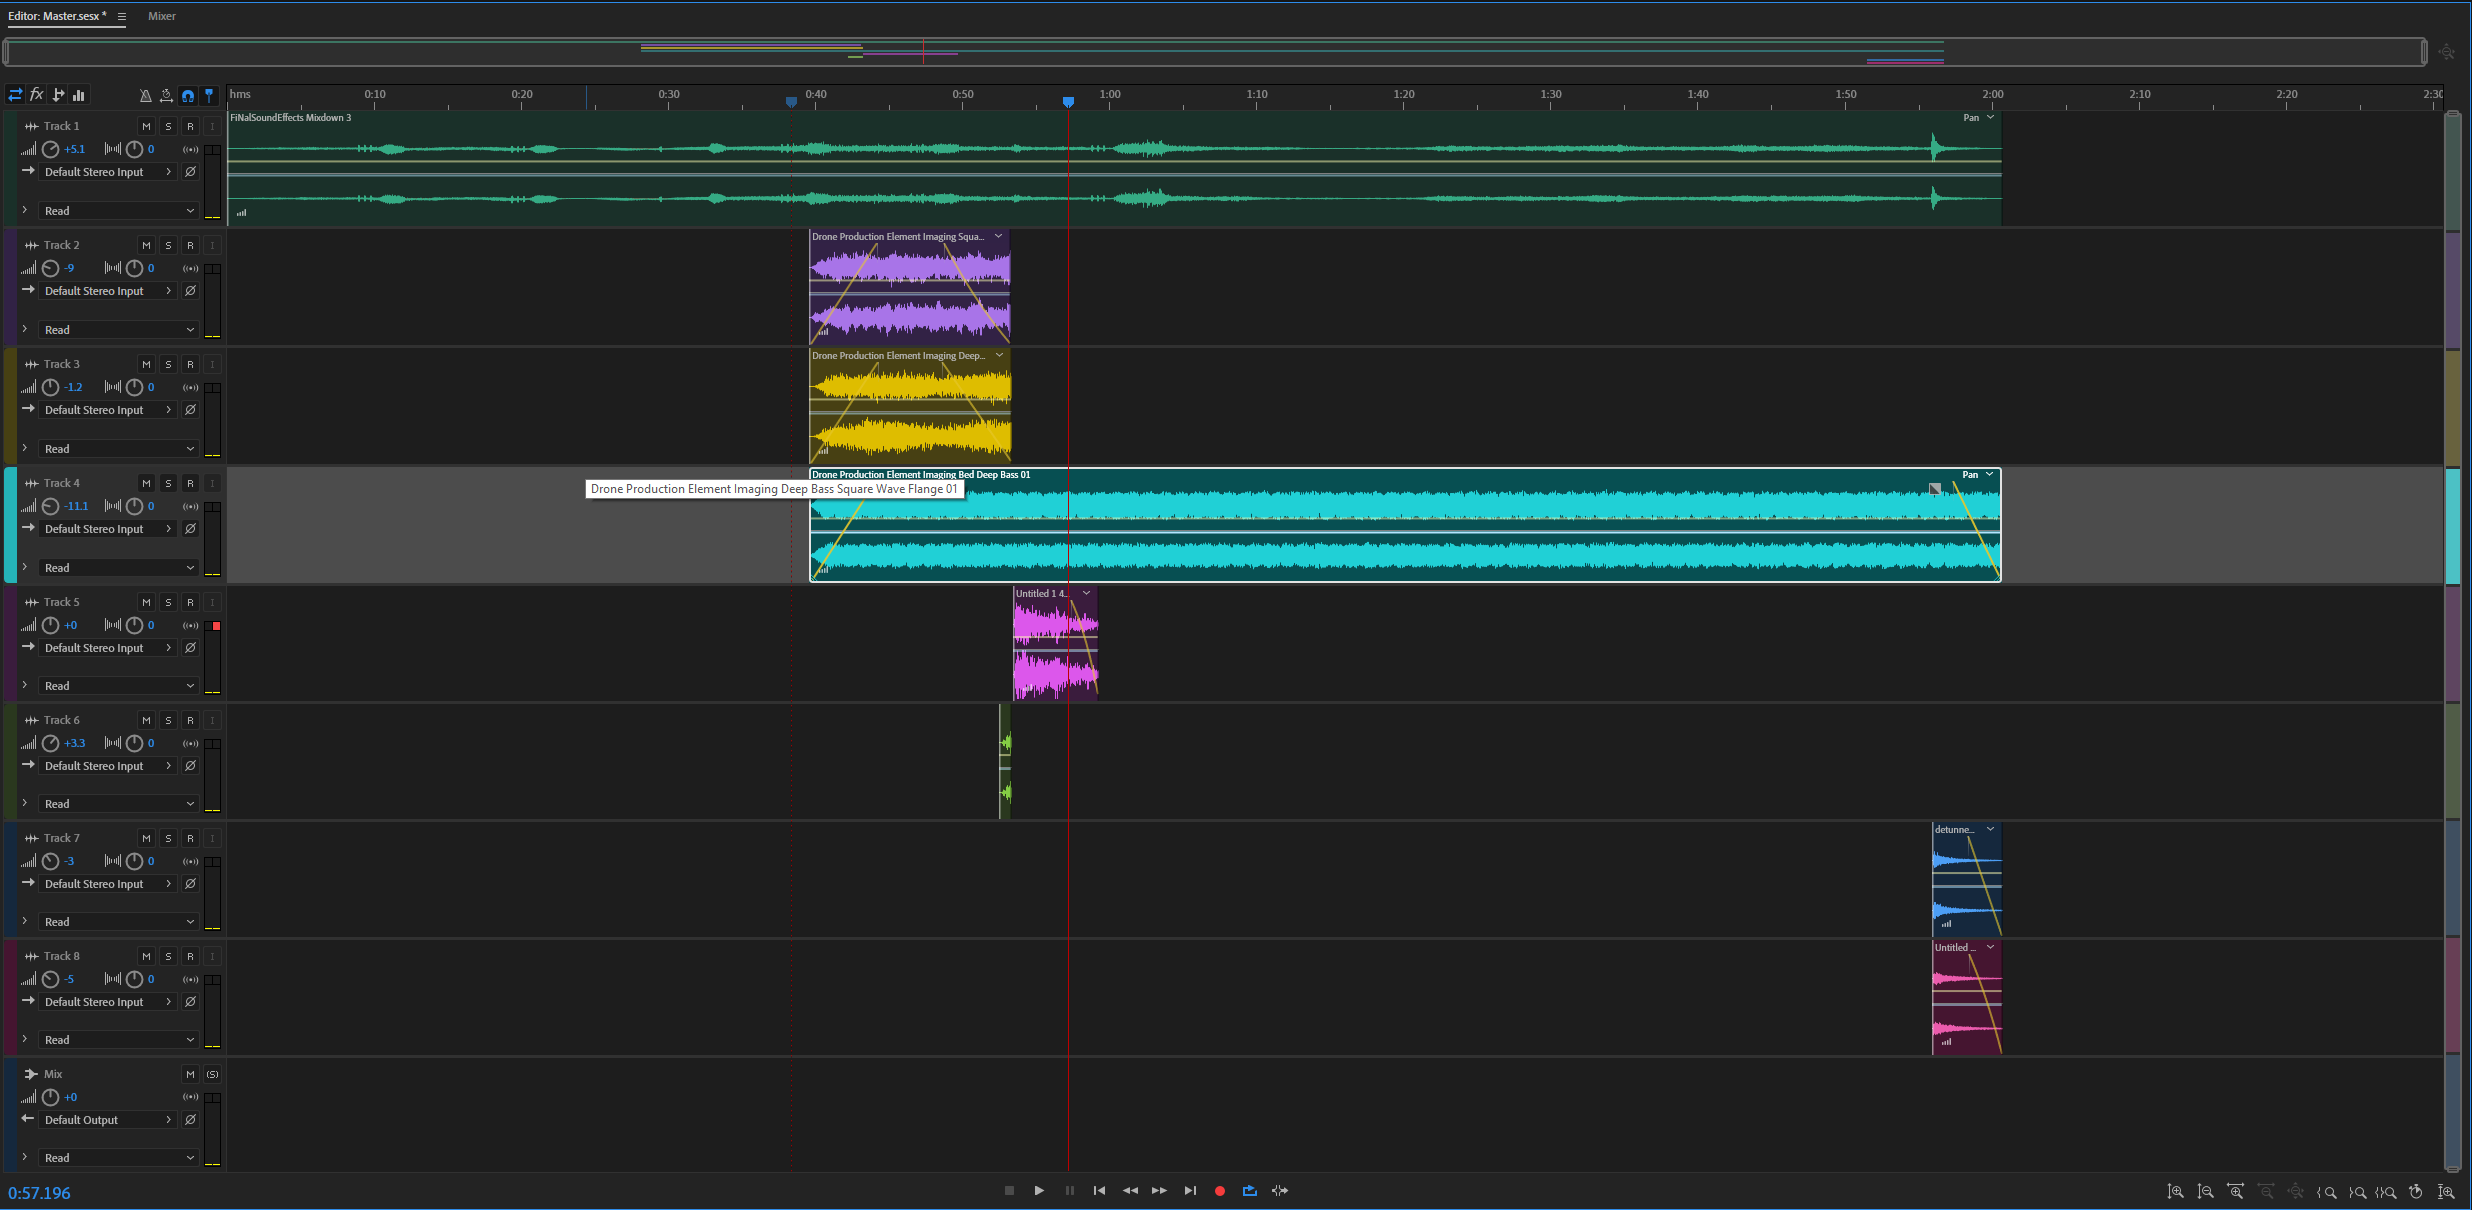
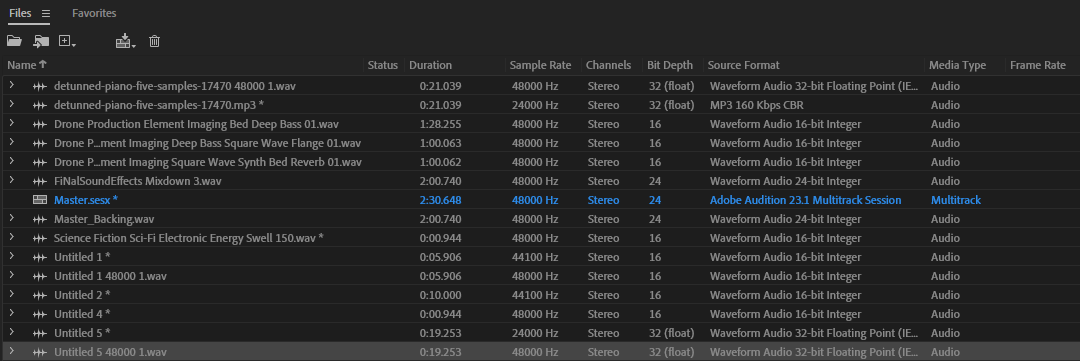
The audio was created using Adobe audition. I used previously aquired knowledge from the first year of the degree course and knowledge i have accumlated outside of university, from creating my own music, in order to work within Audition to create sound effects and layer sounds and music together. First, I began to source sounds and music that I would need and use – I already had many samples available to me from the Adobe library and the GAT sound library from the year one audio course. Within these were hundreds of pre-made sounds, of which I meticulously chose and edited to suit my needs. From the alarm sound to the backing ambience, I took sounds from various files within these libraries, altered their pitches, altered their lengths, added effects such as flangers (their were many processes for each indivdual sound.) Important ones which stand out are the portal’s noise when opening and the ships hum as it goes over the camera. These where created using multiple sounds layered and edited to form the low bass and hum of the ship, as well as the rippling effect.
Portal Opening NoisePortal Emerging NoiseExample of a drone created from Grey Noise, used for the ships many layered engine soundsAdobe Audition MixdownSome of the sound effects used to layer into the mixdown
Generating noise to create drones.
(O’Reilly – Video Training, 2014)
The music was a different ordeal. I created some of the backing sounds in the programme Ableton, writing the chorus myself. After, I sourced some more ethereal effects, like choir singing and typical horror sound effects, string noises and atypical bumps. I then once again took these into audition to edit and layer into a musical piece. At this point, I had to match the sounds and music to the video and the timing points, such as the portal opening, the engines boosting and the door slamming in the hallway – they all had to be timed perfectly within the track. Once I had an acceptable soundtrack, I mixed both the sound effects and music together, adjusting the levels of the music and certain effects so they didnt become lost amongst one another. Now the track was mastered, I exported the piece to a WAV file and imported that into Premiere Pro, where I could add the final slight adjustments to the timings and render the final movie out.